For Tesla Model 3 owners, accessing vehicle data for diagnostics or performance monitoring can be a valuable capability. While Teslas are known for their advanced technology, they still incorporate an OBD2 port, albeit in a less conventional location than many gasoline-powered vehicles. If you’re looking to connect an OBD2 scanner to your 2020 Tesla Model 3, understanding where to find the port is the first step. This guide will walk you through the location and access procedure for the OBD2 port in your 2020 Tesla Model 3, ensuring you can safely connect your diagnostic tools.
Finding the OBD2 Port in Your 2020 Tesla Model 3
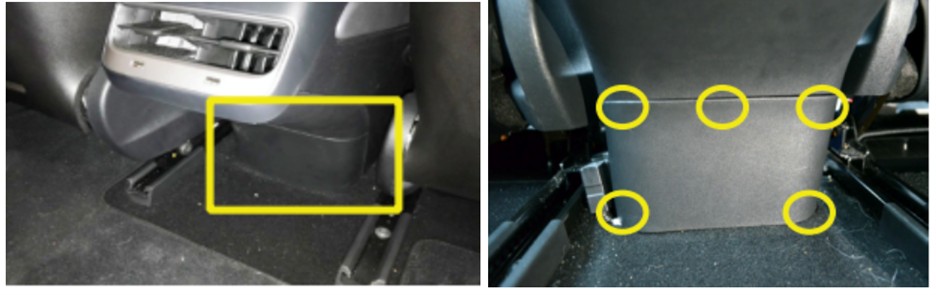
Unlike traditional vehicles where the OBD2 port is typically located under the dashboard on the driver’s side, the Tesla Model 3 places it in the rear center console. Specifically, the OBD2 diagnostic connector is situated beneath the rear air vents, accessible from the rear passenger legroom. Reaching it requires removing a small cover panel on the center console.
Step-by-Step Guide to Accessing the OBD2 Port
Before proceeding, it’s crucial to ensure your Tesla Model 3 is completely powered down. Tesla recommends a full shutdown, which can take up to 15 minutes, performed through the car’s touchscreen menu. Failure to power down the vehicle before connecting or disconnecting OBD2 equipment may lead to vehicle damage or errors.
Here’s how to access the diagnostic port:
-
Prepare the Interior: Begin by sliding both front seats forward as far as they can go. This will provide you with ample space to work in the rear passenger area.
-
Locate the Center Console Panel: Move to the back seat and find the small plastic panel at the base of the center console, positioned between the front seats. This panel is secured by five push-fit clips.
-
Initial Panel Release: Using an Allen wrench or an L-shaped screwdriver, insert the short end of the tool under the panel on the right side. Rotate the tool to a vertical position and gently pull towards you, parallel to the floor. This should disengage the bottom right clip.
- Release Top Right Clip: Use your hands to grasp the panel and pull it towards you. This action should release the top right clip.
- Remove the Panel: Continue to carefully loosen and open the remaining three clips. Once all clips are free, pull the panel away to remove it completely.
-
Access the Diagnostic Connector: Behind the removed panel, you will find the Tesla proprietary diagnostic connector. It typically has a white connector secured by a clip. Press the clip and slide it to the left to release the white connector.
-
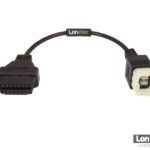
Connect Your Diagnostic Cable: Now, you can plug in the appropriate Tesla diagnostic cable. Connect the two white ends of your cable to the corresponding connectors in the vehicle. Ensure they click securely into place. The connectors are designed to fit only in the correct orientation.
-
Connect OBD2 Dongle: With the diagnostic cable connected, you can now plug in your OBDLink dongle or another compatible OBD2 reader. Pair it with your smartphone or tablet using a suitable app like Scan My Tesla or TM-Spy to begin accessing vehicle data.
Important Note: Connecting any aftermarket equipment to your Tesla is done at your own risk. It is crucial to handle the diagnostic port and connections with care. Always inspect your cables for any damage before each use. This adapter cable is designed to allow you to read data from your vehicle using the car’s CAN hi and Lo signals and provides power to the OBD2 dongle. Carvitas and obd-de.com are not responsible for any damage to your Tesla resulting from the improper use of this product.