A loose OBD2 port can be a frustrating issue for any car owner. This port is essential for diagnostics, allowing you to read trouble codes and monitor your vehicle’s health. When the pins inside become loose, it can lead to intermittent connections, preventing proper communication with diagnostic tools. If you’re experiencing this problem, you might be relieved to know that often, it’s a fix you can tackle yourself. This guide will walk you through the process of tightening those Obd2 Port Pins to restore a reliable connection.
Understanding the OBD2 Port and Pins
The OBD2 (On-Board Diagnostics II) port, standardized across most modern vehicles, is your gateway to your car’s computer systems. It’s typically located under the dashboard on the driver’s side. Inside this port are several pins, each serving a specific function, from power and ground to data communication lines like CAN bus and K-line. These pins are designed to make firm contact with the OBD2 scanner connector. Over time and with repeated use, the metal terminals within the OBD2 port can lose their tension, leading to loose connections and diagnostic issues. This guide focuses on how to carefully address these loose OBD2 port pins.
Step-by-Step Guide to Fixing Loose OBD2 Port Pins
Before starting, it’s important to note that working with electrical connectors requires care. Ensure your vehicle is turned off. While this procedure is generally safe, if you are uncomfortable working on your car’s electrical system, it’s always best to consult a professional mechanic.
Step 1: Removing the OBD2 Port from the Bracket
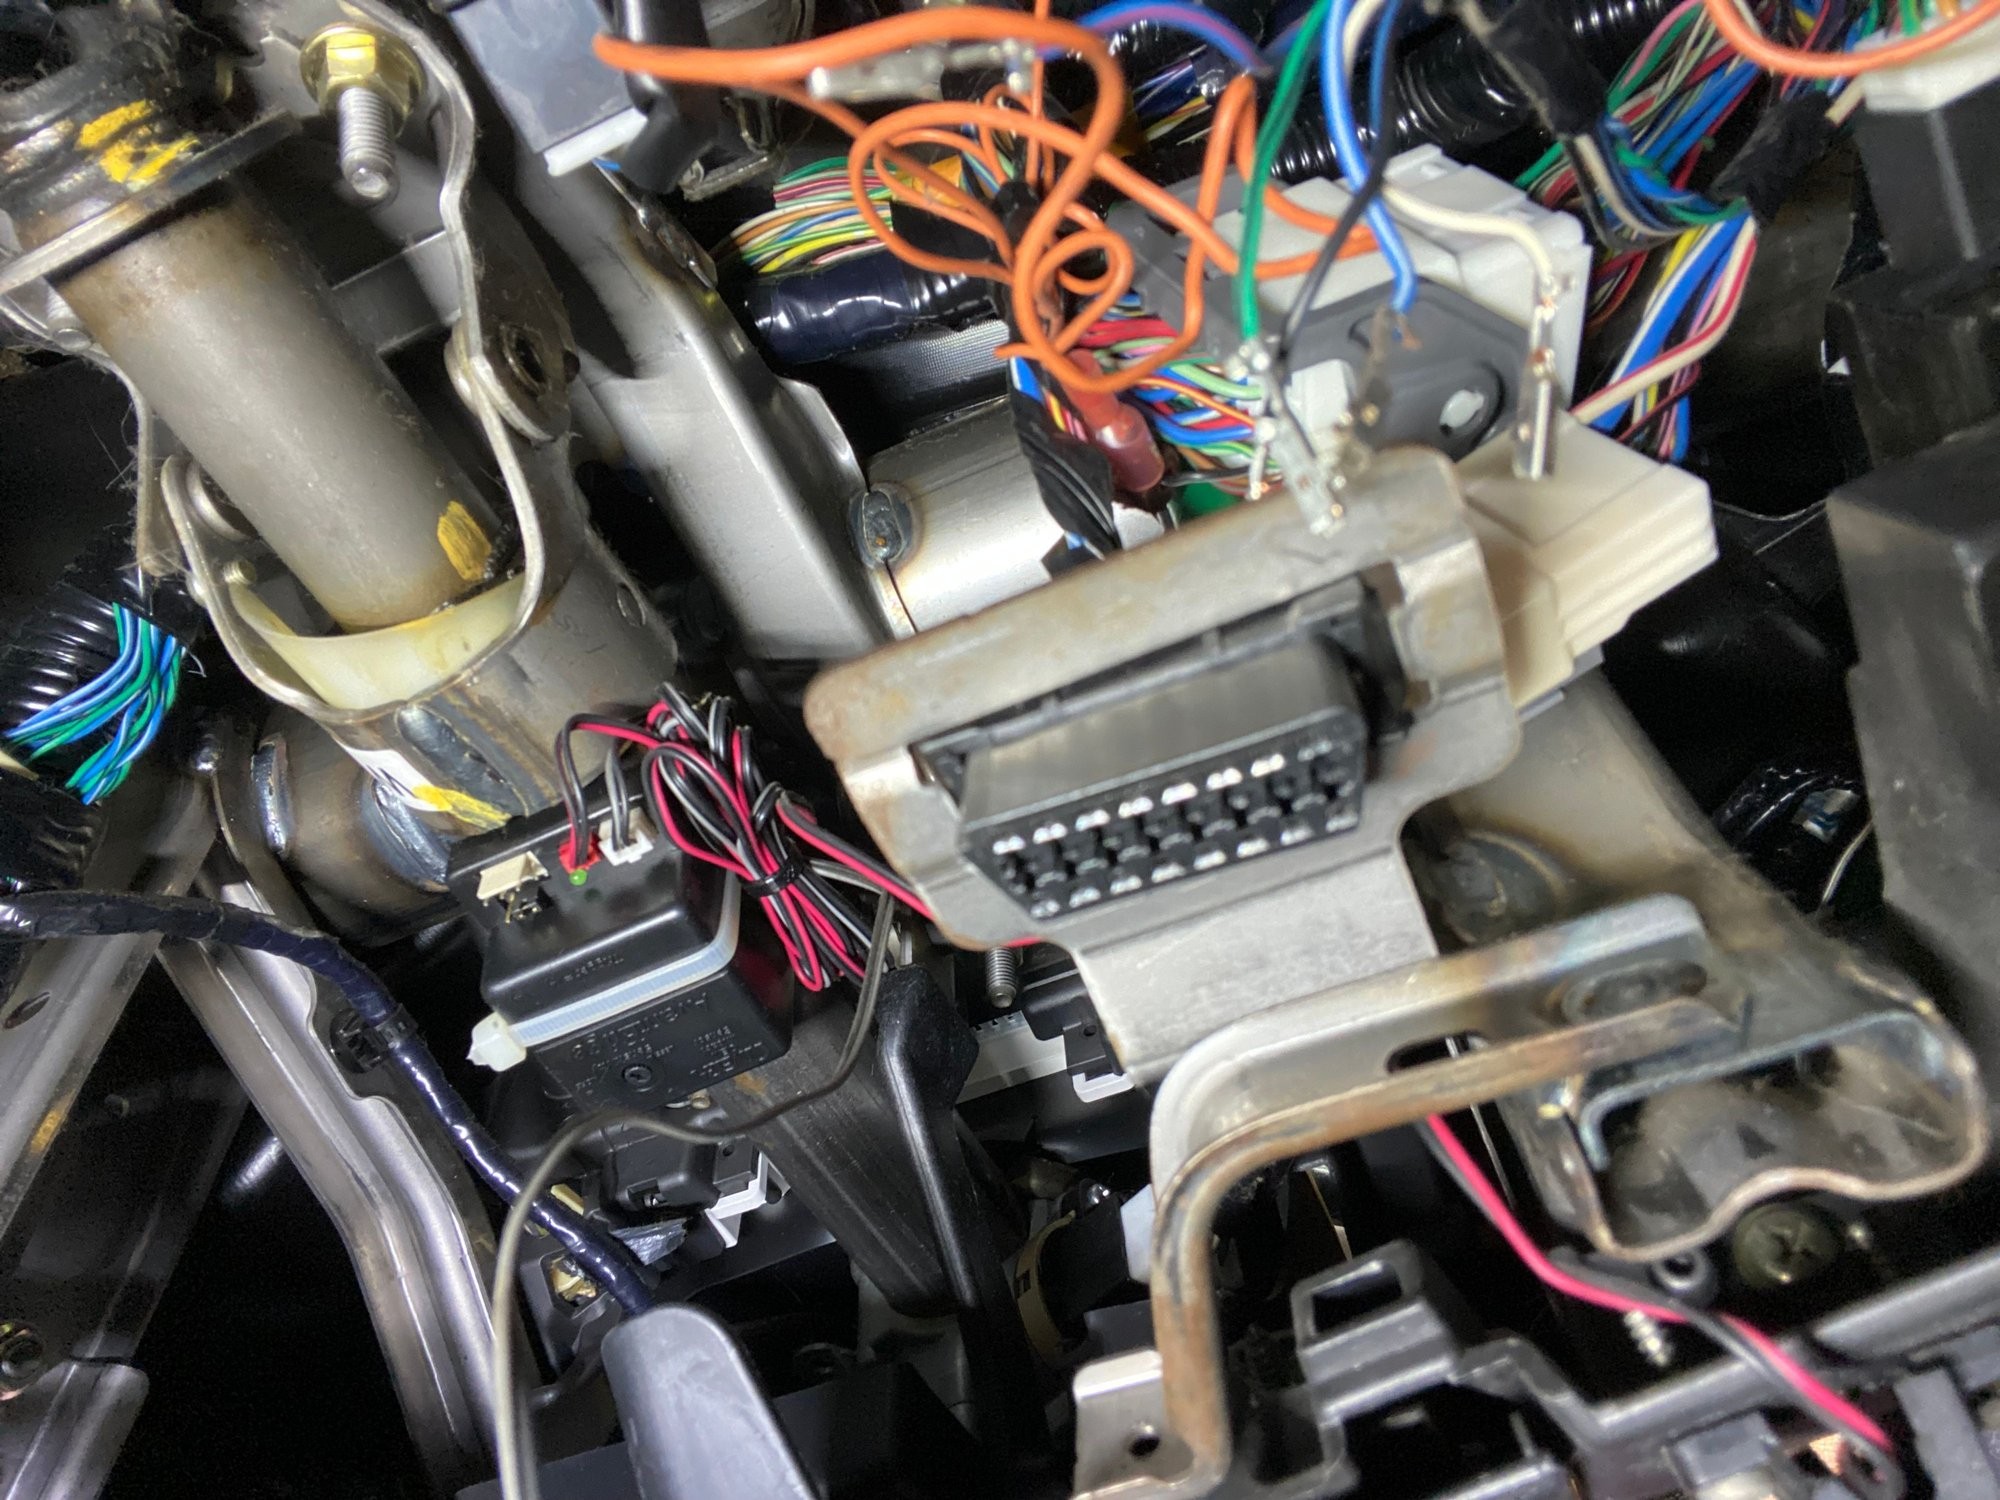
The first step is to access the back of the OBD2 port. In many vehicles, it’s held in place by a bracket, often mounted under the dashboard.
To remove the OBD2 port, you’ll usually find plastic tabs on the sides of the port that secure it to the bracket. Using your fingers or a small flathead screwdriver, gently push these tabs inwards. While pushing the tabs, push the OBD2 port upwards or outwards to free it from the bracket. Sometimes, maneuvering the port to one side while pressing the tab on the opposite side can be helpful.
Step 2: Accessing the Wire Connectors
Once the OBD2 port is detached from the bracket, you can see the backside where the wires are connected. Before proceeding, it’s a good idea to take pictures of the wiring and note down the wire colors and their positions. This will be crucial for reassembly.
Next, you need to remove the white plastic retainer clip which secures all the wires in the OBD2 port housing. This clip usually needs to be gently pried or pushed to release it.
As shown in the image, a probe or small screwdriver can be used to lift the white plastic bracket up and out of its position in the OBD2 port housing. This will allow you to access the individual wire terminals.
The end of the white tab often sits under a black tab, so you might need to carefully slide your tool underneath to fully release it.
Step 3: Re-tensioning the Connector Pins
Now you’re ready to address the loose OBD2 port pins. Each wire is connected to a terminal inside the OBD2 port. To release a wire and its terminal, you’ll need to insert a thin probe or terminal release tool into the port. There is a small plastic tab on each terminal that locks it in place.
As indicated in the picture, insert the probe in the direction of the arrow to press the release tab. When pressed correctly, you should feel the wire loosen slightly. Do not force it. Once the terminal is slightly released, you can gently pull the wire from the back of the connector. Repeat this for each wire you wish to re-tension.
The key to fixing loose OBD2 port pins is to carefully re-bend the internal metal tab within each terminal. This tab is what makes contact with the pins of the OBD2 scanner. Over time, these tabs can flatten out, causing a weak connection.
Using your probe, carefully insert it under the metal tab inside the terminal and gently bend it upwards to increase the tension. Be very gentle, as these tabs are delicate and can break. You are aiming to restore a slight curve to the tab so it will make firmer contact.
Step 4: Reassembling the OBD2 Port
After re-tensioning each terminal, carefully push the wires back into their original positions in the OBD2 port. You should feel a click as each terminal locks back into place. Refer to the pictures and notes you took earlier to ensure you are placing the wires in the correct locations. Reinstall the white plastic retainer clip to secure all the terminals. Finally, push the OBD2 port back into its mounting bracket until it clicks into place.
Tools for the Job
While you can use basic tools like small screwdrivers and probes, having the right tools can make the job easier and reduce the risk of damage. Terminal release tools, specifically designed for automotive connectors, are a good investment if you plan to do more electrical work on cars. As shown in the image, specialized probes, especially bent ones, can be particularly useful for accessing and re-tensioning the terminals within the OBD2 port.
When to Seek Professional Help
While this DIY fix can often resolve loose OBD2 port pin issues, there are situations where professional help is needed. If you are uncomfortable working with electrical connectors, if the terminals are damaged beyond repair, or if the problem persists after attempting this fix, it’s best to consult a qualified mechanic. They can properly diagnose the issue and perform more extensive repairs, including replacing the entire OBD2 port or addressing wiring problems.
By following these steps, you can often fix a loose OBD2 port and ensure a reliable connection for your diagnostic needs. Remember to work carefully and patiently, and don’t hesitate to seek professional help if needed.