For Kawasaki V650 owners looking to tap into their motorcycle’s diagnostic data, the 4-pin OBD2 connector can seem like a hurdle. Unlike standard 16-pin OBD2 ports found in cars, Kawasaki utilizes a compact 4-pin connector. However, accessing your bike’s ECU for fault codes and live parameters is more straightforward than you might think. This guide provides a clear, step-by-step approach to connecting a standard OBD2 reader to your Kawasaki 4-pin system, empowering you to monitor your motorcycle’s health with ease.
Understanding the Kawasaki 4-Pin OBD2 Connector
The key to bridging the gap between your Kawasaki’s diagnostic system and readily available OBD2 tools lies in understanding the 4-pin connector. This connector, typically located under the seat, provides essential lines for communication and power. While it deviates from the standard automotive OBD2 interface, it carries the necessary signals to interface with diagnostic scanners.
Pinout of the Kawasaki 4-Pin Connector
When looking at the connector on your Kawasaki V650, with the key at the top and from the front, the pin configuration is as follows:
K Line   GND
L Line VBAT- K Line: This is the diagnostic communication line (ISO 9141-2 K-line).
- GND: Ground, the common ground for the electrical circuit.
- L Line: This is another diagnostic communication line (ISO 9141-2 L-line), though often not essential for basic OBD2 functionality in this context.
- VBAT: Battery Voltage, providing 12V power to the OBD2 reader.
Creating a Patch Cable: Connecting OBD2 to Kawasaki 4-Pin
To connect a standard 16-pin OBD2 connector to your Kawasaki’s 4-pin system, you’ll need to create a simple adapter cable. This involves connecting the corresponding pins between the two connectors. Here’s how to wire it:
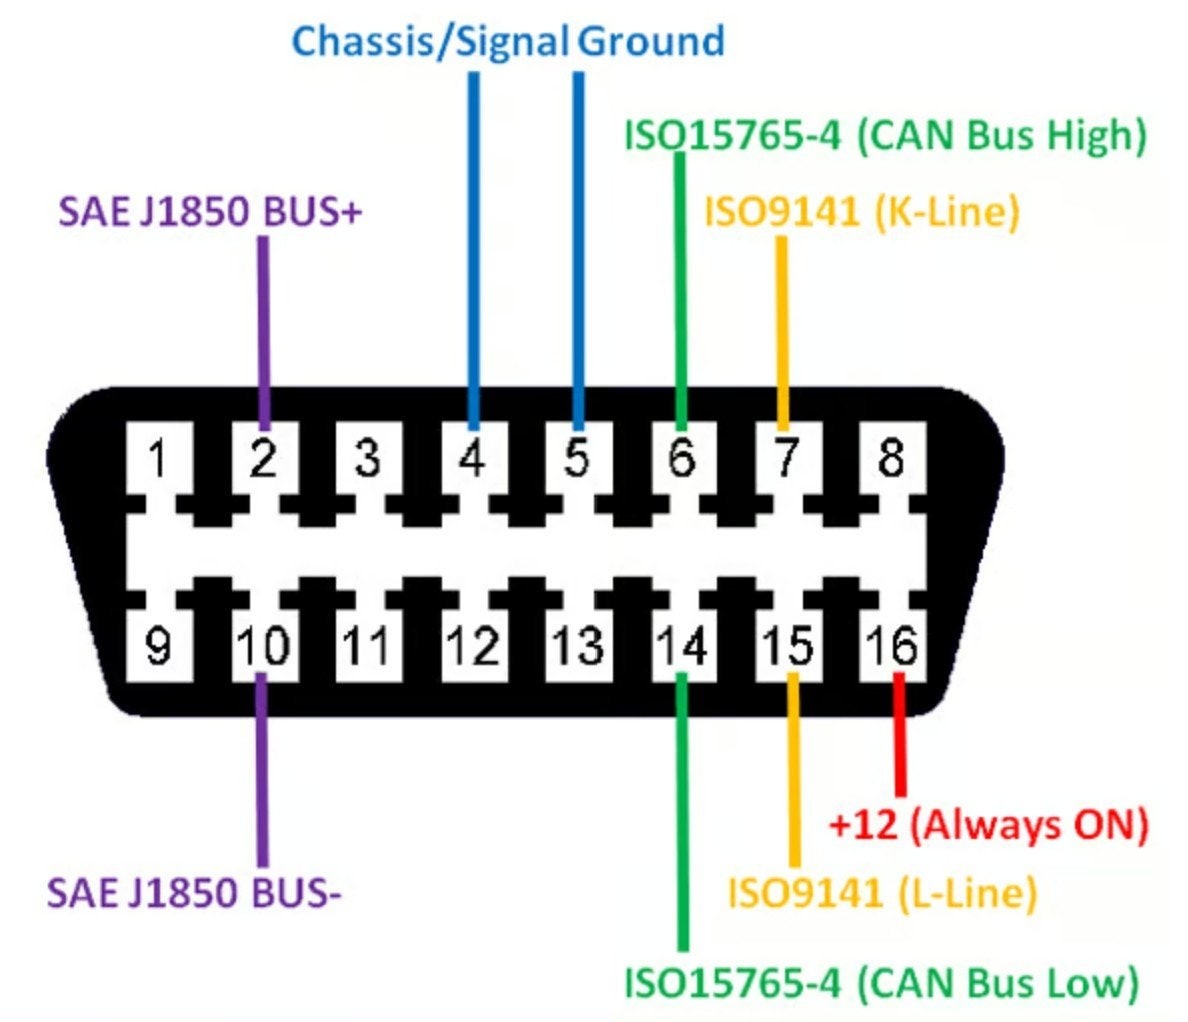
| Kawasaki 4-Pin | OBD2 16-Pin (Car Style) | Wire Color (V650) |
|---|---|---|
| GND | 4 & 5 (Ground) | Black/Yellow (BLK/YEL) |
| K Line | 7 (K Line) | Purple/Violet (Pink/Blue on schematic) |
| VBAT | 16 (Battery Power) | Brown/White |
| L Line (Optional) | 15 (L Line – Optional) | Light Green/Black (LG/BK) |
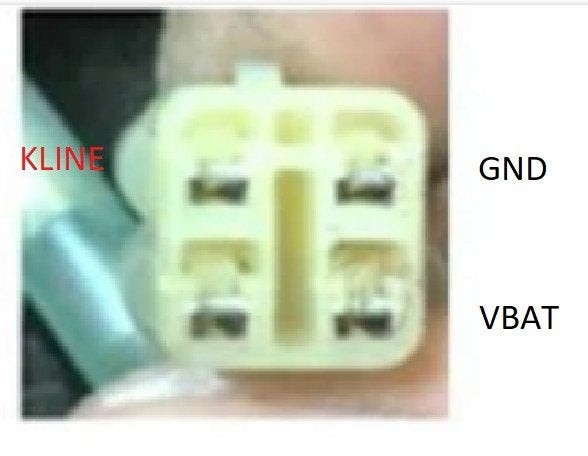

Face view of the Kawasaki V650’s 4-pin OBD2 socket, illustrating the pin layout for K-Line, Ground (GND), L-Line, and Battery Voltage (VBAT).
For most basic OBD2 readers and functionalities with the Kawasaki V650, connecting just the GND, K Line, and VBAT is sufficient. The L-Line connection (Pin 15 on OBD2) can be optionally connected if your OBD2 adapter and software utilize it, but it’s often not necessary for standard diagnostics on this motorcycle model.
To build your adapter, you’ll need:
- A standard 16-pin OBD2 female connector (socket).
- A 4-pin male connector that mates with the Kawasaki’s connector (often a Honda-type connector can be adapted, or you can source a compatible 4-pin connector).
- Wires for connections.
- Tools for crimping or soldering wires.
Carefully connect the wires according to the table above, ensuring secure and correct pin connections. A well-made adapter cable will ensure reliable communication between your OBD2 reader and your Kawasaki V650.
Close-up view of a DIY OBD2 adapter cable constructed for connecting a standard 16-pin OBD2 reader to a Kawasaki motorcycle’s 4-pin diagnostic port.
Selecting a Compatible OBD2 Reader
While the physical connection is handled by the adapter cable, the communication protocol is crucial. Kawasaki V650, like many motorcycles of its era, often uses the KWP2000 (ISO9141) protocol. Ensure your OBD2 reader supports this protocol to establish communication. Many inexpensive ELM327-based OBD2 readers are compatible with KWP2000, but it’s always best to verify the specifications of your chosen reader.
Testing and Using Your OBD2 Connection
Once you’ve created your adapter cable and have a compatible OBD2 reader, connect everything to your Kawasaki V650. Use an OBD2 software application on your smartphone, tablet, or laptop (like Torque, OBD Fusion, or similar).
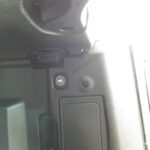
A functional prototype setup showing the OBD2 adapter connected to a Kawasaki V650, ready for diagnostic data access and reading.
With a successful connection, you should be able to access various engine parameters, read diagnostic trouble codes (DTCs), and even clear fault codes. This empowers you to monitor your engine’s temperature, sensor readings, and identify potential issues proactively.
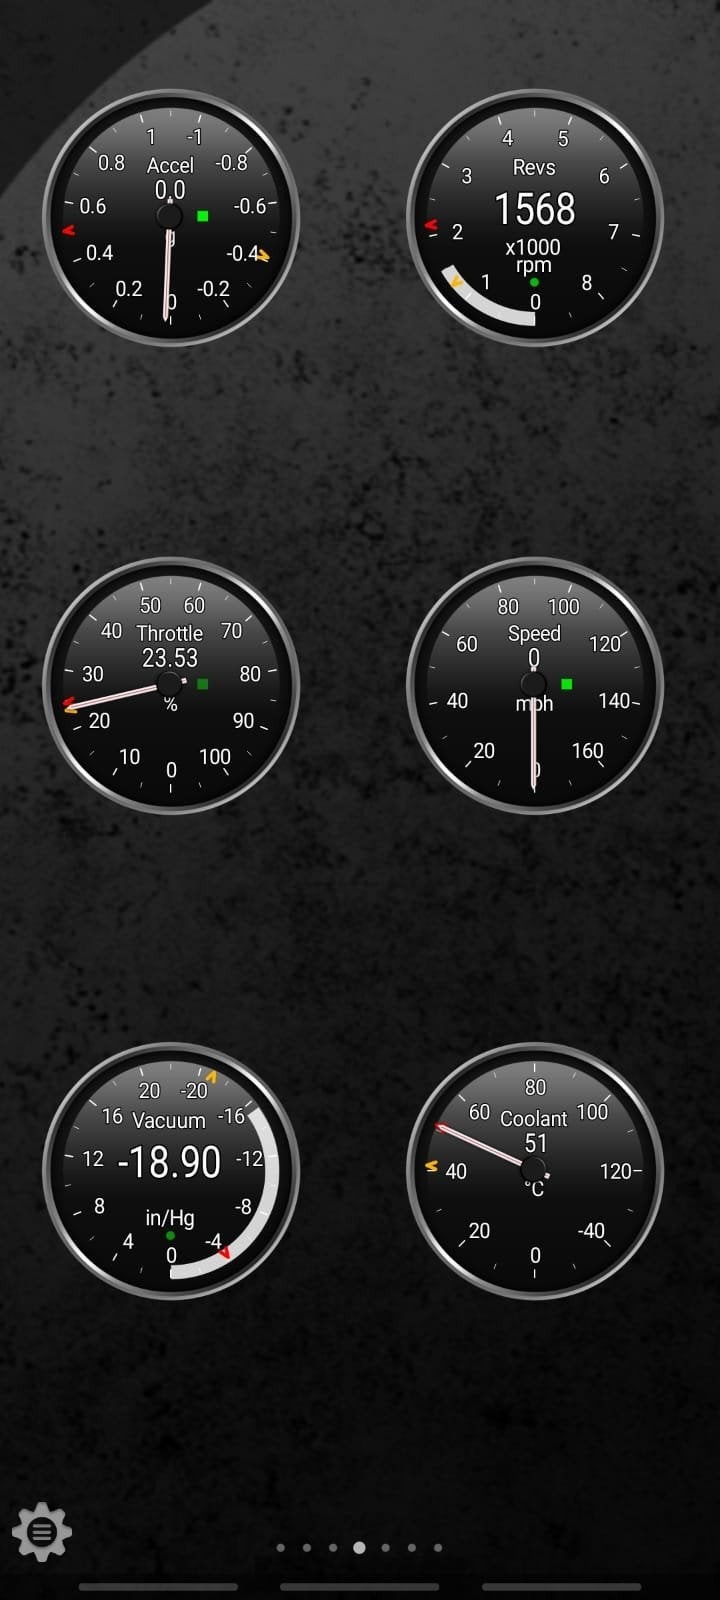
Screenshot of the Torque Android application displaying a live coolant temperature reading, successfully obtained from the Kawasaki V650’s ECU through the OBD2 connection.
Conclusion: Unlock Motorcycle Diagnostics
Connecting an OBD2 reader to your Kawasaki V650 using the 4-pin connector is a valuable skill for any motorcycle enthusiast. By creating a simple adapter cable and using a compatible OBD2 reader, you gain access to a wealth of diagnostic information, helping you maintain your bike, troubleshoot issues, and understand your motorcycle’s performance in greater detail. This DIY approach opens up the world of motorcycle diagnostics, putting you in control of your Kawasaki’s health.