An unexpected check engine light can be alarming, particularly when you’re driving and have somewhere important to be. However, in most situations, seeing your check engine light illuminate is simply an early indication that something in your vehicle needs attention, and it doesn’t automatically signal a major engine failure. This warning light is connected to your car’s powertrain, which includes the engine, transmission, and emissions system. The issue could be as simple as a loose gas cap or a failing fuel pump. Yet, it’s also wise not to immediately dismiss the possibility of more significant and potentially costly engine repairs, even if your car seems to be running normally.
Since the 1980s, the vast majority of vehicles manufactured are equipped with an onboard diagnostics (OBD) system. This system enables your car to monitor its own health, diagnose potential problems, and report these findings by storing specific codes. These codes are known as diagnostic trouble codes (DTCs), and they are invaluable for both car owners and mechanics. By using an automotive diagnostic scanner to read these check engine light codes, you can significantly narrow down the possible causes of the light and understand the severity of the issue. Understanding Check Engine Obd2 Codes is the first step in resolving car problems and ensuring your vehicle’s longevity.
What Your Check Engine Light is Trying to Tell You
How can you decipher the meaning of a check engine light without using a scanner? If you’re driving and don’t have time to investigate immediately, or if you just want a quick assessment, the color and behavior of the light on your dashboard can provide initial clues about the urgency of the situation. The way your check engine light, or sometimes labeled “service engine soon” light, appears is a useful indicator of the problem’s severity:
Solid Yellow or Orange: A solid yellow or orange check engine light indicates that your onboard diagnostic system (OBD) has detected a malfunction in a component or system. The vehicle isn’t able to compensate for the problem effectively, and it requires attention. When the light is solid yellow or orange, the issue is generally not an immediate emergency, and you likely have some time before needing to address it. It’s advisable, however, to drive no more than 100 miles before using an OBD-II scanner to identify the specific check engine obd2 code and understand the problem.
Solid Red: A solid red check engine light, which is not blinking, suggests that the problem needs attention sooner rather than later but isn’t necessarily critical. If your check engine light is red, it’s recommended to drive to the nearest qualified mechanic, repair shop, or car dealership for a professional diagnosis and repair.
Flashing Check Engine Light: A flashing check engine light is a serious warning sign, often indicating a severe issue like engine misfiring. In this situation, the best course of action is to pull over as soon as safely possible and contact roadside assistance or arrange to have your vehicle towed to a licensed mechanic, repair shop, or car dealership. Continuing to drive with a flashing check engine light can cause further damage.
Alt text: Check engine light illuminated on a car dashboard, indicating a potential vehicle issue.
The Simplest Way to Access OBD2 Car Codes
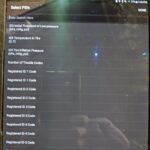
The onboard diagnostics system is a powerful tool for both drivers and technicians to quickly and efficiently assess a vehicle’s condition and safety through an OBD-2 scanner. These scan tools are widely available at most auto parts stores, and some stores even offer complimentary scans. Once connected, an OBD-2 (or OBD-II) scanner can retrieve information related to the check engine light and also access the vehicle identification number (VIN), calibration identification number, and other important vehicle data.
In most passenger vehicles, the OBD2 port is designed for easy access. It’s typically located on the driver’s side of the car, underneath the dashboard. Finding out the check engine obd2 codes and identifying the cause of your check engine light is straightforward. Simply plug in the scanner and follow these steps:
- Step 1: Connect the OBD2 scanner to your vehicle’s OBD2 port.
- Step 2: Turn the vehicle’s ignition to the “on” position (you don’t need to start the engine).
- Step 3: Enter any information requested by the OBD2 scanner, such as the VIN, if prompted.
- Step 4: Press the “scan” or “read codes” button on the scanner to begin the diagnostic scan.
- Step 5: After a short scan, the OBD2 scanner will display any trouble or error codes. Record these check engine obd2 codes for further investigation or to share with your mechanic.
Easy Method to Reset Your Check Engine Light
If you have an OBD scanner, you can also use it to reset your check engine light after you’ve completed a repair. After following the steps above to read the codes, look for an option on your scanner to “clear codes” or “erase codes.” Select this option and press “enter.”
It’s important to remember that while this action will turn off your check engine light, it’s only a temporary fix if the underlying problem hasn’t been properly resolved. If the issue persists, the check engine light will illuminate again to alert you to the ongoing problem. Clearing the code doesn’t fix the car; it only resets the warning light.
Reading Car Engine Codes Without an OBD2 Scanner
If you don’t have an automotive diagnostic scanner available, there are alternative methods you can try to read engine codes without one. While these methods are less convenient and may not work for all vehicles, they can potentially help you retrieve diagnostic trouble codes to understand why your check engine light is on.
Method 1: Using the Odometer Reset Button for Engine Code Retrieval
You might be able to access diagnostic codes using your vehicle’s odometer. Here’s how to attempt to retrieve engine diagnostic trouble codes using your odometer:
- Step 1: Press and hold down the odometer’s reset button.
- Step 2: While keeping the odometer reset button pressed, press and hold the odometer’s trip button simultaneously.
- Step 3: While holding both buttons, turn your vehicle’s ignition switch to the “on” position (without starting the engine).
- Step 4: After turning the ignition to “on,” release both the odometer reset and trip buttons.
- Step 5: If successful, diagnostic trouble codes should start to appear in your odometer display. Record any check engine obd2 codes that are shown.
Method 2: Odometer Reset with Multiple Ignition Cycles
If the first method doesn’t work, your vehicle might require multiple ignition cycles to display the fault code. This method is similar to the first, but involves cycling the ignition “on” and “off.” Follow these steps:
- Step 1: Press and hold both the odometer’s reset and trip buttons.
- Step 2: While holding both buttons, turn the ignition switch to the “on” position.
- Step 3: Keep holding the buttons and turn the ignition switch back to the “off” position.
- Step 4: Without releasing the buttons, turn the ignition switch back to the “on” position again.
- Step 5: With the ignition in the “on” position, release the odometer reset and trip buttons. Check if trouble codes are displayed in the odometer window. Note down any displayed check engine obd2 codes.
Method 3: Ignition Key Cycling and Dashboard Observation
Using the ignition key is another method to try diagnosing check engine light codes without a scanner. This method requires careful observation to interpret the diagnostic trouble code. For OBD-2 compatible vehicles, the trouble code might appear in the odometer display, similar to the previous methods.
However, older vehicles or those with OBD-1 systems might display the engine scanner code as a series of pulses and pauses from the check engine light itself. You’ll need to watch the light and carefully count the pulses and pauses. Each pulse represents a digit, and a pause separates the digits. For example, pulse, pulse, pulse, pulse, pulse, PAUSE, pulse, pulse, pulse would be interpreted as code 53 (five pulses, a pause, and then three pulses).
Once you understand this pattern, follow these steps:
- Step 1: Turn the ignition key from “on” to “off” repeatedly, three to five times, without starting the engine. Finish with the ignition in the “on” position.
- Step 2: Check if all the warning lights on your dashboard illuminate briefly; this indicates you’ve cycled the ignition correctly.
- Step 3: Observe as all lights turn off, except for the check engine light.
- Step 4: Check if a diagnostic trouble code appears in the odometer display.
- Step 5: If no code appears in the odometer, carefully watch the check engine light and record the pulses and pauses to determine your trouble code based on the pulse-pause pattern.
Method 4: Using a Paperclip for OBD-1 Code Access
If the previous methods are unsuccessful, especially with older vehicles, you can attempt to access OBD-1 codes using a simple paperclip or jumper wire. This method is for OBD-1 systems only and should not be attempted on OBD-2 vehicles unless you are certain of the pin locations.
- Step 1: Ensure your car is completely turned off.
- Step 2: Locate the diagnostic connector (OBD-1 port) in your vehicle. It’s often under the dashboard or in the engine bay. Identify the two specific terminals required for code reading (consult your vehicle’s repair manual for the exact terminals).
- Step 3: With the car off, use a paperclip or jumper wire to create a connection (closed circuit) between the two identified terminals in the OBD-1 port.
- Step 4: Turn the ignition switch to the “on” position, but do not start the engine.
- Step 5: Observe the check engine light. It will blink in a pattern of pulses and pauses to display the check engine obd2 codes (OBD-1 codes in this case). Record the pattern and interpret the code as described in Method 3.
Caution: Incorrectly jumping terminals in the OBD port can potentially damage your vehicle’s electrical system. If you are unsure about the correct terminals or this process, it is best to consult a professional mechanic.
Alt text: Diagram illustrating an OBD-II port with labeled pin assignments for automotive diagnostics.
Method 5: Seeking Professional Diagnostic Services
While there are methods to check engine light codes without a code scanner, the most reliable and user-friendly method is to use an OBD-2 scanner. If you don’t own one, many auto parts stores offer free code reading services to help you pinpoint the reason for your check engine light.
However, even with check engine obd2 codes in hand, remember that these codes are often generic and may not provide a complete and precise diagnosis. For a thorough assessment and accurate repair, taking your vehicle to a certified mechanic, a reputable repair shop, or a car dealership is highly recommended. Professionals have the expertise, tools, and diagnostic equipment to accurately interpret the codes, perform further tests if needed, and effectively repair the underlying issue.
Protecting Yourself from Costly Engine Repairs
It can be tempting to ignore a check engine light, particularly if your car seems to be driving normally. However, neglecting even minor issues indicated by the light can lead to more serious and expensive problems down the road. Driving with unresolved problems can cause damage to components like the catalytic converter, oxygen sensors (O2 sensors), or result in other costly engine repairs. Ignoring a seemingly minor issue can potentially turn into thousands of dollars in repair expenses.
Consider the long-term benefits of addressing check engine light issues promptly. Regular maintenance and timely repairs, guided by check engine obd2 code diagnostics, can extend the life of your vehicle and prevent larger, more expensive problems. For further protection against unexpected auto repair costs, explore vehicle service contracts or extended warranties.
Disclaimer: This article is for informational purposes only and is not a substitute for professional automotive diagnostic services and repair. Always consult with a qualified mechanic for any vehicle issues.