Whether you’re a seasoned mechanic or simply a car owner keen on understanding your vehicle’s health, grasping the concept of a Drive Cycle Obd2 is indispensable. This process is particularly crucial when you’re using an OBD2 scanner for a car diagnostic test at home. A drive cycle plays a vital role in verifying repairs and preparing your vehicle for emissions testing.
Alt text: OBD2 port with car key and diagnostic tool, illustrating vehicle diagnostics and drive cycle relevance.
Understanding the Drive Cycle
In simple terms, a drive cycle is a standardized driving pattern designed to allow your vehicle’s computer, known as the Powertrain Control Module (PCM), to perform self-diagnostics. This process is essential for updating check engine light codes, also referred to as OBD2 codes. By completing a drive cycle, you enable your car to run through a series of tests that confirm whether all emission systems are functioning correctly after repairs or code clearing. This is key to determining if your vehicle is ready for an emissions test and to ensure accurate diagnostic readings.
Performing a Drive Cycle: Step-by-Step
Executing a drive cycle OBD2 is straightforward, but it necessitates careful preparation and time. It’s important to note that specific procedures may vary depending on your vehicle’s manufacturer, model, and year. Always consult your owner’s manual for any manufacturer-specific instructions.
However, the following 10 steps outline a general procedure for performing a basic drive cycle:
-
Clear Existing OBD II Error Codes: Begin by using your OBD2 scanner to clear all pre-existing OBD II error codes. This step is mandatory as the drive cycle cannot initiate if there are active codes.
-
Fuel Level Check: Ensure your fuel tank is filled to a level between 30% and 70% capacity. This fuel range is generally required for the drive cycle tests to run effectively.
-
Battery and Alternator Health: Verify the condition of your vehicle’s battery and alternator. A healthy electrical system is crucial for a successful drive cycle. Jump-starting the vehicle is not permissible if you aim to perform a valid drive cycle.
-
Vehicle Rest Period: Allow your vehicle to rest, undisturbed, for a period of eight hours. During this time, refrain from inserting the key into the ignition or unlocking the car doors to ensure a complete system reset.
-
Initial Idle Phase: Start your car engine, leave it in Park (P) or Neutral (N), and let it idle for two to three minutes. This idle period allows the engine to reach a stable operating temperature before initiating the driving portion of the cycle.
Alt text: Car idling in a parking lot, representing the initial idle phase of a drive cycle for OBD2 system checks.
-
Engage Accessories: Turn on your headlights, heater, and defrosters for a minimum of two minutes. This step places a load on the engine and electrical system, testing their performance under typical driving conditions.
-
City Driving Simulation: Drive to an area where you can safely reach 25 mph. Practice slow, complete stops at each stop sign or traffic light. Gradually and steadily increase your speed to 35 mph and then to 45 mph. This simulates typical city driving conditions.
-
Highway Driving Simulation: Locate a freeway on-ramp and accelerate normally to merge into highway traffic. Position yourself in the slower lane and gradually increase your speed to between 55 mph and 60 mph. Engage cruise control to maintain a consistent speed for at least five miles. This step tests the vehicle’s performance at steady highway speeds.
Alt text: Car driving on a highway with cruise control activated, illustrating the highway driving phase of an OBD2 drive cycle.
-
Deceleration Phase: Find a sufficiently long exit ramp and coast to the end, allowing your vehicle to decelerate naturally. You may apply the brakes at the very end of the ramp if necessary. This simulates off-ramp deceleration and tests braking and engine response.
-
Repeat City Driving and Final Idle: Return home or to your mechanic, repeating step number seven to simulate city driving again. Upon reaching your destination, put your vehicle in Park (P) and let it idle for one to two minutes to conclude the drive cycle.
OBD II Scan for Readiness Verification
Following the completion of the drive cycle OBD2, you or your mechanic can now perform an OBD II scan. This scan will determine if your vehicle has successfully completed the drive cycle, if repairs were effective, and if it is ready to pass an emissions test. This process is also valuable after clearing codes to pinpoint potential issues and assess the effectiveness of any repairs.
Remember, a basic drive cycle is designed to mirror a typical daily commute. During this process, your engine’s computer conducts a series of comprehensive tests to ensure all systems are operating as intended and within specified parameters.
Drive Cycle Completion Time
While preparation for a drive cycle, including the vehicle rest period, requires approximately eight hours, the actual driving and testing portion typically takes around 30 minutes to complete, with about 20 minutes spent actively driving. Understanding and performing a drive cycle is a proactive step in maintaining your vehicle’s health, ensuring smooth operation, and prolonging its lifespan. Regular vehicle checkups and attention to dashboard notifications are invaluable investments in your car’s long-term reliability and your peace of mind.
Addressing New OBD2 Codes
It’s possible that after completing a drive cycle OBD2 and driving further, the check engine light may reappear, indicating a new OBD2 code. However, there are tools available to help you manage this situation effectively. nonda’s Smart Vehicle Health Monitor is designed to continuously monitor your vehicle’s health and provide real-time OBD2 code readings.
When paired with the ZUS app, you gain access to comprehensive diagnostics for your codes, including instructional videos demonstrating DIY fixes that you can attempt at home before initiating another drive cycle.
[Insert embedded YouTube video here: How to Fix P0420 Engine Code in 3 Minutes [3 DIY Methods / Only $4.97]]
For further troubleshooting of DTC codes, explore these resources:
- P0171 – System Too Lean (Bank 1)
- P0456 – EVAP Control System Leak Detected (Very Small Leak)
- P0300 – Cylinder Misfire Detected, Random/Multiple Cylinder
- P0400 – Exhaust Gas Recirculation (EGR) Flow Malfunction
- P0128 – Coolant Thermostat Malfunction
These videos are produced by nonda Auto DIY Center. Visit their YouTube channel for more DTC code information and DIY repair guidance.
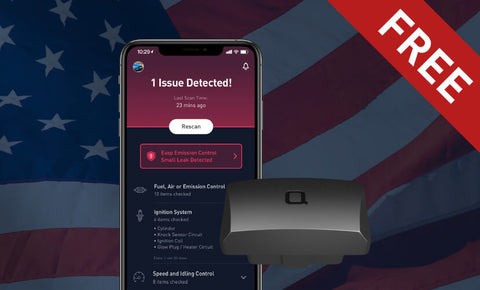
DIY Diagnostics: Get Started for Free
Performing a car diagnostic test at home is now easier than ever with an OBD2 scanner. Discover more about conducting a simple DIY car diagnostic test, and explore nonda’s Car Code Reader, offering a FREE device and FREE APP to empower your vehicle maintenance journey!
 obd2 scanner