For automotive enthusiasts and professionals alike, understanding what’s happening under the hood is crucial. Modern vehicles are complex systems managed by sophisticated computers, and accessing this data used to require specialized and expensive tools. However, the advent of the Laptop Obd2 Interface Kit has democratized vehicle diagnostics, putting powerful capabilities within reach of anyone with a computer.
What is a Laptop OBD2 Interface Kit?
At its heart, a laptop OBD2 interface kit is a tool that bridges the communication gap between your car’s On-Board Diagnostics (OBD) system and your laptop. This kit typically consists of two key components: an OBD2 interface adapter and software compatible with your laptop.
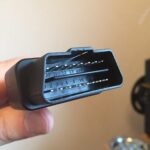
The interface adapter is the hardware piece that physically connects to your car’s OBD2 port, usually located under the dashboard. These adapters are often based on the ELM327 chip, an industry-standard microcontroller firmware designed to decode the various communication protocols used by different car manufacturers. ELM327 effectively translates the “knarly protocols” of your car’s Engine Control Unit (ECU) into a common ASCII format that computers can understand. Originally developed by Elm Electronics, the ELM327’s popularity has led to numerous clones being produced, offering affordable access to OBD2 data. These clones come in various connection types, primarily USB, Bluetooth, and WiFi, catering to different user needs and laptop compatibility.
Alt text: Diagram showing the typical location of an OBD2 port in a vehicle’s interior, under the dashboard on the driver’s side.
The software component of a laptop OBD2 interface kit is what allows you to interact with the data from your car. This software can range from simple terminal programs to sophisticated diagnostic suites. Many software packages are available, some are generic and designed to work with a wide range of vehicles, while others may be specialized for specific car brands or functionalities. While some vendors offer “teaser” versions of their software to entice users to purchase full packages, basic terminal programs can also be used to establish communication and retrieve data using AT commands.
Why Choose a Laptop OBD2 Interface Kit?
The benefits of using a laptop OBD2 interface kit are numerous, especially when compared to dedicated handheld scanners:
- Cost-Effectiveness: Laptop-based kits are generally more affordable than professional-grade handheld scanners, especially considering the powerful processing capabilities of modern laptops you likely already own.
- Versatility and Expandability: Laptops offer significantly more processing power, storage, and display capabilities than handheld scanners. This allows for more advanced diagnostics, data logging, and visualization. Software can be easily updated and expanded, adding new features and vehicle compatibility.
- User-Friendly Interface: Laptop software often provides a more intuitive and user-friendly interface compared to small screens and limited input methods on handheld devices. The larger screen makes viewing data and navigating menus much easier.
- Customization and Programming: Advanced users can leverage laptops for more than just reading diagnostic codes. With the right software and knowledge, you can perform customization, coding, and even some level of ECU programming depending on the vehicle and interface capabilities.
- Data Logging and Analysis: Laptops excel at data logging. You can record real-time data from your car while driving and analyze it later to diagnose intermittent issues or track performance metrics.
Getting Started with Your Laptop OBD2 Interface Kit
Once you have your laptop OBD2 interface kit, getting started is relatively straightforward. Here are the basic steps:
- Install Software: Install the software that came with your kit or download compatible OBD2 software for your laptop. Ensure the software is compatible with your operating system and the type of interface (USB, Bluetooth, WiFi) you are using.
- Connect the Interface: Locate the OBD2 port in your car and plug in the interface adapter.
- Establish Connection: Follow the software instructions to establish a connection between your laptop and the OBD2 interface. This usually involves selecting the correct COM port (for USB) or pairing via Bluetooth or WiFi.
- Explore Basic Commands: You can begin by using basic AT commands to test the connection and gather information from the interface. For example, typing “ATI” and pressing enter should return the interface identification, like “ELM327 v1.5”. “ATRV” will typically return the vehicle’s battery voltage.
Alt text: Close-up photograph of an ELM327 integrated circuit chip, highlighting the component at the heart of many OBD2 interface adapters.
- Retrieve PIDs: To access specific vehicle parameters, you’ll need to use OBD2 PIDs (Parameter IDs). These are standardized codes that request specific data points from the ECU, such as engine temperature, RPM, speed, and sensor readings. Resources like the Wikipedia page on OBD-II PIDs can provide lists of common PIDs and their meanings.
While a laptop OBD2 interface kit primarily provides read-only access to vehicle data for diagnostics and monitoring, it opens up a world of understanding your car’s inner workings. For those looking to delve deeper and potentially emulate ECU communication for more advanced projects, be aware that this is a significantly more complex undertaking, requiring a thorough understanding of vehicle communication protocols. However, for the vast majority of users, a laptop OBD2 interface kit is an invaluable tool for car maintenance, diagnostics, and automotive learning.