Are you fascinated by the inner workings of your car? Do you want to understand what’s happening under the hood without relying solely on expensive professional tools? The world of Obd2 Github projects offers a powerful and accessible entry point into car diagnostics, and projects like PYOBD are leading the charge.
This article explores the exciting realm of open-source OBD2 software, focusing on how platforms like GitHub are democratizing car diagnostics and putting powerful tools into the hands of enthusiasts and professionals alike. We’ll delve into the capabilities of projects like PYOBD, a free and open-source program for car diagnostics available on GitHub, and how you can leverage these resources to better understand and maintain your vehicle.
Unveiling PYOBD: An Open-Source OBD2 Gem on GitHub
PYOBD stands as a testament to the power of open-source collaboration within the OBD2 GitHub community. Originally created by Donour Sizemore, this valuable program was revived and modernized by enthusiasts to ensure its continued functionality. The updated version transitions PYOBD from Python 2 to Python 3 and integrates contemporary libraries, breathing new life into this diagnostic tool.
One of the key enhancements in the revamped PYOBD is the adoption of the Python-OBD library. This integration significantly expands the program’s capabilities, allowing it to support a wider range of OBD2 commands and intelligently detect the specific parameters supported by your car’s computer. This means PYOBD can display a wealth of data, far exceeding the limitations of its earlier iteration. Furthermore, PYOBD’s cross-platform compatibility ensures it runs seamlessly on Windows, Linux, and macOS, making it accessible to a broad user base within the OBD2 GitHub ecosystem and beyond.
YouTube Presentation: See PYOBD in Action
To get a visual overview of PYOBD and its functionalities within the context of OBD2 GitHub resources, check out this presentation video.
Getting Started with PYOBD from GitHub: Prerequisites
To embark on your OBD2 diagnostic journey with PYOBD, sourced and available through OBD2 GitHub, you’ll need a few essential components:
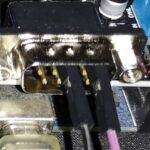
- ELM327 Adapter: This is the hardware interface that bridges your computer and your car’s OBD2 port. Most adapters priced at $10 or more should be compatible.
- Laptop: Your computer will run the PYOBD software and communicate with the ELM327 adapter.
- OBD2 Compliant Car: Ensure your vehicle supports the OBD2 standard. In Europe, OBD2 compliance is generally standard for cars manufactured since 2001. In the USA, this standard applies to vehicles from 1996 onwards.
Recommended ELM327 Adapters (User-Tested and Compatible):
The following ELM327 adapters have been reported to work effectively with PYOBD and similar OBD2 GitHub based tools:
- OBDPro USB Scantool
- OBDLink SX USB
- Chinese OBD2 1.5 USB
- VGate iCar Pro BLE (Bluetooth 4.0)
Share Your Adapter Success! Contribute to the OBD2 GitHub community knowledge base by reporting your successfully tested ELM327 adapters. Your feedback helps expand the compatibility list and benefits other users. Contact information for reporting can typically be found within the PYOBD project repository on GitHub.
USB vs. Bluetooth Adapters:
PYOBD supports both USB and Bluetooth ELM327 adapters. USB adapters generally offer a more stable and faster connection, which is often preferred for diagnostic work. Bluetooth adapters provide wireless convenience, but may sometimes be less reliable, particularly in environments with potential signal interference. Linux users might need to manually pair and connect Bluetooth adapters via the command line due to potential issues with Bluetooth GUI managers on certain distributions.
Choosing a Quality Adapter:
While budget-friendly Chinese clones are available, investing in a reputable adapter from brands like OBDLink or VGate is generally recommended for optimal performance and reliability when working with OBD2 GitHub software. Quality adapters often feature firmware updates, ensuring ongoing improvements and compatibility. If you opt for a Chinese clone, look for models incorporating a PIC18F25K80 chip and an FTDI chip (for USB versions). Firmware version 1.5 is often cited as a good option for Chinese clones, but results can vary. The Konnwei KW903 is a branded Chinese ELM327 adapter that offers a balance of affordability and functionality. However, for superior performance, the Vgate iCar Pro remains a top recommendation.
Installation Guide for PYOBD from GitHub
Before diving into using PYOBD from OBD2 GitHub, you’ll need to install it on your system. The installation process varies slightly depending on your operating system.
Note: Linux users may need to install the libnsl library if it’s not already included in their distribution.
Windows Installation
- Download the Standalone Executable: Obtain the Windows standalone executable of PYOBD from the OBD2 GitHub repository.
- Install ELM327 Driver: Install the driver software for your ELM327 adapter. If a driver wasn’t included with your adapter, you can find drivers at http://www.totalcardiagnostics.com/support/Knowledgebase/Article/View/1/0/how-to-install-elm327-usb-cable-on-windows-and-obd2-software.
Linux Installation
-
Download the Standalone Executable: Download the Linux standalone executable of PYOBD from the OBD2 GitHub repository.
-
Grant User Privileges: Add your user account to the
dialoutandttygroups to allow access to USB and serial ports. Open your terminal and execute the following commands:sudo usermod -a -G dialout $USER sudo usermod -a -G tty $USERImportant: Log out and log back in (or restart your system) for these changes to take effect.
-
Bluetooth Adapter Support (Optional): If using a Bluetooth adapter, you may need to install Bluetooth utilities. Run this command in your terminal:
sudo apt-get install bluetooth bluez-utils blueman
macOS Installation
-
Download the Standalone Executable: Download the macOS standalone executable of PYOBD from the OBD2 GitHub repository.
-
Grant User Privileges: Similar to Linux, grant your user account access to serial ports by running these commands in your terminal:
sudo usermod -a -G dialout $USER
sudo usermod -a -G tty $USER
Important: Log out and log back in (or restart) after running these commands.
Using PYOBD from GitHub for Car Diagnostics
Once PYOBD is installed, you can start using it to diagnose your car. Here’s a basic usage guide for this valuable OBD2 GitHub project:
- Bluetooth Pairing (Bluetooth Adapters): If you are using a Bluetooth ELM327 adapter, you’ll need to pair it with your computer initially. Linux users might need to manually connect via the command line after pairing.
- Run PYOBD: Launch the PYOBD executable or script.
- Connect ELM327 to Car and Computer: Plug your ELM327 adapter into your car’s OBD2 port and connect it to your computer (via USB or Bluetooth).
- Turn Car Ignition ON: Turn your car’s ignition to the “ON” position (you don’t need to start the engine).
- Connect in PYOBD: In the PYOBD application, navigate to “Configure,” select the appropriate port and baud rate for your adapter, and click “Connect.” While “AUTO” port and baud rate detection is available and generally reliable, manual configuration can be faster and more consistent in some cases.
- View Data: Once connected, PYOBD will begin displaying real-time data from your car’s sensors. Note that many sensors only transmit data when the engine is running. If you connect PYOBD before starting the engine, allow a brief period for reconnection after starting the engine.
PYOBD is designed for user-friendliness. Its interface allows you to easily access:
- TESTS Data: Results from various diagnostic tests.
- SENSORS Data: Live readings from engine and vehicle sensors.
- FREEZE FRAME Data: Snapshots of sensor data captured when trouble codes are triggered.
- TROUBLE CODES: Display and clear diagnostic trouble codes (DTCs).
- LIVE GRAPHS: Visualize real-time sensor data graphically.
Important Note: PYOBD, like many general OBD2 tools available through OBD2 GitHub resources, primarily focuses on engine-related data. It typically does not provide access to data from systems like airbags, ABS, or body control modules. For in-depth diagnostics of these systems, specialized software is usually required.
Running PYOBD from GitHub as a Script
For users who prefer to run PYOBD directly from the source code obtained from OBD2 GitHub, here’s how to set up and run the script:
Prerequisites:
- Python 3: Ensure Python 3 is installed on your system.
- libsnl (Linux): Linux users might need to install
libsnlif it’s not already present.
Windows Script Execution
-
Install Requirements: Open a command prompt, navigate to the directory containing the PYOBD script, and run:
pip install -r requirements.txt -
Run the Script: Execute the script using:
python3 pyobd.py
Linux Script Execution
-
Install Dependencies: Open a terminal and install necessary packages. For Debian 10/11 and Ubuntu:
sudo apt-get install dpkg-dev build-essential libjpeg-dev libtiff-dev libsdl1.2-dev libgstreamer-plugins-base1.0 libnotify-dev freeglut3 freeglut3-dev libsm-dev libgtk-3-dev libwebkit2gtk-4.0-dev libxtst-dev gettext python3-dev python3-pip sudo apt-get install python3-pip pip3 install --upgrade pyinstaller pip3 install --upgrade pip sudo apt install libglib2.0-dev libsmbclient-dev libcups2-dev libgirepository1.0-dev libcurl4-openssl-dev libssl-dev libsystemd-dev librsync-dev pip3 install -r requirements.txtFor Ubuntu Noble (and potentially newer versions), a simplified command set may suffice:
sudo apt-get install dpkg-dev build-essential libjpeg-dev libtiff-dev libsdl1.2-dev libgstreamer-plugins-base1.0-0 libnotify-dev libglut-dev libglut3.12 libsm-dev libgtk-3-dev libwebkit2gtk-4.1-dev libxtst-dev gettext python3-dev python3-pip sudo apt install wxpython-tools numpy python3-tornado python3-pint python3-six -
Grant User Privileges: As with the standalone executable, add your user to the
dialoutandttygroups:sudo usermod -a -G dialout $USER sudo usermod -a -G tty $USERImportant: Log out and back in (or restart).
-
Run the Script: Execute PYOBD using:
python3 pyobd.py
macOS Script Execution
-
Install Requirements: Open a terminal, navigate to the script directory, and run:
pip install -r requirements.txt -
Grant User Privileges: Add user privileges:
sudo usermod -a -G dialout $USER
sudo usermod -a -G tty $USER
Important: Log out and back in (or restart).
-
Run the Script: Launch PYOBD with:
python3 pyobd.py
Creating a Standalone Executable for PYOBD from GitHub
For easier distribution and use, you can create standalone executables of PYOBD from the OBD2 GitHub source code. This bundles all necessary dependencies into a single file.
Prerequisites:
- Python 3: Python 3 must be installed.
- libsnl (Linux): Linux users might require
libsnl.
Windows Executable Creation
-
Install Dependencies: Open a command prompt and run:
pip3 install -r requirements.txt pip3 install pyinstaller pip3 install --upgrade pip pip3 install --upgrade pyinstaller -
Create Executable: Execute the PyInstaller command:
pyinstaller --onefile -c -i pyobd.ico --add-data "pyobd.ico;." pyobd.py
Linux Executable Creation
-
Install Dependencies: Open a terminal and install required packages (Debian 10/11, Ubuntu):
sudo apt-get install dpkg-dev build-essential libjpeg-dev libtiff-dev libsdl1.2-dev libgstreamer-plugins-base1.0 libnotify-dev freeglut3 freeglut3-dev libsm-dev libgtk-3-dev libwebkit2gtk-4.0-dev libxtst-dev gettext python3-dev python3-pip sudo apt-get install python3-pip pip3 install --upgrade pyinstaller pip3 install --upgrade pip sudo apt install libglib2.0-dev libsmbclient-dev libcups2-dev libgirepository1.0-dev libcurl4-openssl-dev libssl-dev libsystemd-dev librsync-dev -
Create Executable: Run PyInstaller:
pip3 install -r requirements.txt
pip3 install pyinstaller
pyinstaller --onefile -w -i pyobd.ico --add-data "pyobd.ico:." pyobd.py
macOS Executable Creation
-
Install Requirements: Open a terminal and run:
pip3 install -r requirements.txt pip3 install pyinstaller -
Create Executable: Execute PyInstaller:
python3 -m PyInstaller --onefile -w -i pyobd.ico --add-data "pyobd.ico:." pyobd.py
PYOBD To-Do List: Future Enhancements from the OBD2 GitHub Community
The PYOBD project, like many OBD2 GitHub initiatives, is continuously evolving. Future development plans include:
Adding Sensor Data Recording and Replay Feature
This feature will allow users to record sensor data logs and replay them for in-depth analysis, further enhancing PYOBD’s diagnostic capabilities and solidifying its position within the OBD2 GitHub landscape.
By exploring OBD2 GitHub and projects like PYOBD, you gain access to powerful, open-source tools that empower you to understand your car on a deeper level and participate in a vibrant community of automotive enthusiasts and developers.