Understanding the OBD2 DLC pinout is crucial for anyone involved in vehicle diagnostics, repair, or data logging. The 16-pin Diagnostic Link Connector (DLC) is the standardized interface that provides access to your vehicle’s On-Board Diagnostics system. This guide will delve into the intricacies of the OBD2 pinout, its function, and its importance in modern automotive technology.
What is the OBD2 DLC Pinout?
The OBD2 (On-Board Diagnostics II) system is a standardized protocol used in most modern vehicles to monitor and report on various vehicle parameters. At the heart of this system is the 16-pin Data Link Connector (DLC), commonly referred to as the OBD2 connector. The OBD2 DLC pinout refers to the specific arrangement and function of each of these 16 pins.
This standardized pinout ensures that diagnostic tools can reliably communicate with a wide range of vehicles, regardless of manufacturer. By understanding the OBD2 DLC pinout, you can effectively use OBD2 scanners, data loggers, and other diagnostic equipment to retrieve valuable information about your vehicle’s health and performance.
Why is the OBD2 DLC Pinout Important?
The OBD2 DLC pinout is not just a random arrangement of pins; each pin serves a specific purpose, facilitating communication between the vehicle’s electronic control units (ECUs) and external diagnostic tools. Knowing the OBD2 DLC pinout is essential for:
- Accurate Diagnostics: Correctly connecting your diagnostic tool to the right pins ensures proper communication and data retrieval. Misunderstanding the OBD2 DLC pinout can lead to communication errors or even damage to your equipment or vehicle.
- Using OBD2 Scanners and Tools: Whether you’re a professional mechanic or a DIY enthusiast, understanding the OBD2 DLC pinout is fundamental to using OBD2 scanners, code readers, and data loggers effectively.
- Developing Automotive Applications: For engineers and developers creating automotive applications, a thorough understanding of the OBD2 DLC pinout is necessary to interface with vehicle systems and extract data for various purposes like telematics, performance monitoring, and more.
- Troubleshooting Communication Issues: When facing problems connecting to a vehicle’s OBD2 system, knowledge of the OBD2 DLC pinout can help you diagnose whether the issue lies in the connector, wiring, or tool itself.
Decoding the OBD2 DLC Pinout: Pin by Pin
The SAE J1962 standard and ISO 15031-3 specify the OBD2 DLC pinout. Here’s a breakdown of the function of each pin in a typical Type A OBD2 connector, the most common type found in passenger vehicles:
| Pin Number | Pin Name | Function |
|---|---|---|
| 1 | Manufacturer Discretionary | Often undefined, manufacturer-specific use |
| 2 | SAE J1850 Bus+ | Used in SAE J1850 PWM and VPW protocols |
| 3 | Manufacturer Discretionary | Often undefined, manufacturer-specific use |
| 4 | Chassis Ground | Ground connection for the vehicle chassis |
| 5 | Signal Ground | Ground connection for signal circuits |
| 6 | CAN High (CAN-H) | CAN bus high signal line (ISO 15765-4) |
| 7 | ISO 9141-2 K-Line | K-line for ISO 9141-2 and ISO 14230-4 (KWP2000) |
| 8 | Manufacturer Discretionary | Often undefined, manufacturer-specific use |
| 9 | Manufacturer Discretionary | Often undefined, manufacturer-specific use |
| 10 | SAE J1850 Bus- | Used in SAE J1850 PWM protocol |
| 11 | Manufacturer Discretionary | Often undefined, manufacturer-specific use |
| 12 | Manufacturer Discretionary | Often undefined, manufacturer-specific use |
| 13 | Manufacturer Discretionary | Often undefined, manufacturer-specific use |
| 14 | CAN Low (CAN-L) | CAN bus low signal line (ISO 15765-4) |
| 15 | ISO 9141-2 L-Line | L-line for ISO 9141-2 and ISO 14230-4 (KWP2000) |
| 16 | Battery Power | Vehicle battery positive voltage (+12V or +24V) |
Key Pin Groups in the OBD2 DLC Pinout:
- Power and Ground (Pins 4, 5, 16): Pin 16 provides battery power to the diagnostic tool, while pins 4 and 5 provide ground connections. These are essential for powering the OBD2 scanner and establishing a stable electrical circuit.
- CAN Bus (Pins 6, 14): Pins 6 (CAN-H) and 14 (CAN-L) are the CAN bus communication lines. CAN (Controller Area Network) is the most prevalent protocol for OBD2 communication in modern vehicles (ISO 15765-4).
- J1850 Bus (Pins 2, 10): Pins 2 (J1850 Bus+) and 10 (J1850 Bus-) are used for the SAE J1850 VPW and PWM protocols, primarily found in older vehicles, particularly from GM and Ford.
- ISO 9141-2 and KWP2000 (Pins 7, 15): Pins 7 (K-Line) and 15 (L-Line) are communication lines for the ISO 9141-2 and ISO 14230-4 (KWP2000) protocols, used in some older European and Asian vehicles.
- Manufacturer Discretionary Pins (1, 3, 8, 9, 11, 12, 13): These pins are reserved for manufacturer-specific uses and are not standardized. Their function can vary widely between vehicle makes and models, or they may be unused.
OBD2 Connector Types: Type A vs. Type B
While the pinout is largely consistent, there are two main types of OBD2 connectors defined in SAE J1962: Type A and Type B.
- Type A OBD2 Connector: This is the most common type, found in cars and light-duty vehicles. It is designed for 12V systems. The OBD2 DLC pinout described above is for a Type A connector.
- Type B OBD2 Connector: Type B connectors are typically used in medium and heavy-duty vehicles and are designed for 24V systems. The OBD2 DLC pinout is similar to Type A, but Type B has a keying difference – an interrupted groove – to prevent accidental insertion of a Type A connector into a 24V system.
A Type B OBD2 adapter cable is often designed to be compatible with both Type A and Type B sockets, while a Type A adapter will only fit into a Type A socket.
OBD2 Protocols and the DLC Pinout
The OBD2 DLC pinout is designed to support multiple communication protocols. While modern vehicles predominantly use CAN bus (ISO 15765-4) on pins 6 and 14, older vehicles might utilize different protocols on other pins of the OBD2 DLC pinout. The five main OBD2 protocols and their typical pin assignments are:
- CAN (ISO 15765-4): Pins 6 (CAN-H) and 14 (CAN-L)
- KWP2000 (ISO 14230-4): Pin 7 (K-Line), optionally Pin 15 (L-Line)
- ISO 9141-2: Pin 7 (K-Line), optionally Pin 15 (L-Line)
- SAE J1850 VPW: Pin 2 (J1850 Bus+)
- SAE J1850 PWM: Pins 2 (J1850 Bus+) and 10 (J1850 Bus-)
It’s important to note that a vehicle may only implement one or a subset of these protocols. Auto-detection features in modern OBD2 scanners usually handle protocol identification, but understanding the protocol-to-pin mapping on the OBD2 DLC pinout can be helpful in troubleshooting or for advanced applications.
Locating the OBD2 Connector and DLC Pinout in Your Vehicle
The OBD2 connector is typically located within 2 feet (0.61 meters) of the steering wheel inside the passenger compartment. Common locations include under the dashboard on the driver’s side, near the steering column, or in the center console. However, the exact location can vary by vehicle make and model.
To find the OBD2 connector and confirm the OBD2 DLC pinout of your vehicle, you can:
- Consult your vehicle’s owner’s manual: The manual often indicates the location of the OBD2 connector.
- Use online resources: Websites and forums dedicated to specific vehicle makes and models often provide information on OBD2 connector locations.
- Visually inspect common locations: Look under the dashboard, steering column area, and center console for a 16-pin connector resembling the Type A or Type B OBD2 connector diagrams.
Once you locate the connector, you can visually verify the OBD2 DLC pinout by comparing it to the pinout diagrams provided in this guide or other reliable sources.
Practical Applications of OBD2 DLC Pinout Knowledge
Understanding the OBD2 DLC pinout opens up a wide range of practical applications, including:
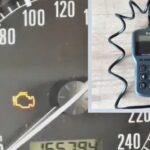
- DIY Car Diagnostics and Repair: Using an OBD2 scanner and your knowledge of the OBD2 DLC pinout, you can read diagnostic trouble codes (DTCs), clear check engine lights, and access real-time sensor data to diagnose and potentially fix car issues yourself.
- Vehicle Performance Monitoring and Data Logging: By connecting OBD2 data loggers to the DLC using the correct pin connections, you can record vehicle parameters like speed, RPM, engine temperature, and more for performance analysis, fuel efficiency studies, or vehicle black box applications.
- Custom Automotive Projects: For hobbyists and engineers, the OBD2 DLC pinout is the gateway to accessing vehicle data for custom projects like creating personalized dashboards, developing smart car applications, or integrating vehicle data with IoT platforms.
- Professional Automotive Services: Mechanics and technicians rely on their deep understanding of the OBD2 DLC pinout and associated diagnostic procedures to efficiently and accurately diagnose and repair vehicles.
Troubleshooting OBD2 Connector and Pinout Issues
If you encounter issues connecting to your vehicle’s OBD2 system, considering the OBD2 DLC pinout is a crucial step in troubleshooting. Common problems and troubleshooting steps include:
- No Power to OBD2 Scanner: Check pin 16 (Battery Power) and pins 4 & 5 (Ground) of the OBD2 DLC pinout. Use a multimeter to verify that pin 16 has battery voltage and pins 4 & 5 have continuity to ground. A blown fuse in the vehicle or a problem with the vehicle’s wiring can cause power issues.
- Communication Errors: Ensure your OBD2 scanner is compatible with your vehicle’s protocol and correctly connected to the appropriate pins of the OBD2 DLC pinout (typically CAN pins 6 & 14 for modern vehicles). Check for bent or damaged pins in the connector.
- Connector Damage: Visually inspect the OBD2 connector for any physical damage, corrosion, or loose wiring. A damaged connector may need replacement.
By systematically checking the OBD2 DLC pinout and related wiring, you can often pinpoint and resolve connectivity issues with the OBD2 system.
Conclusion: Mastering the OBD2 DLC Pinout for Automotive Expertise
The OBD2 DLC pinout is a fundamental aspect of modern vehicle diagnostics and data access. Understanding the function of each pin, the different connector types, and the associated communication protocols is essential for anyone working with automotive technology. Whether you are diagnosing your own car, developing automotive applications, or working as an automotive professional, a solid grasp of the OBD2 DLC pinout will empower you to effectively interact with and leverage the wealth of data available through the OBD2 system.
By using this comprehensive guide, you are now better equipped to understand, utilize, and troubleshoot the OBD2 DLC pinout, enhancing your automotive knowledge and capabilities.