Diagnosing car problems using an OBD2 scanner can be incredibly helpful, especially when that pesky check engine light illuminates. However, frustration hits hard when your Obd2 Scanner Cannot Connect To Ecu (Engine Control Unit). This connection failure prevents you from accessing vital diagnostic data, leaving you in the dark about your vehicle’s health.
This article delves into the common reasons why your OBD2 scanner cannot connect to ECU and provides a step-by-step troubleshooting guide to get you back on track. We’ll explore potential causes ranging from simple fixes to more complex issues, ensuring you have a comprehensive understanding of how to resolve this connectivity problem.
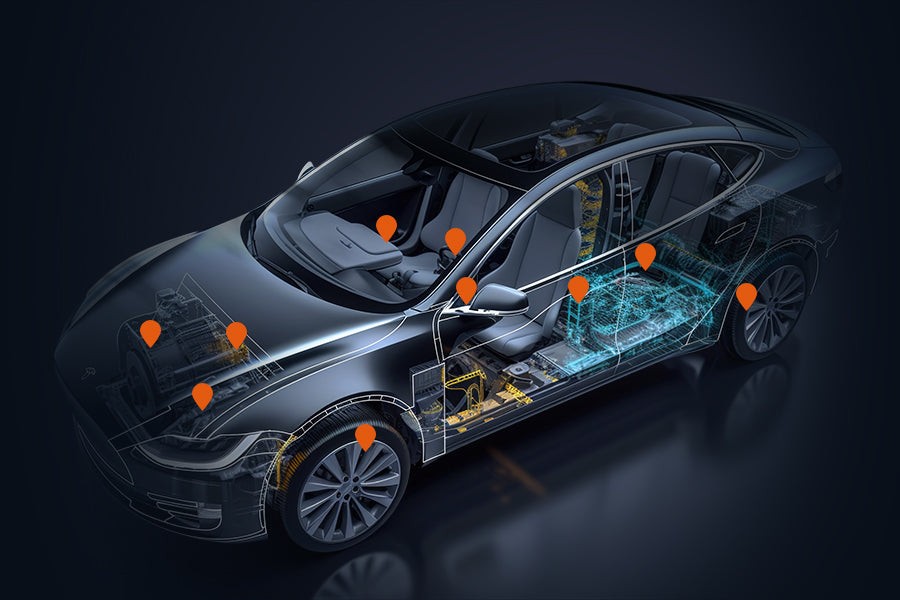
Understanding Why Your OBD2 Scanner Fails to Connect
Before diving into solutions, it’s crucial to understand why an OBD2 scanner cannot connect to ECU. The OBD2 (On-Board Diagnostics II) system is designed to monitor your vehicle’s performance and provide diagnostic information through a standardized port, typically located under the dashboard. When this connection fails, several factors could be at play:
- Power Issues: The OBD2 port and scanner need power to function. A weak car battery or power delivery issues to the OBD2 port itself can prevent connection.
- OBD2 Port Malfunctions: Physical damage, corrosion, or blockages within the OBD2 port can disrupt the connection.
- Scanner Incompatibility: Not all OBD2 scanners are universally compatible with every vehicle. Compatibility issues are a common cause of connection problems.
- Blown Fuses: A blown fuse in the OBD2 system circuit can cut off power to the port, rendering it unusable.
- Communication Protocol Mismatches: Modern vehicles use various communication protocols. If the scanner is not set to the correct protocol, it cannot connect to ECU.
- Software Glitches: Outdated or corrupted software within the OBD2 scanner can also lead to connectivity failures.
Common Culprits Behind OBD2 Connection Issues
Let’s explore each potential cause in more detail to help you pinpoint the reason why your OBD2 scanner cannot connect to ECU.
Power Supply Problems
A sufficient power supply is fundamental for OBD2 scanner operation. Ensure your vehicle’s battery is adequately charged and in good working order. Use a multimeter to test the voltage at the OBD2 port. A healthy port should read approximately 12 volts. Low voltage can indicate a battery issue or a problem with the car’s electrical system affecting the OBD2 port.
Faulty OBD2 Port Examination
Carefully inspect the OBD2 port for any signs of physical damage. Look for bent or broken pins, corrosion, or any foreign objects lodged inside the port. Debris or damage can physically obstruct the scanner’s connector and prevent a proper connection. Ensure the pins are straight, clean, and free from corrosion for a reliable connection.
Scanner Compatibility Verification
Scanner compatibility is a critical aspect often overlooked. Verify that your OBD2 scanner is explicitly compatible with your vehicle’s make, model, and year. Some vehicles, particularly older models or certain brands, might require specific scanners or adapters. Consult your scanner’s manual or the manufacturer’s website for compatibility information. Using an incompatible scanner is a primary reason why an OBD2 scanner cannot connect to ECU.
Blown Fuse Identification and Replacement
A blown fuse is a common electrical issue that can disable the OBD2 port. Locate the fuse box in your vehicle – your owner’s manual will provide its exact location and a fuse diagram. Identify the fuse related to the OBD2 system (often labeled as “diagnostic,” “OBD,” or “accessory”). Inspect the fuse for a broken filament. If blown, replace it with a fuse of the correct amperage rating. Using a fuse with an incorrect amperage can cause further electrical problems.
Communication Protocol Settings
Modern vehicles communicate using different OBD2 protocols such as CAN (Controller Area Network), ISO 9141, and KWP2000. Your OBD2 scanner needs to be configured to use the correct protocol for your vehicle. Refer to your vehicle’s service manual or online resources to determine the appropriate protocol. Many advanced scanners like the Foxwell NT809 can automatically detect the correct protocol, simplifying this step.
Software Updates and Scanner Resets
Outdated scanner software can contain bugs that lead to connection issues. Check for software updates for your OBD2 scanner regularly on the manufacturer’s website. Updating to the latest firmware can resolve compatibility issues and improve performance. Additionally, sometimes a simple reset of the scanner can clear temporary glitches. Turn off the scanner, disconnect it from the OBD2 port, wait a few moments, and then reconnect and power it on again.
Step-by-Step Guide to Troubleshoot OBD2 Scanner Connection Problems
When your OBD2 scanner cannot connect to ECU, a systematic troubleshooting approach is essential. Here’s a step-by-step guide to help you diagnose and resolve the issue:
Step 1: Power Check at the OBD2 Port
Begin by checking if the OBD2 port is receiving power. Turn your vehicle’s ignition to the “accessory” position (without starting the engine). Use a multimeter to test for voltage at pins 4 and 16 of the OBD2 port (pin 4 is ground, pin 16 is power). You should read approximately 12 volts. If there’s no power, suspect a blown fuse or a wiring issue. Tools like the Foxwell NT809 often have built-in voltage check features, simplifying this step.
Step 2: Thorough OBD2 Port Inspection
Visually inspect the OBD2 port again, this time more thoroughly. Use a flashlight to get a better view. Look for any obstructions, corrosion, or damage to the pins. Gently try to clean the port with compressed air to remove dust or debris. Be careful not to damage the pins during cleaning. A robust scanner connector, like that on the Foxwell NT809, can sometimes overcome slightly worn ports, but a clean and undamaged port is always ideal.
Step 3: Scanner Compatibility Verification (Again!)
Double-check scanner compatibility. Revisit the scanner manufacturer’s website or compatibility lists and ensure your scanner model is explicitly listed as compatible with your vehicle’s year, make, and model. If there is any doubt, consider using a compatibility checker tool if provided by the scanner manufacturer.
Step 4: Fuse Box Examination and Fuse Replacement
Locate your vehicle’s fuse box and identify the OBD2 system fuse using your owner’s manual’s fuse diagram. Visually inspect the fuse for a broken wire inside. Even if it looks intact, it’s a good practice to test it with a multimeter for continuity to be certain. Replace any blown fuse with a new fuse of the exact same amperage rating. Keep spare fuses in your vehicle for such situations.
Step 5: Protocol Setting and Adjustment
Consult your vehicle’s service manual or reliable online resources to determine the correct OBD2 communication protocol for your car (e.g., CAN, ISO, KWP2000). Access your scanner’s settings menu and manually select the correct protocol. If your scanner has an “automatic protocol detection” feature, try using that as well. Scanners like the Foxwell NT809 are designed to automatically detect the protocol, simplifying this step significantly.
Step 6: Scanner Software Update Procedure
Connect your OBD2 scanner to a computer with internet access. Visit the scanner manufacturer’s website and look for a “software update” or “firmware update” section for your scanner model. Download and install the latest software version following the manufacturer’s instructions. Some advanced scanners, like the Foxwell NT809, support over-the-air Wi-Fi updates, making the process even easier.
Step 7: Scanner Reset and Reconnection
Perform a scanner reset. Turn off your scanner, disconnect it from the OBD2 port and the vehicle. Wait for a few minutes (5-10 minutes is usually sufficient). Then, reconnect the scanner to the OBD2 port, turn it on, and attempt to connect to the ECU again. A reset can often resolve temporary software glitches that might be preventing the connection. The user-friendly interface of scanners like the NT809 makes this process straightforward.
Additional Tips for Resolving OBD2 Connection Issues
If you are still facing the problem where your OBD2 scanner cannot connect to ECU, consider these additional troubleshooting tips and best practices:
- Secure Connection Check: Ensure the OBD2 scanner connector is firmly and correctly plugged into your vehicle’s OBD2 port. A loose connection can cause intermittent or no communication. Push it in firmly to ensure it’s fully seated.
- Wiring Harness Inspection: Examine the wiring harness leading to the OBD2 port for any signs of damage. Look for frayed wires, cuts, or loose connectors. Damage to the wiring can interrupt communication between the scanner and the ECU.
- OBD2 Port Cleaning: Use an electrical contact cleaner to carefully clean the pins and inside of the OBD2 port. Over time, dirt, oxidation, and grime can accumulate, hindering proper electrical contact.
- Test on Another Vehicle: If possible, try connecting your OBD2 scanner to a different vehicle (that is known to be compatible). If the scanner works on another car, it indicates the problem is likely with your original vehicle’s OBD2 system, not the scanner itself.
- Backup Scanner Test: If you have access to a second OBD2 scanner, try using it to connect to your vehicle. This can help determine if the issue lies with your original scanner or the vehicle.
- Hidden Fuse Check: Some vehicles may have hidden fuses specifically for the OBD2 port in less obvious locations. Consult your vehicle’s service manual or a professional mechanic to check for any hidden fuses.
- Software Update Monitoring: Regularly check the scanner manufacturer’s website for software updates, even after you’ve initially updated. Updates often contain bug fixes and enhanced compatibility for newer vehicle models.
- Online Automotive Communities: Join online forums and communities dedicated to car diagnostics. You can find valuable advice and solutions from other users who may have experienced similar OBD2 scanner cannot connect to ECU issues.
- Vehicle-Specific Procedures: Some vehicles might require specific procedures to initiate communication with an OBD2 scanner, such as turning the ignition to a precise position or performing a sequence of steps. Consult your vehicle’s service manual for any vehicle-specific instructions.
- Professional Diagnostic Tools: If basic OBD2 scanners fail, professional-grade diagnostic tools offer more advanced capabilities and deeper diagnostic access. These tools may be able to bypass issues that simpler scanners cannot.
- Battery Health Assurance: Ensure your vehicle’s battery is in good health. A weak or failing battery can cause voltage drops that interfere with OBD2 communication. A battery test can rule out this possibility.
- ECU/OBD2 Port Calibration/Reprogramming: In rare cases, the ECU or OBD2 port might require professional calibration or reprogramming. This is usually a task for specialist technicians with advanced equipment.
Conclusion: Resolving OBD2 Scanner Connection Frustrations
Troubleshooting why your OBD2 scanner cannot connect to ECU can feel daunting, but with a methodical approach and these troubleshooting steps, you can often resolve the issue yourself.
By systematically checking connections, inspecting for damage, ensuring compatibility, updating software, and considering advanced diagnostic tools when necessary, you can increase your chances of establishing a reliable connection between your OBD2 scanner and your vehicle’s ECU.
If, after trying these solutions, your OBD2 scanner still cannot connect to ECU, it is advisable to seek assistance from a qualified professional mechanic. They have specialized tools and expertise to diagnose and repair more complex OBD2 system or ECU problems.
By implementing these strategies, you can ensure reliable and accurate vehicle diagnostics, helping you maintain your car’s performance and address potential issues promptly.
FAQs:
Why does my OBD2 scanner say “cannot connect to ECU”?
Common reasons include loose connections, scanner incompatibility with your vehicle, a faulty OBD2 port, or a problem with the ECU itself.
How do I fix an OBD2 scanner that won’t connect?
Troubleshooting steps include checking all connections, verifying scanner compatibility, inspecting the OBD2 port and fuses, updating scanner software, and trying a scanner reset.
Can a bad ECU prevent OBD2 scanner connection?
Yes, in some cases, a faulty ECU can be the reason why an OBD2 scanner cannot connect to ECU. However, this is less common than other issues like connection problems or incompatibility.
Is it possible a software update will fix my OBD2 scanner connection problem?
Yes, updating your scanner’s software to the latest version can often resolve compatibility and communication issues by including bug fixes and broader vehicle support.