Diagnosing car troubles can often feel like a daunting task, but with the right tools, you can take control of your vehicle’s health. The Innova OBD2 scanner is a user-friendly device that empowers you to read your car’s diagnostic trouble codes, understand what they mean, and make informed decisions about repairs. This guide will walk you through the simple steps of how to use an Innova OBD2 scanner to get you started.
Step 1: Locating the OBD2 Port in Your Vehicle
Before you can use your Innova OBD2 scanner, you need to find your vehicle’s OBD2 port. This port is standardized and is typically located within a few feet of the steering wheel inside the cabin. Common locations include under the dashboard on the driver’s side, beneath the steering column, or sometimes near the center console. Refer to your vehicle’s owner’s manual if you are having trouble locating it. The OBD2 port is usually trapezoidal in shape with 16 pins.
Step 2: Connecting Your Innova OBD2 Scanner
Once you’ve located the OBD2 port, take your Innova OBD2 scanner and firmly plug the connector into the port. You should feel it click into place. Ensure that the connection is secure before proceeding.
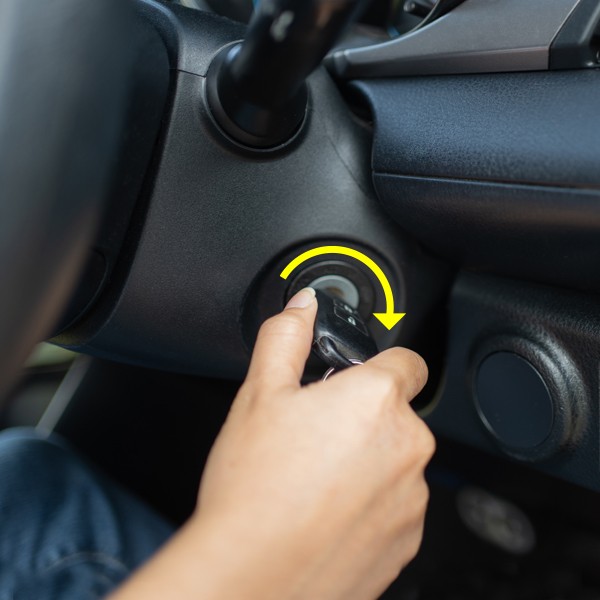
Step 3: Powering On and Establishing Communication
To allow your Innova OBD2 scanner to communicate with your vehicle’s computer, you need to turn the ignition to the ON or IDLE position. This means turning the key in the ignition without starting the engine, or turning it to the first position before starting. This powers up your car’s computer systems. The Innova scanner will automatically attempt to establish a connection, often displaying the vehicle’s VIN (Vehicle Identification Number) on its screen. This process allows the scanner to access the diagnostic information.
Note: Some advanced functions on Innova scan tools may require the engine to be running. If your scanner has such features and you intend to use them, start the engine before connecting the scan tool.
Step 4: Accessing and Reading Diagnostic Trouble Codes
After the Innova OBD2 scanner successfully connects to your vehicle, it will often automatically display any detected diagnostic trouble codes right on the screen. These codes are usually presented with a brief description of the issue. If multiple codes are present, they may be listed by severity or in the order they were detected. Use the UP ▲ and DOWN ▼ buttons on your Innova scanner to scroll through the list of codes and read their descriptions.
For more options and to access codes from specific systems, press the System Status button on your Innova scanner. This will typically bring you to a menu where you can select different vehicle systems to scan, such as Global OBD2 (Check Engine), ABS (Anti-lock Brake System), and others depending on your scanner model and vehicle. Use the UP ▲ and DOWN ▼ buttons to navigate the menu and press ENTER ↵ to select your desired system and proceed with scanning for diagnostic trouble codes within that system.
Step 5: Disconnecting the Innova OBD2 Scanner
Once you have finished reviewing the diagnostic trouble codes and any other information you needed, you can safely disconnect the Innova OBD2 scanner. First, turn the vehicle’s ignition OFF. Then, carefully unplug the scanner from the OBD2 port. Your Innova scanner may store the vehicle data for later review, depending on the model.
By following these steps, you can effectively use your Innova OBD2 scanner to diagnose vehicle issues and gain valuable insights into your car’s condition. This empowers you to communicate more effectively with mechanics or even perform simple repairs yourself.