For car enthusiasts and developers alike, tapping into the wealth of data generated by modern vehicles is incredibly appealing. Imagine building your own custom dashboard, monitoring engine performance in real-time, or even creating sophisticated diagnostic tools. This becomes a reality when you delve into the world of On-Board Diagnostics II (OBD2) and learn how to access this data using C# and readily available hardware like the ELM327 adapter.
Initially, when embarking on car PC projects, many enthusiasts rely on pre-built software interfaces. However, the desire for customization and deeper control often leads to developing bespoke solutions. This is where C# .NET development shines, offering the tools to create personalized car PC front-ends. While tasks like multimedia integration and navigation are relatively straightforward, accessing live engine data through the OBD2 port presents a more intriguing challenge.
Early explorations often involve using existing OBD2 software applications. However, understanding the underlying communication opens up a world of possibilities for direct data access and manipulation.
Understanding OBD2 and ELM327 for C# Projects
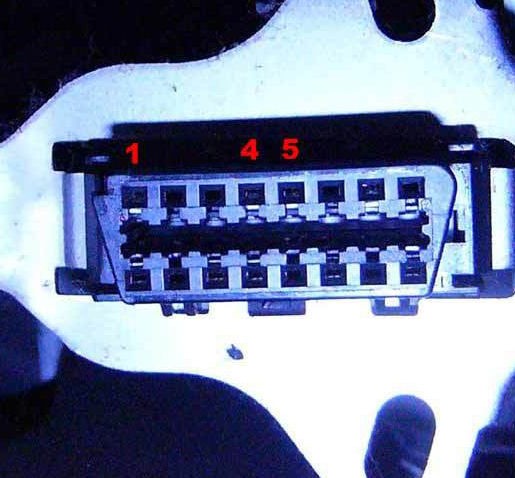
Modern vehicles are equipped with an OBD2 port, a standardized 16-pin connector. This port serves as the gateway for technicians to diagnose vehicle issues and monitor performance. But it’s also an accessible interface for retrieving a wide range of engine and vehicle parameters.
The most user-friendly approach to interface with the OBD2 port is using an OBD2 adapter, particularly the ELM327. This adapter acts as a bridge between your car’s OBD2 system and your computer. ELM327 adapters typically connect to your PC via USB and emulate a serial port interface. This serial communication is key, as it allows you to send commands and receive data using simple serial communication protocols, making it perfectly compatible with C# development. Think of the ELM327 as a translator, converting the complex OBD2 protocols into a more manageable serial data stream that your C# application can easily interpret. You can even test the connection and send raw commands using terminal programs like HyperTerminal or PuTTY, as the ELM327 command set is based on AT commands, similar to modems.
Initializing ELM327 with C# for OBD2 Communication
Before you can request specific engine data, you need to initialize the ELM327 adapter to communicate correctly with your car. OBD2 protocols can vary slightly between car manufacturers and models. The initialization process involves sending a series of AT commands to the ELM327 to establish a reliable connection and configure the communication parameters.
The following C# code snippet demonstrates a typical initialization sequence using the SerialPort class in .NET:
using System.IO.Ports;
using System.Threading;

public void InitializeOBD2(string comPort)
{
    SerialPort serialPort = new SerialPort();
    serialPort.PortName = comPort;
    serialPort.BaudRate = 38400; // or 9600, try different baud rates if needed

    try
    {
        serialPort.Open();
    }
    catch (Exception ex)
    {
        // Handle exception, port may be in use or not found
        return;
    }

    SendData(serialPort, "ATZ"); // Reset ELM327
    Thread.Sleep(2000);
    SendData(serialPort, "ATE0"); // Disable echo
    Thread.Sleep(1000);
    SendData(serialPort, "ATL0"); // Disable line feed
    Thread.Sleep(500);
    SendData(serialPort, "ATH1"); // Enable headers
    Thread.Sleep(500);
    SendData(serialPort, "ATSP 5"); // Set protocol (try different protocols 1-6 if 5 doesn't work)
    Thread.Sleep(500);
    SendData(serialPort, "0100"); // Test connection
    Thread.Sleep(500);

    serialPort.Close();
}

private void SendData(SerialPort port, string data)
{
    if (port.IsOpen)
    {
        port.WriteLine(data + "r"); // Send command with carriage return
    }
}
Explanation of AT Commands:
- ATZ: Resets the ELM327 adapter to its default state. This is a good starting point to ensure a clean communication session.
- ATE0: Disables command echoing. This simplifies parsing the responses from the ELM327 in your C# code as you only receive the data, not the commands you sent.
- ATL0: Disables line feeds in responses, further cleaning up the data stream.
- ATH1: Enables header information in the responses. This is crucial because the header includes the Parameter ID (PID) of the data being returned, allowing you to identify what each value represents.
- ATSP [Protocol Number]: Sets the OBD2 protocol.
ATSP 5in the example is a common protocol, but you might need to experiment with protocols 1 through 6 (ATSP 1,ATSP 2, etc.) depending on your vehicle. If the wrong protocol is selected, you’ll likely receive “ERROR” or “NO DATA” responses. PuTTY or a similar terminal program can be invaluable for testing different protocols manually. - 0100: This is not an AT command but an OBD2 service 01 command (PID 00). It’s a general request to check for supported PIDs and also serves as a connection test.
Retrieving Real-Time Engine Data with OBD2 PIDs in C
Once the ELM327 is initialized and communicating, you can start requesting specific engine parameters. OBD2 uses Parameter IDs (PIDs) – hexadecimal codes that identify specific data points like engine RPM, vehicle speed, coolant temperature, and more.
Each PID is typically represented by a 4-digit hexadecimal number. To request data, you send a command to the ELM327 containing the service code (usually 01 for live data) and the PID.
For example, to request Engine RPM (PID 010C), you would send the command “010C”. The ELM327 will then respond with data that includes the PID and the value. Let’s look at an example response:
Request: 010C
Response: 410C0B34
Here, 410C is the response header ( 41 indicates a positive response to service 01, and 0C is the PID echoed back). 0B34 represents the data in hexadecimal format. The number of bytes for data varies depending on the PID. For RPM (PID 010C), it’s typically two bytes (A and B).
To convert this hexadecimal data to a meaningful RPM value, you need to apply a specific formula. For Engine RPM (PID 010C), the formula is:
RPM = ((A * 256) + B) / 4
Where A is the first byte (0B in our example, which is 11 in decimal) and B is the second byte (34 in our example, which is 52 in decimal).
RPM = ((11 * 256) + 52) / 4 = (2816 + 52) / 4 = 2868 / 4 = 717 RPM
Similarly, to get Vehicle Speed (PID 010D), you would send “010D”. The response data for speed is usually a single byte (A), and the value in km/h is simply equal to A.
A comprehensive list of standard OBD-II PIDs and their formulas can be found on the Wikipedia page: http://en.wikipedia.org/wiki/OBD-II_PIDs. Keep in mind that not all vehicles support every PID. Standard PIDs like Speed and RPM are widely supported, while others might be vehicle-specific.
Simulating OBD2 for C# Development and Testing
Developing and testing your C# Obd2 application directly on a car can be inconvenient. Fortunately, OBD2 simulator software exists. “obdsimwindows” is a free and useful tool that creates a virtual OBD2 port on your computer. This allows you to develop and test your C# code without needing a physical car or ELM327 adapter connected.
You can find more information and download the simulator from forums like mp3car: http://www.mp3car.com/engine-management-obd-ii-engine-diagnostics-etc/137428-free-software-obd-ii-simulator-redux.html
Using an OBD2 simulator is invaluable for:
- Developing C# OBD2 applications without a car: You can write and test your code anywhere, anytime.
- Safely experimenting with OBD2 commands: No risk of sending potentially harmful commands to your vehicle’s ECU during development.
- Testing error handling and data parsing: Simulators can be configured to simulate various scenarios, including error conditions and different data responses.
Conclusion: Unlocking Vehicle Data with C# and OBD2
Accessing OBD2 data with C