Embarking on a DIY headlight upgrade for your E60 BMW can seem daunting, but with the right approach, it’s a rewarding project. Like many enthusiasts, I started this journey aiming to enhance the aesthetics and performance of my E60’s lighting system without breaking the bank. The world of custom headlights is vast, with endless options for projectors, lighting technologies, and modifications. This guide focuses on my personal experience upgrading to LCI (Life Cycle Impulse) headlights, improving lighting functionality, and adding fog light capability to my E60 BMW. My primary goals were to complete my LCI lighting upgrade, achieve better-than-stock lighting, and ensure the headlights remained serviceable for future modifications, all while keeping costs reasonable.
One of the key improvements with LCI headlights is the operational difference compared to pre-LCI versions. LCI headlights replace the inner halogen flash-to-pass lights with cornering lights. These cornering lights activate under specific driving conditions when you turn the steering wheel, enhancing visibility in turns. I appreciate this feature on my X5, and I wanted to integrate it, or something even better, into my E60.
Furthermore, E60 M5 models, in particular, lack factory fog lights. My aim was to address this by potentially replacing the standard cornering lights with fog lights that could serve both functions. After consulting wiring diagrams and parts catalogs, I felt confident in my ability to integrate fog lights from a control and wiring perspective.
My upgrade plan consisted of several key steps:
- Fog Light Switch Installation: I sourced a headlight switch with a dedicated fog light button (part number 61316925254) to replace the original switch.
- Wiring for Fog Light Control: The plan involved running a wire from pin 7 on the new light switch to pin 34 on the LM2 (Light Module 2) to enable fog light control.
- Powering Fog and Cornering Lights: Power for the fog lights would be sourced from LM2 pins 6 and 44 (standard fog light outputs on non-M cars). Cornering lights are typically controlled by pins 12 and 50.
- Dual-Function Lighting: My intention was to bridge pins 6 to 12 and 44 to 50. This configuration should allow the lights to function as cornering lights when fog lights are off, and switch to fog light mode when activated by the fog light button.
- Coding Adjustments: I anticipated needing to use BMW coding software to fine-tune the system and ensure all functions operate correctly.
Unfortunately, I couldn’t test these wiring modifications on the car until I re-wired the headlight harnesses from pre-LCI to LCI specification. This pre-LCI to LCI harness conversion also complicated headlight reassembly, as temporary installation would be necessary for aiming adjustments. Lacking a garage, I needed to schedule dedicated time to complete this phase of the project.
With the planning complete, it was time to begin the physical work. I acquired two used headlights from eBay in varying conditions for just over $300. After receiving a partial refund due to shipping damage to one unit, my total cost was reduced to around $200 for both – a significant saving for this project.
Since I intended to replace the headlight lenses, the condition of the original lenses was not a concern. I had seen DIY methods for trimming and resealing original lenses, but this approach seemed less refined and not easily serviceable in the future. Therefore, I searched for aftermarket LCI lens replacements from Chinese marketplaces.
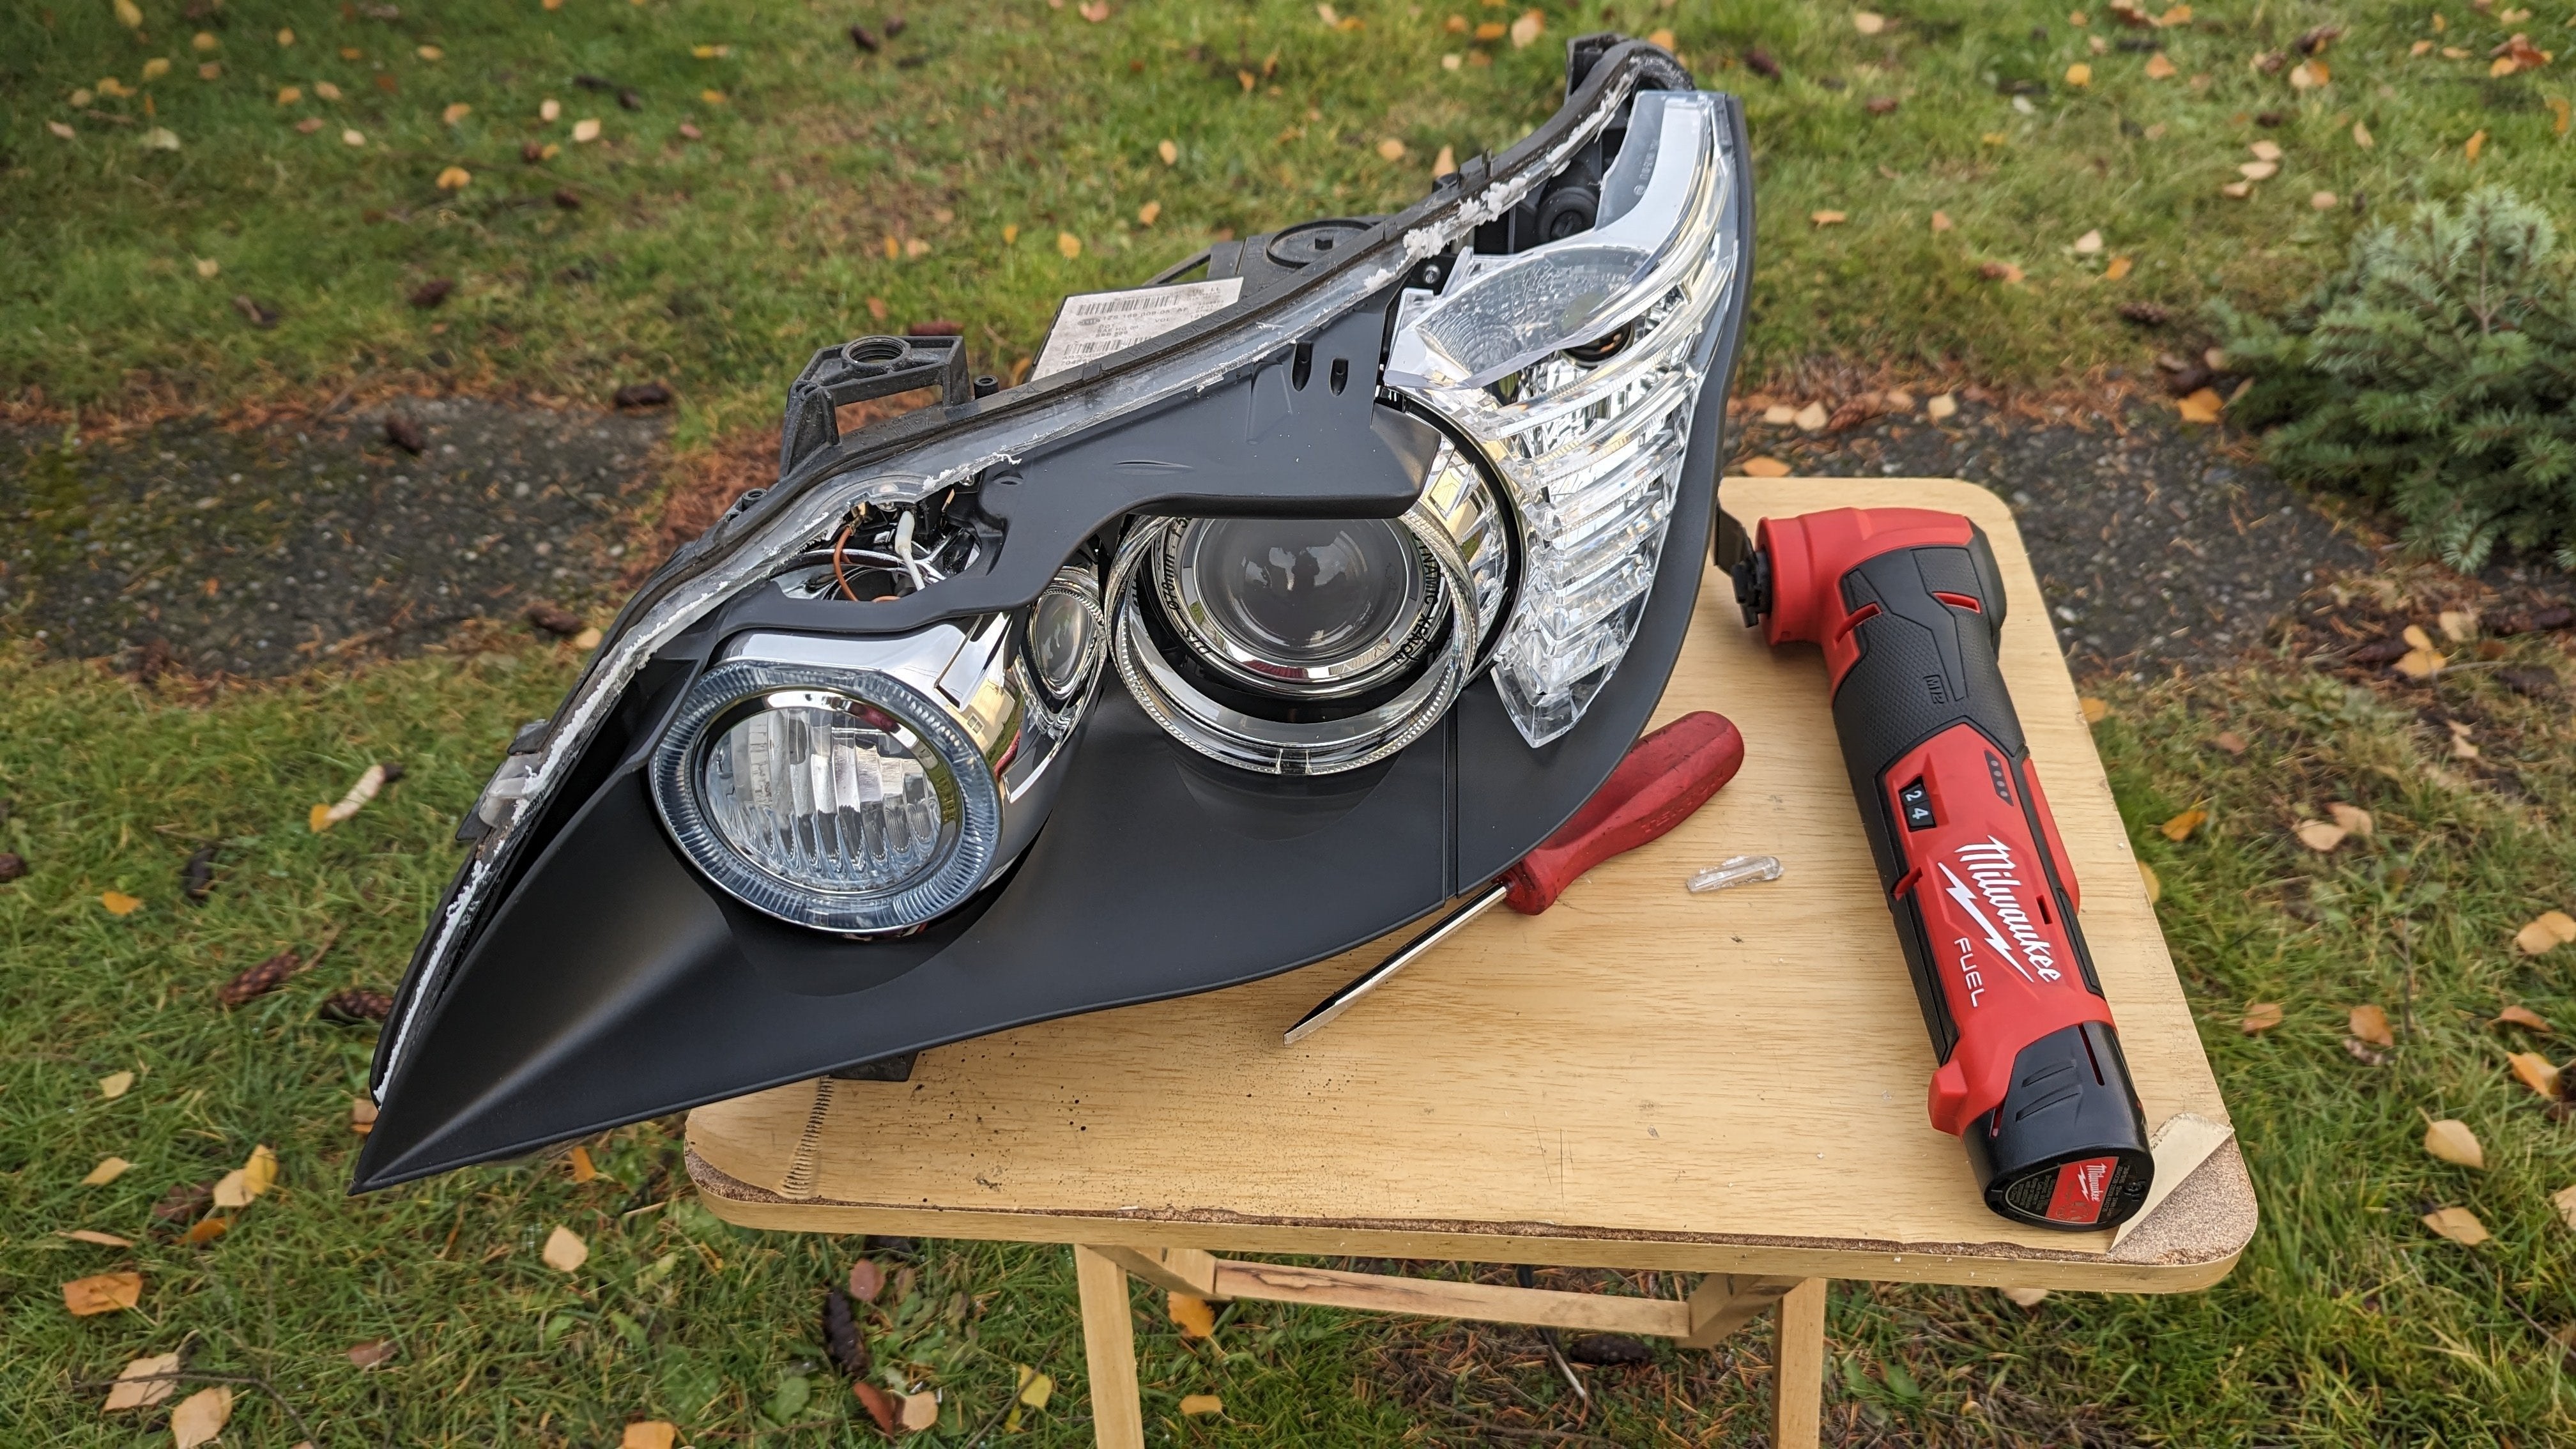
Here’s the headlight housing after the original lens removal.
Alt text: E60 BMW headlight with the lens removed, showcasing the internal components such as projectors and reflectors, after undergoing a DIY disassembly process for lens replacement and upgrade.
This lens removal tool proved invaluable. The most effective technique was to plunge the broad side of the cutter into the lens at a slight angle in the direction of the cut. Skimming attempts caused excessive vibration and were difficult to control. Cutting close to the housing edge isn’t crucial; focus on convenient cutting for initial removal, as further trimming may be needed later.
The turn signal assembly is integrated with the original lens and should detach with it. However, a generous amount of factory permaseal often causes it to stick. Separating the blinker assembly from the lens and then trimming residual permaseal became necessary.
Replacement lenses with pre-installed eyebrows are not available, nor can you purchase the eyebrows separately. They must be carefully removed from the original lenses. Using an Exacto knife to cut between the lens plastic and eyebrow, aided by a quick-grip clamp pulling the lens away, simplifies this process.
Alt text: Close-up of the eyebrow removal process from an E60 BMW headlight lens using a knife, highlighting the delicate separation of the eyebrow from the lens for reuse on aftermarket lenses.
The eyebrow assembly consists of two parts, with the inboard side containing all electrical components. The sealant securing these components can be peeled off once you gain some leverage. Gentle, controlled peeling is preferable to hacking, as it preserves the sealant’s integrity for potential reuse.
Alt text: Disassembled eyebrow components of an E60 BMW headlight, showcasing the separate pieces and the sealant used for assembly, as part of a DIY headlight modification project.
At this stage, you might consider an “eyebrow upgrade” modification, a popular customization. However, I chose to keep mine stock for this build.
Ultimate Eyebrow Upgrade – 5Series.net – Forums
Before attaching the eyebrows to the new lenses, I test-fitted them to the headlight housings. After extensive online research, I located LCI-style E60 lenses. Affordable options were available on Alibaba, but shipping costs were prohibitive for small orders. I found suitable lenses on eBay that appeared identical to the Alibaba sets, including the inboard port hole and markings resembling the “HELLA” stamp on OEM lenses.
Alt text: Comparison of aftermarket LCI lenses for E60 BMW headlights with OEM lenses, showing identical markings and port holes, confirming fitment and quality for a DIY headlight upgrade.
The lenses seemed to be perfect replicas of the OEM parts, with correct markings and precise fitment – a crucial find!
With fitment confirmed, I secured the eyebrows to the new lenses. I pressed them firmly into place and sealed them with black RTV silicone sealant. This provides moisture protection and added security, although the eyebrows primarily rely on a compression fit. Repeated installations and removals confirmed their secure fitment without unintentional movement.
Alt text: Eyebrows securely installed on new E60 BMW headlight lenses, sealed with black RTV silicone to ensure moisture protection and secure fitment during a DIY headlight lens replacement.
The sealant voids visible in the center of the photo (pre-RTV) will be filled and appear uniform after sealing.
The next step involved disassembling the headlight housing further. Five (or six?) Torx screws secure the shroud assembly (containing cornering light, angel eyes, and chrome shrouds). Additional permaseal may be present in the area circled in red in the following photos, further securing this assembly.
Alt text: Location of Torx screws securing the shroud assembly in an E60 BMW headlight, highlighted in blue circles, indicating disassembly points for accessing internal components.
Alt text: Area of potential additional permaseal in an E60 BMW headlight, circled in red, indicating a possible point of resistance during shroud assembly removal in a DIY headlight modification.
Here’s a view of the shroud assembly’s back side. The angel eye projector is visible on the left. Fiber optic tubes (likely the correct term) at the 1 and 7 o’clock positions of the bulb housing feed the inner angel eye rings. Reflecting on this, wrapping these tubes might increase the inner angel eye brightness – a potential future enhancement to consider.
The outer angel eye is illuminated by the projector bowl, but much of this light is blocked by the cornering light mounted within the angel eye ring.
With the shroud assembly removed, the remaining components are the Bi-Xenon projector, AFS (Adaptive Frontlighting System) assembly for horizontal aiming, headlight aim adjustment mechanisms (including the height control motor), and the wiring harness.
Removing the Bi-Xenon projector involves detaching two Torx screws (red circles) securing the retainer bracket, a quarter-turn plastic mount for the height control motor (green circle), and two retaining clips (blue circles).
Alt text: Key removal points for the Bi-Xenon projector in an E60 BMW headlight, with red circles indicating Torx screws, a green circle for the height control motor mount, and blue circles for retaining clips, guiding DIY disassembly.
All wires from the AFS assembly, except for the small two-wire connector controlling the high beam shutter, must be disconnected. The entire headlight wiring harness is self-contained and can then be removed for repair or modification. I had to completely repair one harness and partially repair the other due to wire degradation.
Alt text: Removed wiring harness from an E60 BMW headlight, illustrating the self-contained nature of the harness and its accessibility for repair or modification during a DIY headlight project.
Various diameters of shrink tubing were used to insulate individual wires after de-pinning. For larger pins, wires were cut and heat shrink tubing was applied from the middle. Color-coded shrink tubing helped maintain wire identification.
Reinstalling the wiring harness with thicker gauge wiring proved slightly challenging but manageable.
Next, I removed the remaining headlight aim adjustment hardware. This step was necessary to prepare the plastic housing for baking, which softens the permaseal for easier removal. The aim adjustment hardware consisted of plastic gears that clipped together and a single metal screw requiring numerous wrench turns to remove.
Alt text: Removal of the aim adjustment hardware from an E60 BMW headlight, showing the plastic gears and metal screw that need to be detached before baking the housing for permaseal removal in a DIY headlight modification.
Now comes the least enjoyable part: permaseal removal. To reuse the housing, most of the permaseal must be removed – a tedious task.
I reattached the remaining lens fragment to the housing corner to provide a handle. Then, I placed the assembly in a 250°F (approx. 121°C) oven for a few minutes. Heating softens the permaseal and makes the plastic more pliable. This allowed me to grab the lens fragment and peel it away from the housing.
You might wonder, “If oven heating works, why cut the lens initially?” Without cutting and removing the lens structure, flexing, tearing, and peeling the lens from the permaseal is impossible. The lens structure must be weakened or removed for oven separation to be effective.
For permaseal scraping, I purchased dedicated removal tools. However, they are ineffective without heating the permaseal. The process involves alternating between oven heating and scraping until the tool resistance increases. Repeat heating and scraping cycles, test-fitting the new lenses to identify areas needing further permaseal removal. Continue until the lens fits cleanly into the channel. Complete permaseal removal is not essential, but thorough removal is beneficial. This stage is indeed time-consuming and frustrating.
In hindsight, purchasing new housing carcasses from Alibaba might be a worthwhile alternative to consider if repeating this process.
Congratulations! The most challenging part is complete. Now, the upgrades and more enjoyable modifications can begin.
Instead of replacing the Bi-Xenon projectors entirely with aftermarket units, I opted for a clear lens swap. Stock Hella projectors are reputedly high-quality, and a lens swap avoids the complexities of custom bracketry or AFS assembly modifications.
I had previously purchased clear STI-R lenses, before fully understanding the nuances of projector disassembly. While these lenses closely match the stock lens geometry, some fine-tuning is necessary. Consequently, I also purchased lens spacers. These spacers are effective for moving the lens closer to the projector. However, if increased distance is required, spacers are unhelpful. And, predictably, that’s exactly what I encountered.
To be continued…