For car enthusiasts and tech-savvy drivers, integrating advanced OBD2 diagnostics with your in-car entertainment system is a game-changer. If you’re using an Eonon Android head unit, you might have encountered challenges connecting high-quality OBD2 adapters like the OBDLink MX. While Eonon head units often come with generic OBD2 readers, upgrading to an OBDLink MX offers superior performance and features. This guide provides a detailed, step-by-step process to successfully connect your OBDLink MX to your Eonon head unit, specifically models like the GA9353 and potentially other Android 9 based units. Say goodbye to connectivity frustrations and unlock the full potential of your car diagnostics.
Preparing Your Eonon Head Unit
Before diving into the OBD adapter configuration, let’s prepare your Eonon head unit to ensure a smooth pairing process. These initial steps are crucial for clearing any potential conflicts and setting the stage for a successful connection.
-
Restart Your Head Unit: Begin by performing a full restart of your Eonon head unit. Locate the reset button, usually a small pinhole, and use a paperclip or SIM card eject tool to press and hold it briefly. This ensures a clean slate for the Bluetooth pairing process.
-
Clear Bluetooth Paired Devices: Once your head unit has restarted, navigate to the Bluetooth settings menu. Within this menu, find the list of paired devices and clear it entirely. This removes any previous Bluetooth connections that might interfere with the new OBDLink MX pairing.
-
Configure Bluetooth Pairing Settings: In the Bluetooth settings, look for “Bluetooth options” or similar advanced settings, typically found at the bottom right of the screen. Access these options and set the pairing code to “1234”. Additionally, enable the “auto connect” feature. This standard pairing code and auto-connect setting will facilitate easier communication with the OBDLink MX adapter.
This image depicts the Bluetooth settings screen on an Eonon head unit, highlighting the options to clear paired devices and configure pairing settings. The alt text emphasizes the visual representation of the described steps, aiding users in locating these settings on their device.
With your Eonon head unit prepared, we can now move on to configuring the OBDLink MX adapter itself.
Configuring Your OBDLink MX Adapter
The OBDLink MX requires specific configuration steps to ensure seamless compatibility with your Eonon head unit. These steps involve resetting the adapter and using the OBDLink app to apply specific commands.
-
Factory Reset OBDLink MX: For a clean configuration process, perform a factory reset on your OBDLink MX. Locate the button on the adapter and press and hold it for approximately 30 seconds. Continue holding until the green LED indicator starts flashing. This reset ensures that the adapter is in a default state before configuration.
-
Update Firmware via OBDLink App: Pair your OBDLink MX with your smartphone via Bluetooth and open the OBDLink app. Navigate to the firmware update section within the app and ensure your adapter is running the latest firmware version. Keeping your firmware up-to-date is crucial for optimal performance and compatibility. As of this guide, firmware version 4.6 is recommended.
-
Interface Initialization – Command 1: This is a critical step to ensure compatibility. Within the OBDLink app, go to “settings,” then “preferences,” then “advanced,” and finally, “interface initialization.” In the command input field, enter the following command exactly:
STBTDN OBDIIand press “OK.” This command renames the OBDLink MX device to “OBDII,” which is essential for the Eonon head unit to recognize it correctly. -
Connect and Disconnect: Return to the main menu of the OBDLink app and connect to your OBDLink MX device. Once connected, immediately press the “disconnect” button within the app. After disconnecting, physically restart the OBDLink MX by unplugging it from the OBD port and plugging it back in.
-
Interface Initialization – Command 2: After the OBDLink MX restarts, return to the “interface initialization” menu in the OBDLink app. Delete the previous command “STBTDN OBDII” and enter the following command:
STBTCOD 001F00and press “OK.” This command sets the Bluetooth modem Class of Device (CoD), further assisting the Eonon head unit in properly identifying the OBDLink MX as an OBD sensor. -
Connect and Disconnect Again: Repeat the connect and disconnect process from step 4. Connect to the OBDLink MX via the app, then disconnect and physically restart the adapter by unplugging and replugging it into the OBD port.
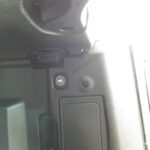
This image showcases an OBDLink MX adapter plugged into a car’s OBD port. The alt text emphasizes the practical application of the guide, visually demonstrating the OBDLink MX connected to the vehicle for diagnostics and data access.
These configuration steps effectively change the Bluetooth name and Class of Device of the OBDLink MX, making it recognizable and compatible with your Eonon head unit as an OBD sensor.
Final Bluetooth Connection on Your Eonon Head Unit
With both your Eonon head unit and OBDLink MX adapter configured, the final step is to establish the Bluetooth connection directly on your head unit.
-
Access Bluetooth Settings on Head Unit: Navigate back to the Bluetooth settings menu on your Eonon head unit.
-
Connect to “OBDII”: Search for available Bluetooth devices. You should now see “OBDII” listed as an available device. Select “OBDII” to initiate the pairing process. Due to the previous configurations, it should connect seamlessly.
Once connected, your Eonon head unit should now recognize the OBDLink MX as a functional OBD2 sensor. You can now use compatible apps on your head unit, such as Torque Pro or OBDLink, to access real-time vehicle diagnostics, performance data, and more, all powered by the reliable OBDLink MX adapter.
This method is believed to be effective for Eonon Android 9 head units and potentially other models. By following these steps, you can overcome common connectivity issues and enjoy the enhanced capabilities of your OBDLink MX with your Eonon in-car system. Enjoy the victories over connectivity struggles and happy driving!