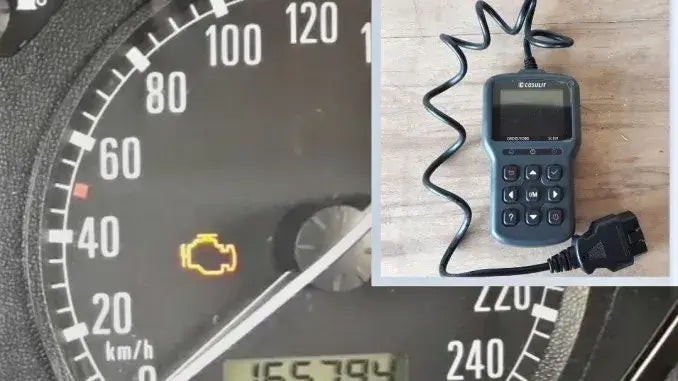
That ominous check engine light – it can be a source of instant anxiety for any car owner. It’s crucial to understand that driving with your check engine light illuminated is not advisable. But what if you could take control, understand the issue, and potentially resolve it yourself?
CGSULIT, your auto repair expert at obd-de.com, is here to guide you through the process of turning off the check engine light using an OBD2 code reader. This simple tool can empower you to diagnose minor issues, saving you time and money on unnecessary mechanic visits. Think of it as having a diagnostic tool right in your glove compartment, as straightforward to use as your smartphone.
Let’s dive into how you can clear those codes and regain peace of mind. For a visual guide, you can also find a video tutorial on our YouTube channel.
To clear a check engine light, you’ll need an OBD2 reader, often called an OBD2 scanner or scan tool. It’s important to note that basic code readers might only read codes, not clear them. Ensure you have a scanner with code clearing capabilities.
A reliable option is the CGSULIT SC301 OBDII reader. You can read a detailed review of this tool here, or watch a video review on our YouTube channel.
Step-by-Step Guide: Clearing Check Engine Light Codes
While prior experience with an OBD2 scanner can be helpful, it’s not essential. If you’re a first-time user, we recommend checking out our article on how to use an OBD2 scanner in five easy steps or watching our video tutorial on YouTube.
Let’s proceed with clearing those codes:
1. Locate the OBDII Port
The first step is to find your vehicle’s OBDII port. This port is standardized and usually located under the dashboard on the driver’s side. Check your owner’s manual if you are unsure of its exact location.
2. Connect the OBD Code Reader
With the ignition off, plug your OBD2 scanner into the OBDII port. Ensure it’s firmly connected.
3. Turn On the Ignition (Key On, Engine Off)
Turn your ignition key to the “ON” position. This powers up your car’s electronics and the OBD2 scanner, but do not start the engine yet. This is also known as “Key On, Engine Off” (KOEO).
4. Allow the OBD Code Reader to Scan for Codes
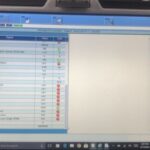
Once powered, your OBD2 scanner will typically begin scanning automatically or require you to select a “Scan” or “Read Codes” option from its menu. Let the scanner complete its diagnostic scan.
5. Read and Understand the Error Codes
After the scan, the OBD2 scanner will display any stored Diagnostic Trouble Codes (DTCs). These codes are alphanumeric and correspond to specific issues within your vehicle’s systems.
It’s crucial to interpret these codes correctly. Your OBD2 scanner may have a built-in DTC library for quick lookups. Alternatively, you can easily search for the code online to understand its meaning and the potential problem.
Important: Before clearing any codes, understand what they signify. Clearing a code without addressing the underlying issue is only a temporary fix, and the check engine light will likely reappear. Serious issues should be diagnosed and repaired by a qualified mechanic.
6. Navigate the Scanner Menu to Clear Codes
If you’ve assessed the error code and believe it’s safe to clear (perhaps after addressing a minor issue like a loose gas cap), navigate your OBD2 scanner’s menu to find the “Clear Codes,” “Erase Codes,” or similar option. This is usually found within a “Tools” or “Service” menu.
Follow the on-screen prompts, which may ask for confirmation before clearing the codes. Select “Yes” or “Confirm” to proceed.
7. Return to the Main Menu
After successfully clearing the codes, use the “Escape” or “Return” button on your scanner to go back to the main menu.
8. Disconnect the OBD Code Reader
Turn off the OBD2 scanner if it has a power button. Then, carefully disconnect it from the OBDII port. Avoid pulling forcefully to prevent damage to the port or scanner.
9. Turn Off the Ignition
Turn the ignition key back to the “OFF” position, or as far back as it goes to completely turn off the vehicle’s electrical systems.
10. Start the Engine and Check the Check Engine Light
Now, start your engine as you normally would. Observe the dashboard – the check engine light should now be off.
To confirm the issue is resolved (if it was a minor, intermittent problem), start and stop the engine a few times after it reaches operating temperature. If the check engine light remains off, you’ve successfully cleared the code.
Conclusion: Take Control of Your Check Engine Light
As you’ve seen, clearing a check engine light with an OBD2 scanner is a straightforward process, often taking just 5-10 minutes. Once you’ve done it yourself, you’ll appreciate the convenience and empowerment these tools offer.
However, remember that clearing codes is not a substitute for proper car maintenance and repair. Always investigate and understand the underlying issue indicated by the error codes. If the problem is serious, the check engine light will likely return, and professional diagnosis and repair are necessary.
Learning to clear check engine lights is a valuable skill for any car owner, especially when performing DIY repairs. It allows you to confirm successful repairs and ensures you’re not driving around with a persistent check engine light after resolving an issue. Invest in an OBD2 scanner and take control of your car’s diagnostics!