In today’s cars, diagnosing issues is no longer solely the domain of professional mechanics. Thanks to the standardization of On-Board Diagnostics II (OBD2) systems, and the accessibility of affordable OBD2 scanners, you can easily get a glimpse into your vehicle’s health right from your driveway. The first step in utilizing this powerful tool is knowing How To Plug In Obd2. This seemingly simple process is crucial for accessing a wealth of information about your car’s performance and potential problems. This guide will walk you through exactly how to connect your OBD2 scanner, ensuring you can confidently begin your DIY car diagnostics journey.
Locating the OBD2 Port in Your Vehicle
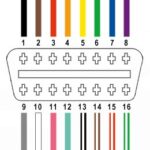
Before you can plug in your OBD2 scanner, you need to find the diagnostic port in your car. For the vast majority of cars and light trucks manufactured since 1996, the OBD2 port is standardized for easy access. You’ll typically find this female 16-pin connector located inside the cabin of your vehicle, and almost always on the driver’s side.
The most common location is under the dashboard, just below the steering column area. You might need to crouch down and look upwards to spot it. It’s designed with a distinctive trapezoidal shape, making it easily identifiable.
While the under-dash location on the driver’s side is the most prevalent, there are exceptions. In some vehicle models, the OBD2 port might be:
- Inside the center console: Check within the storage compartment of your center console, particularly in newer vehicles where aesthetics might prioritize hiding the port.
- Under the passenger side dashboard: Less common, but it’s worth a quick check if you don’t find it on the driver’s side.
- Behind a small access panel: Some vehicles may have a small, labeled panel that you need to open to access the OBD2 port.
If you are still having trouble locating it, your vehicle’s owner’s manual is your best resource. It will pinpoint the exact location of the OBD2 port for your specific make and model.
Step-by-Step Guide to Plugging In Your OBD2 Scanner
Connecting your OBD2 scanner is designed to be user-friendly. The connector is keyed, meaning it will only fit in the correct orientation. Here’s a simple step-by-step guide:
-
Turn Off the Ignition: Ensure your vehicle’s ignition is completely turned off. This is a safety precaution and ensures proper communication between the scanner and your car’s computer system.
-
Align the Connectors: Take your OBD2 scanner and locate the male connector. Carefully align it with the trapezoidal shape of the OBD2 port in your car. It will only fit one way.
-
Gently Push and Connect: Push the scanner’s connector firmly into the OBD2 port. You should feel a snug fit. A slight wiggle might be necessary to ensure a full and secure connection. Avoid forcing it, as this could damage the pins in either the scanner or the vehicle’s port.
-
Turn the Ignition to “ON” (Engine Off): Once connected, turn your vehicle’s ignition to the “ON” position. This means turning the key to the point where the dashboard lights illuminate, but do not start the engine.
-
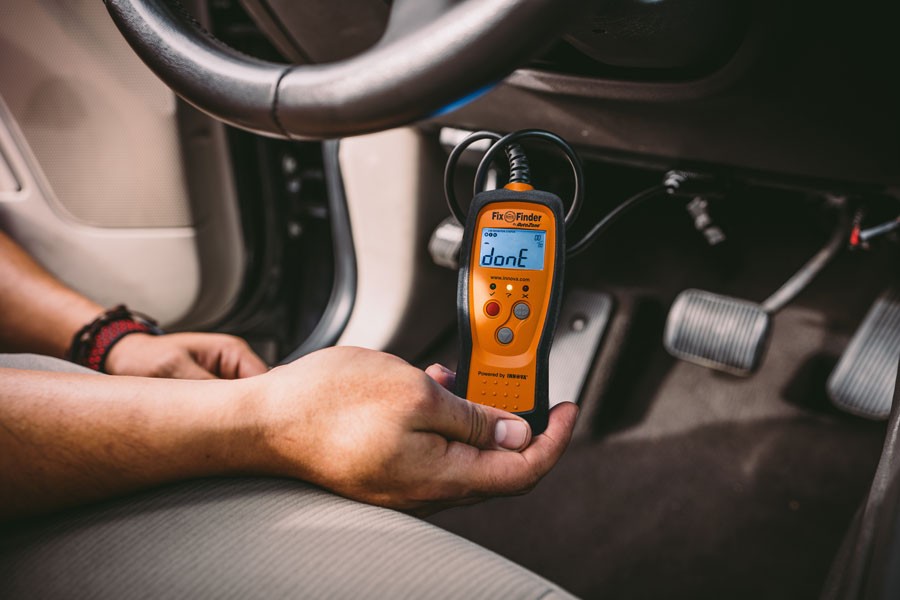
Power Up and Boot Sequence: In most cases, the OBD2 port will provide power to your scan tool. You should see your scanner power on and begin its boot sequence. Wait for it to fully power up and reach its main menu or connection screen.
-
Follow Scanner Prompts: Your OBD2 scanner will then guide you through any additional steps. This might include selecting your vehicle’s make and model, entering the VIN (Vehicle Identification Number), or choosing whether to start the engine for certain tests (though typically not required for initial code reading).
Once these steps are completed, your OBD2 scanner is successfully plugged in and ready to communicate with your vehicle’s computer.
Navigating the OBD2 Scanner Menu
After successfully plugging in your OBD2 scanner and completing the boot sequence, you’ll be presented with a menu of options. The exact menu will vary depending on the type and features of your scanner, ranging from basic code readers to advanced professional-grade tools. However, common options you’ll likely encounter include:
-
Read Codes: This is the primary function for most users. Selecting “Read Codes” will instruct the scanner to retrieve and display any stored or pending Diagnostic Trouble Codes (DTCs) from your vehicle’s computer. These codes are numerical representations of detected faults within various systems. The scanner may also provide a brief text description of the fault. If multiple codes are present, the scanner will typically scroll through them.
-
Erase Codes: This option allows you to clear or reset DTCs that are stored in the vehicle’s computer. Use this function with caution and only after you have properly diagnosed and addressed the underlying issue causing the code. Clearing codes without fixing the problem will only temporarily turn off the check engine light, and the code will likely return. Most scanners will ask for confirmation before erasing codes to prevent accidental deletion.
-
Live Data (or Data Stream): For scanners equipped with this feature, “Live Data” allows you to monitor real-time sensor readings from various engine and vehicle systems. This is invaluable for diagnosing intermittent issues or observing sensor behavior under different driving conditions. You can view parameters like engine temperature, RPM, oxygen sensor readings, and more.
-
Freeze Frame Data: This function captures a snapshot of sensor data at the precise moment a DTC was triggered. “Freeze Frame” information provides valuable context by showing the conditions (e.g., engine load, speed, temperature) that were present when the fault occurred, aiding in diagnosis.
-
Vehicle Information (or Vehicle Info): This option typically displays basic information about your vehicle as stored in the car’s computer, such as the VIN and vehicle calibration IDs.
-
I/M Readiness (Inspection/Maintenance Readiness): “I/M Readiness” checks the status of various emissions-related systems to determine if your vehicle is ready for an emissions or smog test. It indicates whether the required monitors have run and completed their diagnostic checks.
Navigating the menu is usually done using arrow buttons and an “Enter” or “OK” button on the scanner. Many scanners also include a “Back” or “Escape” button to navigate to the previous menu screen.
Understanding Diagnostic Trouble Codes (DTCs)
When you use the “Read Codes” function, your OBD2 scanner will display codes that follow a standardized format: a letter followed by four numerical digits (e.g., P0301). Understanding this structure is key to interpreting the codes:
-
The First Letter: Indicates the primary vehicle system related to the code:
- P (Powertrain): Relates to engine, transmission, fuel system, and emissions controls. These are the most common codes.
- B (Body): Concerns body control systems like airbags, power windows, central locking, and interior electronics.
- C (Chassis): Deals with chassis systems, including ABS (Anti-lock Braking System), steering, suspension, and ride control.
- U (Network or Undefined): Indicates communication issues within the vehicle’s computer network.
-
The First Number (after the letter): Typically a ‘0’ or ‘1’:
- 0: Indicates a generic or SAE (Society of Automotive Engineers) standardized code. These codes are common across all vehicle manufacturers.
- 1: Indicates a manufacturer-specific code. This means the code is defined by a particular car manufacturer and may have a more specific meaning than a generic code.
-
The Second Number (after the first digit): Specifies the subsystem within the broader system indicated by the letter. For Powertrain (P) codes, common digits include:
- 1 & 2: Fuel and Air Metering
- 3: Ignition System or Misfire
- 4: Auxiliary Emission Controls
- 5: Vehicle Speed Control & Idle Control
- 7, 8, & 9: Transmission
-
The Last Two Digits: These digits provide further refinement and pinpoint the specific component or circuit that is experiencing the fault. There are hundreds of possible combinations, offering detailed diagnostic information.
For example, the code P0301 tells us:
- P: Powertrain system
- 0: Generic code
- 3: Ignition System or Misfire
- 01: Specifically cylinder #1
Therefore, P0301 indicates a cylinder #1 misfire in the engine.
Benefits of Using an OBD2 Scanner for DIY Diagnostics
Investing in an OBD2 scanner and learning how to plug it in opens up several benefits for car owners, particularly those inclined towards DIY car maintenance:
-
Save Money on Diagnostics: Instead of paying a mechanic for an initial diagnostic scan, you can quickly read the codes yourself and get a starting point for troubleshooting.
-
Early Problem Detection: Regularly scanning your vehicle can help you identify potential issues early, even before the check engine light illuminates. Addressing problems early can prevent more costly repairs down the road.
-
Smog Test Readiness: The I/M Readiness function helps you ensure your vehicle is likely to pass an emissions test, avoiding unexpected failures and re-test fees.
-
Empowerment and Knowledge: Using an OBD2 scanner gives you a better understanding of your vehicle’s systems and empowers you to take a more active role in its maintenance and care.
By mastering how to plug in OBD2 and understanding the basics of code interpretation, you can take the first step towards becoming a more informed and capable car owner, potentially saving money and time while keeping your vehicle running smoothly.