Dealing with car diagnostics can often feel like navigating a complex maze, especially when you encounter a permanent engine code. These Diagnostic Trouble Codes (DTCs), are designed to remain stubbornly present in your vehicle’s Engine Control Unit (ECU) until the underlying issue is definitively resolved. Unlike temporary codes that might vanish on their own, permanent codes require a more deliberate approach to clear, even after you’ve addressed the problem.
This guide provides a comprehensive, step-by-step walkthrough on how to effectively remove a permanent engine code, ensuring your vehicle is running optimally and compliant with emission standards.
Understanding Permanent OBD2 Codes
Permanent engine codes, also sometimes referred to as “confirmed” DTCs, serve a critical function in modern vehicle diagnostics. They are mandated by environmental regulations to ensure that significant emissions-related problems are properly fixed and not simply masked or ignored.
Unlike their temporary counterparts (sometimes called pending or intermittent codes), permanent codes are specifically designed to resist being cleared through simple methods like disconnecting the battery or using a basic OBD2 scanner. They are stored in the ECU’s non-volatile memory and will only be erased when the vehicle’s diagnostic system verifies, through a series of drive cycles, that the fault condition is no longer present.
This persistence is rooted in the OBD2 system’s role in monitoring vehicle emissions. Regulatory bodies like the Environmental Protection Agency (EPA) in the United States require vehicles to maintain stringent emission standards. Permanent codes help ensure accountability and encourage drivers to address issues that could impact air quality.
Ignoring a permanent code is not advisable. While your vehicle might seem to be running normally, these codes indicate that a problem has occurred and potentially still exists, affecting performance, fuel efficiency, and emissions. Furthermore, a permanent code will prevent your vehicle from passing an emissions test in many jurisdictions, leading to potential fines and registration issues.
Step-by-Step Guide to Removing Permanent OBD2 Codes
Clearing a permanent OBD2 code requires a systematic approach, focusing on verifying the repair and allowing the vehicle’s diagnostic system to confirm the resolution. Here’s a detailed guide to help you through the process:
Step 1: Diagnose and Fix the Underlying Issue
The first and most crucial step in removing a permanent code is to accurately diagnose and repair the problem that triggered it in the first place. Permanent codes are not mere glitches; they are indicators of actual malfunctions within your vehicle’s systems.
To begin, you’ll need to use an OBD2 scanner to retrieve the specific DTC. Connect the scanner to your vehicle’s diagnostic port, typically located under the dashboard on the driver’s side. Turn the ignition to the “ON” position (without starting the engine) and follow the scanner’s prompts to read the stored codes.
Note down the exact code and use resources like online databases or repair manuals to understand its meaning and the associated symptoms. For example, a P0420 code indicates a problem with the catalytic converter efficiency.
Once you understand the code, perform the necessary repairs. This might involve replacing a faulty sensor, repairing a vacuum leak, or addressing a more complex mechanical issue. Ensure you follow proper repair procedures and use quality replacement parts.
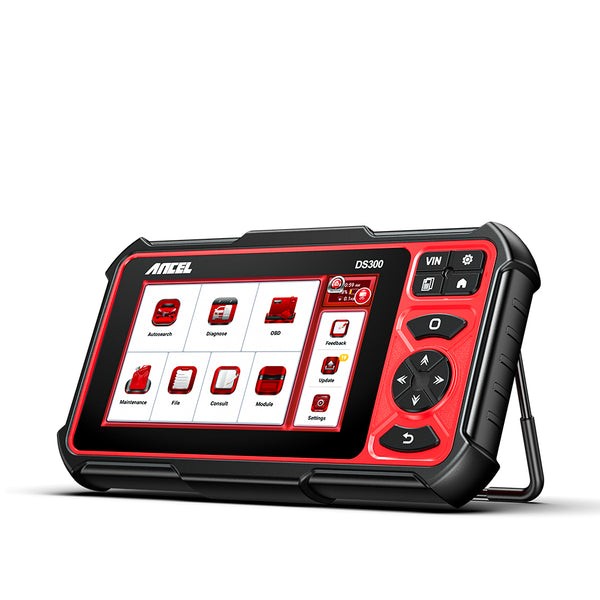 Car Scanner | ANCEL
Step 2: Perform a Proper Drive Cycle
After completing the repair, a drive cycle is essential. A drive cycle is a predefined set of driving conditions that prompts your vehicle’s ECU to run comprehensive self-tests on its systems. If the repair was successful and the issue is resolved, the ECU will recognize this during the drive cycle and eventually clear the permanent code.
Drive cycle procedures vary depending on the vehicle manufacturer and model. However, a general drive cycle typically includes these stages:
- Cold Start: Begin with the engine completely cold (having sat for several hours or overnight).
- Warm-up Phase: Start the engine and allow it to idle for a couple of minutes. Then, drive at a moderate speed (around 25-45 mph) for approximately 10-15 minutes, avoiding hard acceleration and sudden braking.
- Highway Speed Phase: Drive at highway speeds (50-60 mph) for about 5-10 minutes. Maintain a steady speed if possible.
- Deceleration and Idle: Gradually slow down without using the brakes as much as possible. Come to a complete stop and let the engine idle for a few minutes.
Consult your vehicle’s owner’s manual or a reliable online resource specific to your car’s make and model for the exact drive cycle recommended by the manufacturer. Completing the correct drive cycle is crucial for the ECU to accurately reassess the repaired system.
Step 3: Utilize an Advanced OBD2 Scanner
If the permanent code persists after several drive cycles, an advanced OBD2 scanner may be necessary. Basic scanners often lack the functionality to directly clear permanent codes, as this is intentionally restricted to ensure proper repairs.
Advanced scanners, sometimes called professional-grade or bidirectional scanners, offer more sophisticated functions, including the ability to command specific diagnostic modes. For clearing permanent codes, you’ll want a scanner that supports:
- Mode $04 (Clear/Reset Emissions-Related Diagnostic Information): This mode is designed to clear emission-related diagnostic information, which can include permanent codes after the system has passed its self-tests.
- Mode $0A (Permanent DTCs): While not directly for clearing, this mode allows you to specifically read permanent DTCs, confirming they are still present before attempting to clear them.
To use an advanced scanner:
- Connect the Scanner: Plug the scanner into your vehicle’s OBD2 port and turn the ignition to the “ON” position.
- Navigate to Diagnostic Modes: Use the scanner’s menu to find the options for diagnostic modes or advanced functions.
- Select Mode $04: Choose the option to clear emissions-related diagnostic information or reset codes. Follow the on-screen prompts. The scanner might guide you through specific steps or require confirmation before executing the command.
- Verify Code Clearance: After attempting to clear the code, use the scanner to read codes again, specifically checking for permanent DTCs (Mode $0A).
Keep in mind that even with an advanced scanner, the permanent code will only clear if the ECU’s self-tests have passed. If the underlying issue remains or the drive cycle was not completed correctly, the code will likely reappear.
Step 4: Consider an ECU Software Update
In some less common scenarios, a permanent code might persist due to software glitches or outdated programming in the ECU. Vehicle manufacturers periodically release ECU software updates to address known issues, improve performance, and enhance diagnostic capabilities.
Check with your dealership or the vehicle manufacturer’s website to see if there are any available software updates for your vehicle’s ECU. Updating the ECU software can sometimes resolve issues that prevent codes from clearing correctly.
ECU updates are typically performed at a dealership using specialized equipment. In some cases, independent repair shops with access to manufacturer software can also perform these updates. Follow the manufacturer’s instructions and recommendations for ECU software updates.
Step 5: ECU Reset as a Last Resort
Resetting the ECU should be considered as a last resort method, as it erases all stored data, including learned settings and adaptations. This can sometimes force the clearing of persistent codes, but it should only be done if other methods have failed.
To perform an ECU reset:
- Disconnect Battery: Locate the negative terminal of your car battery and disconnect the cable using a wrench.
- Wait: Allow the vehicle to sit for at least 15-30 minutes. This allows any residual electrical charge to dissipate and ensures a complete ECU reset.
- Reconnect Battery: Reconnect the negative battery cable securely.
- Perform Drive Cycle: After reconnecting the battery, start the engine and perform a complete drive cycle as described in Step 2. This allows the ECU to relearn necessary settings and recalibrate systems.
Be aware that resetting the ECU can have temporary effects on vehicle performance as it relearns parameters. It’s also important to note that simply disconnecting the battery for a short period might not be sufficient to clear permanent codes, as the ECU’s non-volatile memory is designed to retain these codes.
Step 6: Seek Professional Help
If you’ve diligently followed all the above steps and the permanent code stubbornly remains, it’s time to consult a professional mechanic or a certified automotive technician. Some permanent codes can be exceptionally challenging to clear, and they might indicate more complex or intermittent issues that require specialized diagnostic tools and expertise.
A professional mechanic can perform in-depth diagnostics, utilize advanced scan tools, and have access to manufacturer-specific resources to accurately pinpoint and resolve the underlying problem. They can also ensure that the repair is verified correctly and that the permanent code is appropriately cleared.
Why Removing Permanent Codes Matters
Clearing permanent engine codes is not just about turning off the check engine light. It’s crucial for several important reasons:
- Emissions Compliance: Permanent codes directly relate to your vehicle’s emissions systems. Failing to address them can lead to failing emissions tests, resulting in fines and preventing vehicle registration renewal in many areas.
- Fuel Efficiency: Many issues that trigger permanent codes can negatively impact your vehicle’s fuel economy. Resolving these issues and clearing the codes can help restore optimal fuel efficiency, saving you money on gas.
- Preventing Further Damage: Ignoring permanent codes can allow underlying problems to worsen over time. What starts as a minor sensor malfunction could potentially lead to more significant and costly engine or component damage if left unaddressed.
Preventing Permanent OBD2 Codes
While knowing how to remove permanent codes is essential, preventing them in the first place is even better. Here are some proactive steps to minimize the occurrence of permanent engine codes:
- Regular Scheduled Maintenance: Adhering to your vehicle’s recommended maintenance schedule is paramount. Regular oil changes, filter replacements, spark plug maintenance, and other routine services keep your vehicle running efficiently and reduce the likelihood of system failures that trigger codes.
- Address Issues Promptly: Don’t ignore warning lights or unusual vehicle behavior. Address any potential problems as soon as they arise. Early diagnosis and repair can prevent minor issues from escalating into more serious problems that trigger permanent codes.
- Use Quality Parts and Fluids: When performing maintenance or repairs, opt for OEM (Original Equipment Manufacturer) or high-quality aftermarket parts and fluids. Quality components are more reliable and less prone to premature failure, reducing the risk of diagnostic codes.
Final Thoughts
Removing a permanent OBD2 code requires a blend of understanding, systematic troubleshooting, and sometimes, professional assistance. By correctly diagnosing and repairing the underlying issue, performing proper drive cycles, and utilizing the right tools when necessary, you can effectively clear these persistent codes and ensure your vehicle operates optimally, efficiently, and within emission standards. Proactive maintenance and timely repairs are your best defenses against the headache of dealing with permanent engine codes.
FAQs
Can a permanent engine code affect my car’s warranty?
Yes, a permanent engine code can potentially impact your car’s warranty, especially if the underlying issue is related to neglected maintenance or modifications not approved by the manufacturer. It’s always best to address any permanent codes promptly to avoid potential warranty complications. Consult your warranty documentation and your dealership for specific details related to your coverage.
Can a permanent engine code cause my vehicle to go into limp mode?
Yes, in certain situations, a permanent engine code, particularly those related to critical engine or transmission functions, can indeed cause your vehicle to enter limp mode (also known as reduced power mode or fail-safe mode). Limp mode is a safety mechanism designed to prevent further damage by limiting engine power and vehicle speed when a severe fault is detected. If a permanent code triggers limp mode, it’s crucial to address the issue immediately and avoid driving the vehicle unnecessarily.
Can I clear a permanent engine code without driving the car?
Generally, no, you cannot reliably clear a permanent engine code without driving the car and completing a proper drive cycle. The drive cycle is specifically designed to allow the vehicle’s onboard diagnostic system to run self-tests and verify that the repaired system is functioning correctly. Only after these tests pass will the ECU typically allow the permanent code to be cleared, either automatically or through the use of an advanced scan tool. Simply clearing codes with a scanner without verifying the repair through a drive cycle is unlikely to be effective for permanent codes.