The OBD2 port, or On-Board Diagnostics II port, is a crucial interface in every modern vehicle manufactured from 1996 onwards. This standardized 16-pin connector allows mechanics and car owners to access a wealth of data from the vehicle’s computer system using a scan tool. While designed for durability, the OBD2 port can sometimes become damaged or faulty, necessitating replacement. If you’re facing issues with your car’s diagnostic port, this guide will walk you through the process of how to replace your OBD2 port, ensuring you restore this vital connection for diagnostics and maintenance.
Understanding the OBD2 Connector
Before diving into the replacement process, it’s important to understand what the OBD2 connector is and its function. It’s a standardized interface, meaning regardless of the car manufacturer, any OBD2 scanner should be able to retrieve a set of basic diagnostic data.
Here’s a pinout of a standard OBD2 connector:
- Pin 1: Manufacturer’s choice
- Pins 2 & 10: SAE J1850 (network)
- Pin 3: Manufacturer’s choice
- Pin 4: Chassis ground
- Pin 5: Signal ground
- Pins 6 & 14: CAN bus high and low (network)
- Pins 7 & 15: ISO9140 K-Line (network)
- Pins 8, 9, 11, 12, 13: Manufacturer’s choice
- Pin 16: Battery positive (key off power)
Common Causes of OBD2 Port Damage
Pin 16, providing battery positive, is frequently the culprit in OBD2 port issues. Why is this pin so vulnerable? Several factors contribute to OBD2 port damage:
-
Blown Fuses and Power Surges: A short circuit in an aftermarket accessory connected to the OBD2 port, or an issue in a shared circuit, can cause the fuse protecting pin 16 to blow. While a blown fuse itself won’t damage the terminal, improper probing with test equipment by inexperienced individuals can lead to physical damage. This kind of damage from careless testing is a primary reason for OBD2 connector repairs.
-
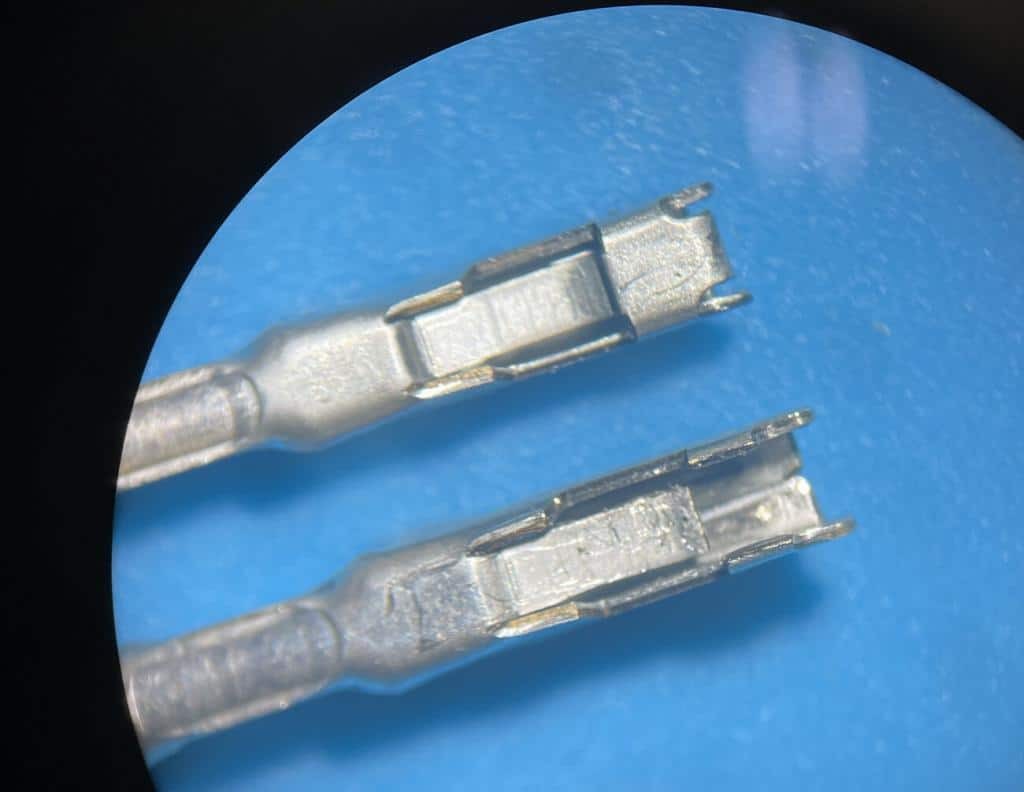
Aftermarket Accessories: The increasing popularity of OBD2 port accessories like insurance dongles, GPS trackers, and performance monitors contributes to wear and tear. Lower quality aftermarket devices might have male pins that are oversized, which can stretch and damage the female terminals within the car’s OBD2 connector over time. Furthermore, some devices may draw excessive current from pin 16 continuously, exceeding the connector’s design specifications. The OBD2 port is intended to power scan tools for short diagnostic sessions, not to sustain high-current devices constantly.
Symptoms Indicating Your OBD2 Port Needs Replacement
Recognizing the signs of a faulty OBD2 port is the first step towards addressing the issue. Common symptoms include:
- Scan Tool Connection Failure: The most obvious sign is the inability to connect a scan tool to your vehicle. If your scanner powers on but fails to establish a communication link with the car’s computer, a damaged OBD2 port is a likely suspect.
- Intermittent Connection Issues: If the connection between the scan tool and the OBD2 port is unstable, cutting in and out, this can also point to loose or damaged terminals within the port.
- Visibly Damaged Connector: A visual inspection might reveal physical damage to the OBD2 port itself. Look for bent or broken pins, cracks in the plastic housing, or signs of burning or corrosion.
- Check Engine Light and Diagnostic Trouble Codes (DTCs): While a check engine light can be triggered by numerous issues, it’s worth noting if it appears alongside difficulties connecting to the OBD2 port. You may be unable to retrieve the DTCs due to the port problem.
- Power Issues with Accessories: If accessories that draw power from the OBD2 port (if you have any) are malfunctioning or not powering on, it could indicate a problem with the power supply pins in the port.
Is Replacing an OBD2 Port a DIY Task?
Replacing an OBD2 port is generally manageable for a moderately skilled DIYer with some automotive electrical experience. However, it’s not a task for complete beginners. The complexity lies in correctly identifying the wiring, safely disconnecting and reconnecting terminals, and ensuring a robust and reliable repair.
Factors to consider before attempting a DIY OBD2 port replacement:
- Wiring Knowledge: You’ll need to understand basic automotive wiring and be comfortable working with electrical connectors and terminals.
- Tools: Specialized tools like terminal crimpers and removal tools are highly recommended for a professional-quality repair. Soldering equipment might also be necessary depending on the repair method.
- Time and Patience: Replacing an OBD2 port can take a couple of hours, especially if it’s your first time. Rushing the job can lead to mistakes and further problems.
- Vehicle-Specific Information: Access to your vehicle’s wiring diagrams is extremely helpful for identifying the correct wires and ensuring proper reconnection.
If you’re unsure about any of these aspects, it’s always best to consult a qualified mechanic.
Tools and Parts Needed for OBD2 Port Replacement
Before starting the replacement, gather the necessary tools and parts:
- Replacement OBD2 Port Connector: You have options here:
- Dealer Parts: Ideally, sourcing a replacement connector and terminals from your car’s dealer ensures the best fit and quality. While often sold separately (connector housing and terminals), dealer parts guarantee compatibility.
- Aftermarket Connectors: Aftermarket OBD2 connectors are available online, often at lower prices. However, be cautious about quality. Look for reputable brands and read reviews. Avoid very cheap, generic connectors as terminal quality can be subpar.
- Connector Experts: Companies like Connector Experts specialize in OE-style connectors and terminals and are a good source for quality replacement parts.
- OBD2 Terminals: You may need to replace individual terminals if they are damaged. Ensure you get the correct type and size for your connector. Toyota part number 82998-05010 is mentioned as a potentially compatible terminal, especially for Toyota vehicles, but always verify compatibility for your specific car model.
- Wire Crimpers: High-quality crimpers designed for small, open-barrel terminals are essential for creating secure and reliable terminal connections. Engineer brand crimpers are mentioned as a good option.
- Wire Strippers and Cutters: For preparing wires for crimping or soldering.
- Soldering Iron and Solder (Optional): Depending on your chosen repair method, soldering may be required for wire connections.
- Heat Shrink Tubing: To insulate soldered connections and protect crimped terminals.
- Terminal Removal Tools: These tools help to safely remove terminals from the connector housing without damaging them or the connector.
- Multimeter: For testing continuity and voltage to verify connections.
- Wiring Diagrams (Vehicle-Specific): Crucial for identifying wires and ensuring correct connections. Access these through online service manuals or databases like TIS (Toyota Information System).
- Basic Hand Tools: Screwdrivers, pliers, sockets, etc., for accessing the OBD2 port location.
- Zip Ties: For securing wiring neatly after the repair.
Step-by-Step Guide: Replacing Your OBD2 Port
Safety First: Always disconnect the negative battery terminal before working on any automotive electrical circuits to prevent shorts and electrical damage.
-
Accessing the OBD2 Port: The OBD2 port is typically located under the dashboard on the driver’s side. You may need to remove lower dash panels to gain better access. Refer to your vehicle’s service manual for specific instructions on accessing the OBD2 port.
-
Disconnecting the Old Connector: Once you have access, carefully examine how the OBD2 connector is mounted. It might be clipped into a bracket or secured with screws. Disconnect the connector from its mounting. Before disconnecting the wires, take clear pictures or carefully note the wire colors and their positions in the connector. This is crucial for correct reconnection.
-
Removing Terminals (If Replacing Terminals): If you are only replacing damaged terminals and reusing the existing connector housing, use terminal removal tools to carefully extract each terminal from the connector. Work one wire at a time to avoid confusion.
-
Wiring and Terminal Replacement/Repair:
- Terminal Replacement: If replacing terminals, crimp new terminals onto the existing wires using your crimping tool. Ensure a strong and proper crimp. If soldering, carefully solder the wires to new pigtail terminals and insulate with heat shrink tubing.
- Connector Replacement: If replacing the entire connector, you’ll need to transfer the wires from the old connector to the new one. You can either cut and splice the wires, or, ideally, remove the terminals from the old connector and install them into the new connector housing in the correct positions, crimping new terminals if necessary due to damage.
-
Installing the New Connector: Connect the wires to the new OBD2 port connector, ensuring each wire is in the correct pin location according to your notes or wiring diagram. Double-check the pinout diagram to be absolutely certain. Secure the new connector in its mounting bracket or location.
-
Testing the New Port: Reconnect the negative battery terminal. Plug in your OBD2 scan tool and turn on the ignition (but don’t start the engine). Verify that the scan tool powers on and successfully connects to your vehicle’s computer. Check for communication and attempt to read data or DTCs to confirm the repair is successful.
Choosing Quality Parts Matters
While cheaper aftermarket OBD2 connectors might seem appealing, investing in quality parts, ideally OE or from reputable suppliers like Connector Experts, is crucial for a long-lasting and reliable repair. Lower quality terminals can have poor spring tension, leading to intermittent connections and future problems. As highlighted in the original article, the labor cost of replacing an OBD2 port is significant. Using substandard parts can lead to repeat repairs and ultimately cost more in the long run.
Conclusion
Replacing an OBD2 port, while requiring some technical skill, is a manageable repair for informed DIYers. By understanding the common causes of damage, recognizing the symptoms, and following a careful replacement process with quality parts and the right tools, you can restore this essential diagnostic interface in your vehicle. Remember to prioritize safety, take your time, and if you’re ever in doubt, seek assistance from a professional automotive technician to ensure the job is done correctly and reliably.

