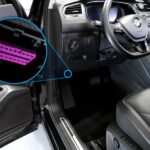
For Kawasaki V650 owners looking to tap into their bike’s diagnostics, using an OBD2 reader is simpler than you might think, despite some online confusion. The key is understanding the 4-pin connector and how to interface it with a standard OBD2 device. This guide will walk you through the process of creating a Kawasaki Obd2 Adapter 4 Pin setup, allowing you to read diagnostic codes and monitor your motorcycle’s performance.
Contrary to some forum discussions, connecting an OBD2 reader to your V650 doesn’t require complex modifications. It’s about understanding the pin layout and ensuring compatibility, especially concerning the KWP2000 (ISO9141) protocol. While pre-made cables might exist, their compatibility can be uncertain. For those with some DIY experience, creating a custom adapter cable offers a reliable solution.
Let’s break down the essentials for building your own kawasaki obd2 adapter 4 pin.
The Kawasaki V650’s 4-pin diagnostic connector provides the necessary connections: 12V power, Ground (GND), K-Line (for communication), and L-Line (often not required but potentially useful). Looking at the connector on the bike, with the key at the top and viewing it from the front, the pinout is as follows:
K-Line    GND
L-Line    VBAT (12V)
To connect this to a standard OBD2 car-style connector, you’ll need to bridge the connections as follows:
- OBD2 Connector Pins 4 & 5 (Ground) connect to GND (Black/Yellow wire on the V650).
- OBD2 Connector Pin 7 (K-Line) connects to K-Line (Pink/Blue or Purple/Violet wire on the V650).
- OBD2 Connector Pin 16 (12V) connects to VBAT (Brown/White wire on the V650).
If your OBD2 connector socket has an L-Line connection available (Pin 15), you can connect it to the L-Line (Light Green/Black wire) on the V650, but it’s often unnecessary for basic diagnostics.
To create a working adapter, you’ll need an OBD2 socket and a compatible 4-pin connector. An old Honda plug, as used in the original example, or similar 4-pin connectors can work. Solder or crimp wires between the OBD2 socket and your chosen 4-pin connector according to the pinout described above.
Face view of the OBD2 socket on the Kawasaki V650, illustrating the 4-pin configuration.
Example of a DIY OBD2 adapter cable for Kawasaki V650, demonstrating the wiring between the OBD2 and 4-pin connectors.
Once you’ve created your kawasaki obd2 adapter 4 pin cable, you can connect it to a standard OBD2 reader. Popular options include Bluetooth OBD2 dongles that pair with smartphone apps like Torque or similar OBD2 software. These apps allow you to read fault codes, clear codes, and monitor live data such as engine temperature, RPM, and more.
A prototype setup showing the OBD2 adapter connected to a dongle for testing and data acquisition on the Kawasaki V650.
With a working connection, you can finally access valuable data from your Kawasaki V650. Using apps like Torque, you can customize dashboards to display the information most relevant to you, such as coolant temperature monitoring with custom alarms.
Screenshot from the Torque app showing a customized dashboard displaying real-time coolant temperature data from a Kawasaki V650, connected via the OBD2 adapter.
In conclusion, setting up a kawasaki obd2 adapter 4 pin for your V650 is achievable with a bit of wiring knowledge. By creating a simple adapter cable and using readily available OBD2 readers and smartphone apps, you can unlock a wealth of diagnostic information and gain a deeper understanding of your motorcycle’s performance. Start exploring your V650’s data today!
