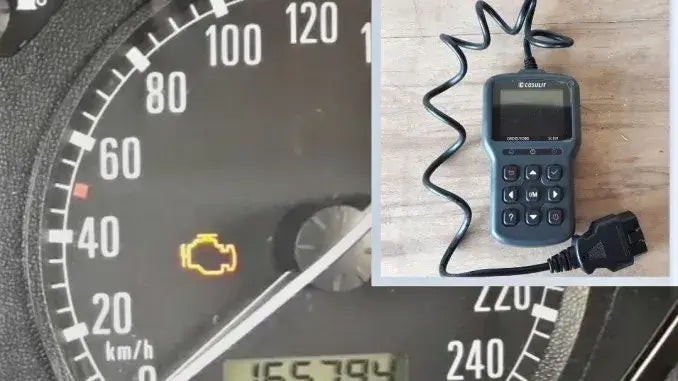
That little yellow or orange icon on your dashboard – the check engine light – can be alarming. It signals that your car’s onboard diagnostic system has detected a potential issue. While it’s crucial not to ignore it, you might be able to address the problem and clear the light yourself using an OBD2 scanner. This guide from obd-de.com will walk you through the process of using an OBD2 scanner to clear the check engine light, saving you time and potentially a trip to the mechanic.
This process is straightforward and doesn’t require advanced automotive knowledge. In fact, using an OBD2 scanner is often compared to operating a smartphone – intuitive and user-friendly.
To clear the check engine light, you’ll need an OBD2 scanner, also known as an OBDII reader or code reader. It’s important to note that basic code readers might only read error codes but not have the functionality to clear them. Ensure you choose a scanner that explicitly states it can both read and erase trouble codes.
A reliable option for an OBD2 scanner is the CGSULIT SC301. This tool is capable of both reading and clearing codes, and is a user-friendly device for car owners.
Step-by-Step Guide to Clearing Your Check Engine Light with an OBD2 Scanner
While prior experience with an OBD2 scanner can be helpful, it’s not essential. These steps are designed for first-time users to confidently clear their check engine light. If you’re completely new to OBD2 scanners, you can find additional resources online or video tutorials to familiarize yourself with basic operations.
1. Locate the OBD2 Port
The OBD2 port is a standardized diagnostic port found in most cars manufactured after 1996. It’s usually located within the driver’s side interior, often under the dashboard, near the steering column, or in the center console area. Refer to your vehicle’s owner’s manual if you have trouble locating it. The port is typically trapezoidal in shape with 16 pins.
2. Connect the OBD2 Scanner
Once you’ve found the OBD2 port, take your OBD2 scanner and firmly plug the connector into the port. Ensure it clicks or fits snugly to establish a good connection. Handle the connector with care to avoid damaging the port or the scanner.
3. Turn On the Ignition (Accessory Mode)
Insert your car key into the ignition and turn it to the “Accessory” or “ON” position. This position provides power to the car’s electrical systems, including the OBD2 port and diagnostic system, without starting the engine. Do not start the engine at this stage.
4. Allow the OBD2 Scanner to Scan for Codes
With the scanner connected and the ignition in the “ON” position, the OBD2 scanner will typically power on automatically or require you to press a power button. Follow the scanner’s on-screen prompts to initiate a scan. The scanner will communicate with your car’s computer to retrieve any stored diagnostic trouble codes (DTCs) that triggered the check engine light. This process may take a few moments.
5. Read and Understand the Error Codes
After the scan is complete, the OBD2 scanner will display a list of error codes. There might be one or multiple codes present. It’s crucial to understand what these codes mean before clearing them. Each code corresponds to a specific issue within your vehicle’s systems.
Your OBD2 scanner may have a built-in DTC lookup library, allowing you to view code definitions directly on the device. Alternatively, you can use online resources or mobile apps to search for the meaning of each code. Understanding the error code is vital to assess the severity of the problem. Clearing the code without addressing the underlying issue is only a temporary fix, and the check engine light will likely reappear.
6. Navigate to the Clear Codes or Erase Codes Menu
Once you’ve reviewed and understood the error codes and decided to clear them (perhaps after addressing a minor issue or for diagnostic purposes), navigate through the OBD2 scanner’s menu to find the “Clear Codes,” “Erase Codes,” or similarly worded option. The menu layout varies between different scanners, but these options are usually found within a “Tools” or “Service” menu.
Select the clear codes option and confirm your choice when prompted. The scanner will then send a command to your car’s computer to clear the stored error codes and reset the check engine light.
7. Return to the Main Menu
After successfully clearing the codes, use the “Escape” or “Return” button on your OBD2 scanner to go back to the main menu or the initial screen that appears when the device powers on. This ensures you are ready to disconnect the scanner properly.
8. Disconnect the OBD2 Scanner
Carefully disconnect the OBD2 scanner from the OBD2 port. Gently pull the connector straight out, avoiding any twisting or excessive force that could damage the port or scanner. If your OBD2 scanner has a power switch, turn it off before disconnecting.
9. Turn Off the Ignition
Turn the ignition key back to the “OFF” position and remove it from the ignition.
10. Start the Engine and Check if the Light is Off
Now, start your car’s engine as you normally would. Check the dashboard to see if the check engine light has turned off. In most cases, if the issue was minor or has been resolved, the light should disappear immediately.
To further verify, let the engine run and reach its normal operating temperature. You can also start and stop the engine a few more times to confirm that the check engine light remains off.
Important Considerations
Clearing the check engine light with an OBD2 scanner is a useful skill for car owners. It allows you to address minor issues, confirm repairs, and gain insights into your vehicle’s health. However, it’s crucial to remember that clearing the code only turns off the light; it doesn’t fix the underlying problem.
If the check engine light reappears shortly after clearing it, or if the error codes indicate a serious issue, it’s essential to have your vehicle professionally diagnosed and repaired by a qualified mechanic. Ignoring persistent check engine lights or serious error codes can lead to further damage and potentially unsafe driving conditions.
In conclusion, learning how to use an OBD2 scanner to clear the check engine light is a straightforward process that can empower you to take a more active role in your car’s maintenance. When used responsibly and in conjunction with proper diagnostics, it’s a valuable tool for any car owner.