The check engine light. Just seeing it illuminate on your dashboard can trigger a wave of anxiety. Is it serious? Expensive? Can I even drive my car? While a check engine light shouldn’t be ignored, it doesn’t always signal a catastrophic engine failure. Often, it indicates a minor issue that, once addressed, simply needs its code cleared from your car’s computer system. The good news is, you can often do this yourself using an OBD2 scanner, saving you time and a trip to the mechanic for a simple reset.
This guide, brought to you by the auto repair experts at obd-de.com, will walk you through the easy steps to clear your check engine light using an OBD2 scanner. We’ll show you how simple it can be to take control of your car’s diagnostics and potentially resolve minor issues right in your driveway.
Clearing the check engine light requires just one essential tool: an OBD2 scanner, also known as an OBDII code reader. It’s important to note that while basic code readers can read diagnostic trouble codes (DTCs), not all of them have the capability to clear these codes and turn off the check engine light. Therefore, ensure you have a scanner that explicitly states it can both read and clear codes.
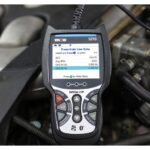
For a reliable and user-friendly option, consider a tool like the CGSULIT SC301 OBDII reader. It’s a great example of a scanner that offers both code reading and clearing functions. You can find in-depth reviews of the CGSULIT SC301 online to see if it fits your needs.
Step-by-Step Guide to Clearing Your Check Engine Light
While prior experience with an OBD2 scanner can be helpful, it’s certainly not a prerequisite. These tools are designed for ease of use, even for beginners. If you’re completely new to using a scanner, we recommend checking out our article on “How to Use an OBD2 Scanner: Five Easy Steps” for a more detailed introduction. You can also find helpful video tutorials on our YouTube channel to guide you through the process visually.
Let’s get started with clearing that check engine light!
1. Locate the OBDII Port
The first step is to find your vehicle’s OBDII port. This port is the standardized connection point for diagnostic tools. It’s typically located within the passenger compartment of your car, usually under the dashboard on the driver’s side. Common locations include beneath the steering column or near the fuse box. Refer to your car’s owner’s manual if you’re having trouble locating it.
Finding the OBDII port under the dashboard of a car, a necessary step to connect an OBD2 scanner for diagnostics and clearing check engine lights.
2. Connect Your OBD2 Scanner
Once you’ve located the OBDII port, carefully connect your OBD2 scanner. The connector on the scanner is designed to fit snugly into the port in only one orientation. Do not force it. It should click or slide in smoothly.
Connecting an OBD2 code reader to the OBDII port inside a vehicle, establishing the communication link for accessing vehicle diagnostic information and clearing error codes.
3. Turn On the Ignition (Key to “ON” or Engine Start)
With the scanner connected, you need to turn on your car’s ignition. The key position you need is typically the “ON” position, just before you start the engine. In some vehicles, this might be indicated as position II. You may hear some systems in your car power up. Some OBD2 scanners can also operate with the engine running, but for the initial scan and code clearing, the “ON” position is generally sufficient.
Ignition key turned to the ‘ON’ position in the car’s ignition switch, activating the vehicle’s electrical systems and enabling communication with the OBD2 scanner.
4. Initiate a Scan for Error Codes
Now, follow your OBD2 scanner’s instructions to initiate a scan. This usually involves navigating through a menu using buttons on the scanner. Select the “Read Codes,” “Diagnostic Scan,” or a similarly worded option. The scanner will then communicate with your car’s computer to retrieve any stored diagnostic trouble codes.
An OBD2 scan tool performing a diagnostic scan on a vehicle, reading and retrieving potential error codes from the car’s computer system.
5. Read and Understand the Error Codes
Once the scan is complete, the OBD2 scanner will display a list of error codes. There might be just one code, or multiple. It’s crucial to carefully note down these codes.
This step is arguably the most important. Before you even think about clearing the check engine light, you need to understand what these codes mean. These codes are your car’s way of telling you what’s wrong. Ignoring them and simply clearing the light without investigation is not recommended and could lead to more serious problems down the road.
Most OBD2 scanners have a built-in DTC library that allows you to look up the meaning of the codes directly on the device. Alternatively, you can easily search for the codes online using a search engine. Websites and online databases dedicated to OBD2 codes can provide detailed explanations and possible causes for each code.
An OBD2 code reader displaying diagnostic trouble codes (DTCs) on its screen, providing information about potential vehicle malfunctions that triggered the check engine light.
6. Clear the Check Engine Light (Erase Codes)
After you’ve researched and understood the error codes, and if you’ve addressed the underlying issue (or if you are dealing with a minor or intermittent fault), you can proceed to clear the check engine light.
Navigate through your OBD2 scanner’s menu again. This time, look for options like “Erase Codes,” “Clear Codes,” or “Reset.” Select this option. The scanner will typically ask for confirmation before clearing the codes. Confirm your selection to proceed.
Navigating the menu on an OBD2 scanner, specifically highlighting the DTC (Diagnostic Trouble Code) library function used to look up error code definitions.
7. Return to the Main Menu
Once the codes are cleared, navigate back to the main menu of your OBD2 scanner. This is usually the initial screen that appears when the scanner powers on and connects to your car.
The start menu screen of an OBD2 scan tool, typically the initial display after powering on and connecting to the vehicle, providing options for different diagnostic functions.
8. Disconnect the OBD2 Scanner
With the codes cleared and the scanner back at its main menu, you can now safely disconnect it from your car’s OBDII port. Gently pull the connector straight out, being careful not to bend or damage the pins on either the scanner or the port. If your OBD2 scanner has a power button, turn it off before disconnecting.
Disconnecting the OBD2 reader from the vehicle’s OBDII port, completing the diagnostic and code clearing process.
9. Turn Off the Ignition
Turn your car’s ignition completely off. Remove the key from the ignition switch.
Ignition key turned off in the car’s ignition switch, deactivating the vehicle’s electrical systems after completing the diagnostic procedures.
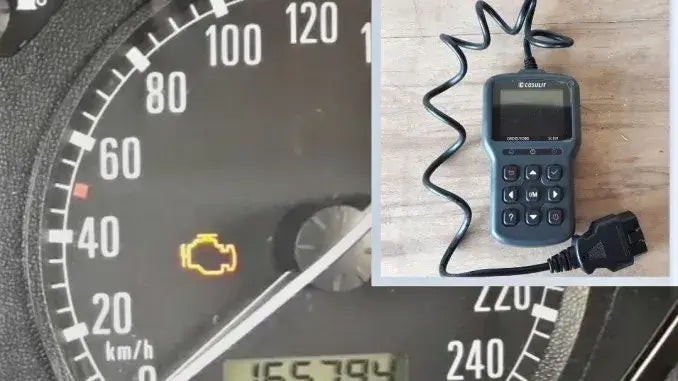
10. Start the Engine and Check
Finally, start your car’s engine. Check your dashboard. If the process was successful in clearing the code, the check engine light should now be off.
It’s a good idea to start and stop your engine a few times, and even take a short drive, to ensure the check engine light does not reappear immediately. If the light comes back on soon after clearing it, it indicates that the underlying issue persists and needs further attention and proper repair.
Checking the dashboard after starting the engine to verify if the check engine light has been successfully turned off following the OBD2 scanner reset procedure.
Conclusion: Empower Yourself with OBD2 Diagnostics
As you’ve seen, clearing a check engine light with an OBD2 scanner is a straightforward process that most car owners can easily learn. It’s a valuable skill that can save you time and money on minor car issues. The entire process, from connecting the scanner to clearing the code, typically takes only about 5 to 10 minutes.
However, remember that clearing the check engine light is only part of the equation. It’s essential to understand the underlying error codes and address any actual problems with your vehicle. Think of clearing the code as confirming a repair or acknowledging a minor, resolved issue, not as a fix in itself.
Learning to use an OBD2 scanner and clear check engine lights is a great step towards becoming a more informed and proactive car owner, allowing you to handle basic diagnostics and maintenance with confidence.