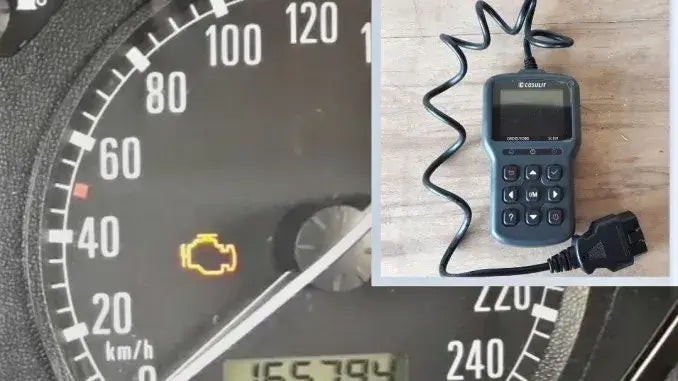
That ominous yellow glow of the check engine light can be a cause for concern for any car owner. It signals that your vehicle’s onboard diagnostic system has detected a problem. While it’s crucial to address the underlying issue, sometimes you need to clear the code after repairs or for diagnostic purposes. Fortunately, clearing a check engine light code is straightforward with an OBD2 scanner. This guide will show you exactly How To Clear A Code With Obd2, empowering you to take control of your car’s diagnostics from the comfort of your garage.
To clear a check engine light, you’ll need an OBD2 scanner, also referred to as an OBDII reader or scan tool. It’s important to note that not all basic code readers have the function to erase codes; some only read them. Therefore, ensure you have a scanner capable of both reading and clearing trouble codes. A reliable OBD2 scanner, like the CGSULIT SC301, provides this essential clear code functionality.
Clearing a code with an OBD2 scanner is a simple process, often taking just minutes. While prior experience with a code reader can be helpful, it’s not mandatory. This guide will walk you through each step, making it easy even for first-time users to understand how to clear a code with OBD2.
Step-by-Step Guide: Clearing Error Codes with an OBD2 Scanner
Let’s break down the process into easy-to-follow steps.
1. Locate the OBD2 Port
The first step in learning how to clear a code with OBD2 is finding the OBD2 port in your vehicle. This port is your access point to the car’s computer system. Typically, it’s located under the dashboard on the driver’s side. Look for a 16-pin connector, often near the steering column or in the footwell area. Refer to your vehicle’s owner’s manual if you are unsure of the exact location.
2. Connect the OBD2 Code Reader
Once you’ve located the OBD2 port, carefully connect your OBD2 scanner. Simply plug the scanner’s connector into the port. Ensure it’s firmly seated to establish a good connection. Avoid forcing it, as the connector should slide in smoothly.
3. Turn On the Ignition (Key On, Engine Off)
To allow the OBD2 scanner to communicate with your vehicle’s computer, you need to turn on the ignition. Turn the key to the “ON” position, which powers up the car’s electrical systems and dashboard lights, but do not start the engine. This is often referred to as “Key On, Engine Off” (KOEO).
4. Allow the OBD2 Code Reader to Scan for Codes
With the scanner connected and the ignition on, the OBD2 scanner will typically power on automatically or require you to press a power button. Follow the scanner’s instructions to initiate a scan. The scanner will then communicate with your car’s computer, retrieving any stored diagnostic trouble codes (DTCs). This process may take a few moments.
5. Read and Understand the Error Codes
After the scan is complete, the OBD2 scanner will display a list of error codes. There might be a single code or multiple codes. It’s crucial at this stage to understand what these codes mean. Interpreting the codes correctly is a vital step before you proceed to clear them.
Understanding the error code helps you determine the nature and severity of the problem. Most OBD2 scanners have a built-in DTC lookup library, allowing you to get a basic description of the code directly on the device. Alternatively, you can search online using the code and your vehicle’s make and model to find detailed information.
Remember, simply clearing the code without addressing the underlying issue is only a temporary fix. If the problem persists, the check engine light will likely reappear soon after you clear it.
6. Navigate to the Clear Codes or Erase Codes Menu
Once you have reviewed and understood the error codes, and if you are confident that the issue has been resolved or you are proceeding for diagnostic purposes, navigate the OBD2 scanner’s menu to find the “Clear Codes,” “Erase Codes,” or similar option. The menu layout can vary slightly depending on the scanner brand and model, but the terminology is usually straightforward.
Select the clear codes function and confirm your selection when prompted. The scanner may ask for confirmation to ensure you intentionally want to erase the codes.
7. Return to the Main Menu
After successfully clearing the codes, use the scanner’s “Escape” or “Return” button to go back to the main menu. This ensures that the code clearing process is fully completed within the scanner’s system.
8. Disconnect the OBD2 Code Reader
With the codes cleared and the scanner back at the main menu, you can now safely disconnect the OBD2 scanner from the OBD2 port. Gently pull the connector straight out, being careful not to bend or damage the pins. If your OBD2 scanner has a power switch, turn it off before disconnecting.
9. Turn Off the Ignition
Turn the ignition key back to the “OFF” position, completely powering down the vehicle’s electrical systems.
10. Start the Engine and Verify the Check Engine Light is Off
Finally, start your car’s engine as you normally would. Check the dashboard to see if the check engine light is now off. If the light is gone, you have successfully cleared the code. To further confirm, you can start and stop the engine a few more times after it reaches operating temperature to ensure the light does not reappear immediately.
Conclusion: Taking Control of Your Car’s Diagnostics
As you’ve seen, learning how to clear a code with OBD2 is a simple and valuable skill for any car owner. The entire process is quick, typically taking only 5 to 10 minutes. Having the ability to clear codes yourself saves time and potentially money by avoiding unnecessary trips to a mechanic for simple code clearing.
However, it’s crucial to reiterate that clearing a check engine light code is not a substitute for proper vehicle maintenance and repair. Always prioritize diagnosing and fixing the underlying issue that triggered the code in the first place. Clearing codes should be done responsibly, ideally after addressing the problem or as part of a diagnostic process.
Mastering how to clear a code with OBD2 is a practical step towards becoming more car-savvy and confidently handling basic automotive diagnostics and maintenance tasks.