The check engine light, that little amber icon on your dashboard, can be a source of anxiety for any car owner. It signals that something is amiss within your vehicle’s complex systems, and while it might seem daunting, it doesn’t always necessitate an immediate trip to the mechanic. In many cases, understanding the problem and even resolving it can be within your reach, thanks to the power of an OBD2 scanner. One of the most common uses for these handy devices is to clear the check engine light after addressing a minor issue.
This guide will walk you through the straightforward process of using an OBD2 scanner to turn off your check engine light. It’s a task that’s surprisingly simple, often compared to using your smartphone, and can save you time and money by potentially avoiding a mechanic visit for simple resets.
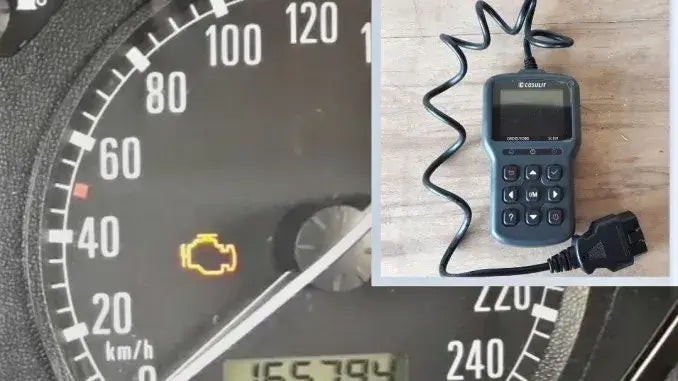
Before we dive into the steps, it’s crucial to understand what you’ll need. The key tool is an OBD2 scanner, sometimes referred to as an OBDII reader or code reader. It’s important to note that while basic code readers can read diagnostic trouble codes (DTCs), not all of them have the capability to clear these codes and turn off the check engine light. Ensure your scanner specifically states that it can clear codes before proceeding. A reliable and user-friendly option is the CGSULIT SC301 OBD2 scanner, known for its ease of use and comprehensive features.
Step-by-Step Guide to Clearing Your Check Engine Light
While prior experience with an OBD2 scanner can be helpful, it’s certainly not mandatory. These devices are designed for user-friendliness, even for first-timers. If you’re completely new to OBD2 scanners, you might find it beneficial to consult a separate guide on basic OBD2 scanner usage before starting this process.
Step 1: Locate the OBD2 Port
The first step is to find your vehicle’s OBD2 port. This port is the communication interface between your car’s computer and the OBD2 scanner. It’s standardized across most vehicles manufactured after 1996 and is typically located within the driver’s side interior of your car. Common locations include under the dashboard, near the steering column, or sometimes in the center console area. Refer to your vehicle’s owner’s manual if you’re having trouble locating it.
Step 2: Connect Your OBD2 Scanner
Once you’ve located the OBD2 port, take your OBD2 scanner and firmly plug its connector into the port. Ensure it’s securely connected to establish a proper communication link with your vehicle’s computer system.
Step 3: Turn On the Ignition (Key On, Engine Off)
Now, you need to turn on your vehicle’s ignition. This means turning the key to the “ON” position, which powers up your car’s electrical systems and the computer, but without starting the engine. This is sometimes referred to as “Key On, Engine Off” (KOEO).
Step 4: Scan for Error Codes
With the OBD2 scanner connected and the ignition on, power on your scanner. Most scanners will automatically begin to power up once connected. Navigate to the “Scan” or “Read Codes” option in the scanner’s menu. Initiate the scan, and the scanner will communicate with your vehicle’s computer to retrieve any stored diagnostic trouble codes.
Step 5: Understand and Interpret the Codes
Once the scan is complete, the OBD2 scanner will display a list of error codes, if any are present. You might see one code or multiple codes. It’s crucial at this stage to understand what these codes mean. Many OBD2 scanners have a built-in DTC library that allows you to look up the meaning of each code directly on the device. Alternatively, you can use online resources or smartphone apps to search for the code definitions.
Interpreting the codes is vital because it tells you the nature of the problem that triggered the check engine light. This step helps you determine if the issue is minor, something you’ve already addressed (like a loose gas cap), or a more serious problem that requires further attention. Remember, clearing the code without understanding the underlying issue is only a temporary fix and the check engine light might reappear if the problem persists.
Step 6: Clear the Error Codes
If you’ve understood the error code and are confident that the issue is resolved or is minor enough to clear, you can proceed to clear the codes and turn off the check engine light. Navigate through your OBD2 scanner’s menu to find the “Clear Codes,” “Erase Codes,” or a similarly named option. Select this option.
The scanner may prompt you to confirm if you want to clear the codes. Confirm your selection by pressing “Yes” or “OK.” The scanner will then send a command to your vehicle’s computer to clear the stored error codes and reset the check engine light.
Step 7: Verify the Light is Off
After clearing the codes, navigate back to the main menu or homepage of your OBD2 scanner. This is usually the screen that initially appears when the scanner powers on.
Step 8: Disconnect the Scanner
Once you’ve verified that the codes have been cleared on the scanner’s display, you can disconnect the OBD2 scanner from the OBD2 port. Gently pull the connector straight out from the port, being careful not to damage the port or the scanner’s connector. If your OBD2 scanner has a power button, turn it off before disconnecting.
Step 9: Turn Off the Ignition
Turn the ignition key back to the “OFF” position, completely powering down your vehicle’s electrical systems.
Step 10: Re-start the Engine
Finally, start your engine as you normally would. Check your dashboard to see if the check engine light has turned off. In most cases, if the underlying issue is resolved or was minor, the light should be gone.
To further confirm, you can start and stop the engine a few more times, allowing it to reach operating temperature, to ensure the check engine light remains off.
Important Considerations
While clearing the check engine light with an OBD2 scanner is a simple procedure, it’s crucial to remember that it’s not a substitute for proper vehicle maintenance and repair. Clearing the code essentially turns off the warning signal, but it doesn’t fix the underlying problem that triggered the light in the first place.
If the check engine light comes back on shortly after you’ve cleared it, this is a strong indication that the original issue persists or is still occurring. In such cases, it’s essential to properly diagnose and address the root cause of the problem. Ignoring a recurring check engine light can lead to more significant vehicle damage and potentially compromise your safety.
When to Seek Professional Help:
If you are unsure about interpreting the error codes, or if the check engine light returns repeatedly, it’s always best to consult a qualified mechanic. They have the expertise and tools to accurately diagnose complex vehicle problems and perform necessary repairs.
Conclusion
As you’ve seen, clearing your check engine light with an OBD2 scanner is a straightforward process that empowers you to take a proactive role in your car’s maintenance. It’s a valuable skill for any car owner, offering convenience and potential cost savings. By understanding how to use an OBD2 scanner, you can confidently address minor issues and gain a better understanding of your vehicle’s health. However, remember that responsible car ownership includes not only clearing codes but also ensuring that any underlying problems are properly diagnosed and resolved for the long-term health and reliability of your vehicle.