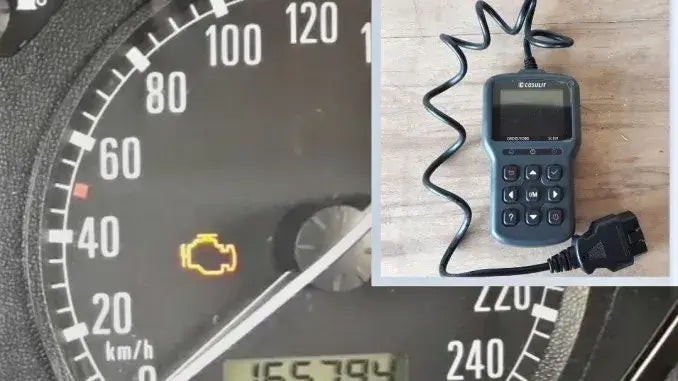
That unsettling check engine light – it’s enough to make any car owner’s heart sink. It signals that something is amiss with your vehicle, and while it’s crucial not to ignore it, it doesn’t always mean an expensive trip to the mechanic is immediately necessary. With the right tools and a little know-how, you can take control of the situation, understand what’s happening, and even clear those codes yourself.
This guide will walk you through the process of clearing Diagnostic Trouble Codes (DTCs) using an OBD2 scanner. It’s simpler than you might think, comparable to using your smartphone, and can save you time and money. Let’s dive into how you can become your own car diagnostic expert.
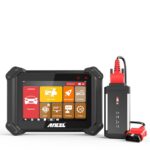
To clear codes on your OBD2 system and turn off that pesky check engine light, you’ll need one essential piece of equipment: an OBD2 scanner, often referred to as a code reader. It’s important to note that not all basic code readers are created equal. Some entry-level models can only read trouble codes, providing you with information about the issue, but they lack the functionality to erase these codes and clear the check engine light. Therefore, ensure you choose an OBD2 scanner that explicitly states it has the capability to both read and clear codes.
For a reliable and user-friendly option, consider the CGSULIT SC301 OBD2 reader. This tool is well-regarded for its ease of use and comprehensive features. You can delve deeper into its capabilities by reading a review here. For a visual demonstration and user perspective, you can also find video reviews on our YouTube channel.
Step-by-Step Guide to Clearing OBD2 Codes with a Scanner
While prior experience with an OBD2 scanner can be beneficial, it’s certainly not mandatory. If you’re a complete beginner, don’t worry! We have resources to help you get acquainted with using a code reader. You can explore a dedicated article detailing the basics of OBD2 scanner operation (click here). Additionally, visual learners can benefit from our video tutorials available on our YouTube channel, which provide step-by-step instructions.
Let’s proceed with the process of clearing those OBD2 codes and regaining control of your car’s diagnostics.
1. Locate the OBD2 Port in Your Vehicle
The first step is to find the OBD2 port in your car. This port is your gateway to accessing your vehicle’s computer system. Thankfully, it’s usually located in an easily accessible spot. Common locations include under the dashboard on the driver’s side, often near the steering column, or sometimes beneath the glove compartment on the passenger side. Consult your car’s owner’s manual if you’re having trouble locating it – it will provide the exact location for your specific vehicle model. The OBD2 port is typically trapezoidal in shape with 16 pins.
2. Connect Your OBD2 Code Reader to the Port
Once you’ve located the OBD2 port, take your OBD2 scanner and firmly plug the connector into the port. You should feel a click or a secure connection, ensuring that the scanner is properly seated. Handle the connector and port with care to avoid damaging the pins.
3. Turn On Your Vehicle’s Ignition (Don’t Start the Engine)
Now, turn your car’s ignition to the “ON” position. This is the position right before you would crank the engine to start. You should see the dashboard lights illuminate. Crucially, do not start the engine at this stage. The OBD2 scanner needs power from the car to operate and communicate with the vehicle’s computer, but the engine doesn’t need to be running for this process.
4. Allow the OBD2 Code Reader to Scan for Codes
With the OBD2 scanner connected and the ignition on, the scanner will typically power on automatically. Follow the scanner’s on-screen prompts to initiate a scan. This process allows the scanner to communicate with your car’s computer and retrieve any stored Diagnostic Trouble Codes (DTCs). The scan duration may vary depending on the scanner and your vehicle, but it’s usually a quick process, often taking just a few moments.
5. Read and Understand the Error Codes
Once the scan is complete, the OBD2 scanner will display a list of error codes. You might encounter a single code or multiple codes, depending on the issues your vehicle is experiencing.
This is a critical step: understanding what these codes mean is paramount. Don’t simply clear the codes blindly without knowing the underlying problem. Each code corresponds to a specific issue within your car’s systems.
Most OBD2 scanners come equipped with a built-in DTC library. This allows you to look up the meaning of the codes directly on the scanner itself. Alternatively, you can use your smartphone or computer to search online databases for OBD2 code definitions. Websites like OBD-Codes.com or reputable automotive forums are excellent resources for deciphering error codes.
Important Consideration: Interpreting the error code will inform you about the severity of the problem. A minor, non-critical issue might trigger the check engine light, but so can a serious mechanical fault. Clearing the code without addressing a significant problem is only a temporary fix. The check engine light will likely reappear soon if the underlying issue persists. It’s crucial to address serious problems promptly to prevent further damage and ensure your safety.
6. Navigate the Scanner Menu to Clear the Codes
After you’ve read and understood the error codes, and if you’re confident that the issue is resolved or is minor enough to clear (perhaps after performing a simple fix like tightening a gas cap, which can sometimes trigger a code), proceed to clear the codes.
Navigate through the OBD2 scanner’s menu. Look for options like “Clear Codes,” “Erase Codes,” or “Reset DTCs.” The exact wording may vary slightly depending on your scanner model, but the function will be similar. Select the appropriate option to initiate the code clearing process.
The scanner might display a confirmation prompt, asking if you’re sure you want to clear the codes. Confirm your selection by choosing “Yes” or “OK.”
7. Return to the Main Menu of the OBD2 Scanner
Once you’ve confirmed the code clearing command, allow the scanner to complete the process. It usually takes only a few seconds. After the codes are cleared, use the “Escape” or “Return” button on the scanner to go back to the main menu. This is typically the initial screen you see when the scanner powers on.
8. Disconnect the OBD2 Code Reader from the Port
With the codes cleared and the scanner back at the main menu, you can now disconnect it from the OBD2 port. Carefully pull the connector straight out, again being mindful not to damage the port or the scanner’s connector.
If your OBD2 scanner has a power button, it’s good practice to turn it off before disconnecting it, although many scanners power down automatically when disconnected.
9. Turn Off the Vehicle’s Ignition
Now, turn the ignition key back to the “OFF” position. This turns off the electrical systems of your car.
10. Start the Engine and Check if the Check Engine Light is Off
Finally, start your car’s engine as you normally would. Once the engine is running, check your dashboard. If the code clearing was successful and the underlying issue (if minor) is no longer present, the check engine light should be off.
To further confirm, let the engine run for a few minutes to reach operating temperature. You can also start and stop the engine a few more times. If the check engine light remains off after these steps, you’ve successfully cleared the codes.
Conclusion: Empower Yourself with DIY Car Diagnostics
As you’ve seen, learning how to clear codes on your OBD2 system and turn off the check engine light is a straightforward process. It typically takes just 5 to 10 minutes, depending on your familiarity with your OBD2 scanner and the specific tool you’re using. Once you’ve done it yourself, you’ll understand the convenience and value of having an OBD2 scanner at your disposal. It empowers you to take a proactive role in your car’s maintenance and potentially save money on unnecessary trips to the mechanic for simple code clearing.
However, remember the crucial caveat: clearing codes is not a substitute for addressing the underlying problems. Always make an effort to understand the meaning of the error codes and investigate the potential causes. If the check engine light returns shortly after clearing the codes, it’s a clear indication that a problem persists. In such cases, further diagnosis and repair are necessary. Ignoring persistent issues can lead to more significant problems and costly repairs down the road.
Mastering the skill of clearing check engine lights with an OBD2 scanner is particularly valuable for DIY car repairs. After completing a repair, clearing the codes ensures that the check engine light doesn’t remain illuminated due to the previous issue, giving you confidence that your repair was successful and your vehicle is running smoothly.