Connecting an OBD2 (On-Board Diagnostics II) scanner to your car’s ECU (Engine Control Unit) is a fundamental step in modern automotive diagnostics and performance monitoring. This connection allows you to read diagnostic trouble codes, monitor live engine data, and gain valuable insights into your vehicle’s health. While traditionally straightforward, some car models, like certain Peugeot vehicles, initially presented unique challenges. This guide will walk you through the process of connecting your OBD2 scanner to your ECU, covering both standard connections and solutions for less common scenarios, ensuring a smooth and successful connection.
Understanding OBD2 and ECU Connection
The ECU is the brain of your car’s engine management system, controlling various functions from fuel injection to emissions. OBD2 is a standardized system implemented in most vehicles since the mid-1990s, designed to provide access to this ECU for diagnostic purposes. The OBD2 port, usually located within a few feet of the steering wheel under the dashboard, is the gateway for communication. Typically, connecting an OBD2 scanner is as simple as plugging the device into this port. However, variations in manufacturer implementations can sometimes complicate this process.
Direct OBD2 Connection: The Standard Approach
For many vehicles, connecting an OBD2 scanner is plug-and-play.
- Locate the OBD2 Port: Refer to your vehicle’s manual if you are unsure, but it’s commonly found under the dashboard on the driver’s side.
- Plug in Your OBD2 Scanner: Align the connector of your OBD2 scanner with the port and firmly push it in until it is securely connected.
- Turn on the Ignition: In most cases, you will need to turn your car’s ignition to the “ON” position (without starting the engine) to power the OBD2 port and scanner. Some scanners may also work with the engine running.
- Follow Scanner Instructions: Your OBD2 scanner will have its own operating instructions. Typically, you will navigate through a menu to initiate a connection to the ECU.
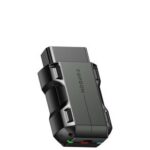
OBD2 adapter and cable for Peugeot e-208
In many modern vehicles, manufacturers have standardized the OBD2 port to be fully compliant, simplifying the connection process. For instance, reports from Peugeot e-208 owners indicate that a software update has enabled standard OBD2 connectivity on these models. This update reroutes the Peugeot diagnostic bus to the standard OBD2 pins, eliminating the need for custom adapters in many cases. If you own a newer vehicle, especially a Peugeot e-208 or similar model, it’s worth checking for software updates from your manufacturer, which might streamline your OBD2 connection experience.
Utilizing an Adapter Cable: For Specific Vehicle Needs
In some instances, a direct OBD2 connection might not work immediately. This can be due to:
- Older Vehicles: While OBD2 is a standard, earlier implementations might have slight variations.
- Manufacturer-Specific Configurations: Some manufacturers might use vendor-specific pins for diagnostic communication, as was initially the case with some Peugeot models before software updates.
- Specialized Diagnostic Needs: Certain advanced diagnostic functions or access to specific vehicle systems might require a modified connection.
In these situations, an adapter cable wired to accommodate the specific vehicle’s pin configuration becomes necessary. For example, for Peugeot e-208 models before the software update, or for users needing to access the Peugeot diagnostic bus directly, a cable wired as follows has been reported to be effective:
Adapter Cable Wiring (Example for Peugeot e-208)
- Pin 1 (Car – Switched 12V): Connect to Pin 16 (OBD Dongle – +12V) – Provides power to the OBD2 scanner when the car is on.
- Pin 3 (Car – CAN High Peugeot): Connect to Pin 6 (OBD Dongle – CAN High J-2284) – Connects the Peugeot CAN High communication line.
- Pin 4 (Car – Chassis Ground, 0V): Connect to Pin 4 (OBD Dongle – Chassis Ground, 0V) – Provides ground connection.
- Pin 8 (Car – CAN Low Peugeot): Connect to Pin 14 (OBD Dongle – CAN Low J-2284) – Connects the Peugeot CAN Low communication line.
Important Considerations When Using an Adapter Cable:
- Verify Compatibility: This specific wiring configuration is based on user experience with 2020-era PSA platform cars (like Peugeot e-208). Do not use this wiring on other vehicle platforms without thorough research and verification. Incorrect wiring can damage your ECU or OBD2 scanner.
- Check Vehicle-Specific Information: Always consult your vehicle’s repair manual or reliable online resources for accurate OBD2 pinout information for your specific make, model, and year.
- Safety First: If you are unsure about wiring or electrical connections, consult a qualified automotive technician.
- Power Source: The example wiring uses switched 12V power, meaning the OBD2 scanner only powers on when the car is on. This prevents battery drain but might limit monitoring capabilities when the car is off (e.g., during DC charging, if the CAN bus is inactive when off).
Conclusion: Connecting to Your ECU with Confidence
Connecting an OBD2 scanner to your ECU is usually a simple process. Start with a direct connection to the OBD2 port. If you encounter issues, especially with vehicles that might have manufacturer-specific configurations, research if a software update has standardized the OBD2 port, as seen with some Peugeot models. If an adapter cable is necessary, proceed with caution, always verifying the correct wiring for your specific vehicle before making any connections. By understanding these methods and prioritizing safety, you can effectively connect to your ECU and unlock valuable diagnostic and performance data from your vehicle.