Keeping your OBD2 scanner updated is crucial for optimal performance and access to the latest vehicle data. Regular updates ensure compatibility with newer car models, expand diagnostic capabilities, and fix potential software bugs. This guide will walk you through the process of updating your OBD2 scanner, troubleshoot common issues, and highlight the importance of keeping your device current.
Checking for Available Updates
Before initiating an update, it’s essential to check if an update is indeed available for your OBD2 scanner. Typically, manufacturers release updates periodically to enhance functionality and vehicle coverage. Here’s how you can check:
- Connect to Your Computer: Use the provided USB cable to connect your OBD2 scanner to your computer. Ensure the connection is secure at both ends.
- Launch the Update Software: Most OBD2 scanner brands offer dedicated update software that you need to install on your computer. Launch this software.
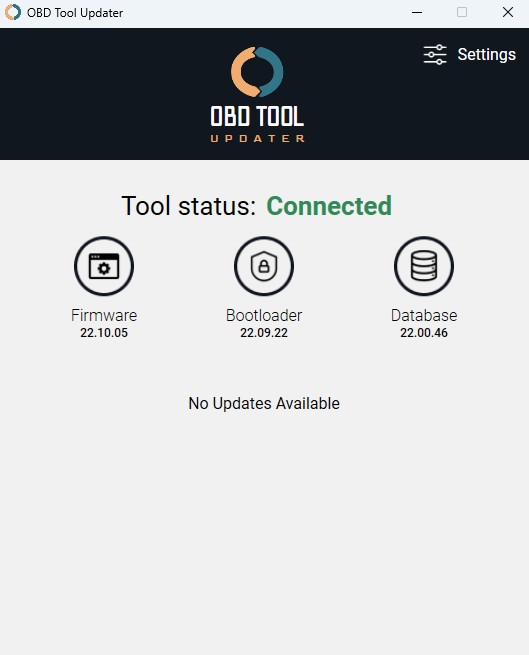
- Check Connection Status: The update software should recognize your connected scanner. Look for a “Connected” status within the software interface. If you encounter connection problems, refer to the troubleshooting tips below.
- Initiate Update Check: Within the software, there’s usually an option to “Check for Updates” or similar. Click this button to allow the software to communicate with the manufacturer’s servers and check for the latest firmware version for your device.
If your scanner is already up-to-date, the software will notify you that “No updates available,” often accompanied by a message similar to the image shown. This indicates your tool is running the latest firmware, and no further action is needed at this time.
Performing the Update
Once the update software confirms that a new update is available for your OBD2 scanner, you can proceed with the update process.
- Ensure Stable Connection: Maintain a stable USB connection between your scanner and computer throughout the update. Avoid any accidental disconnections.
- Initiate the Update: The update software will display a button, usually labeled “Update Now” or “Install Update.” Click this button to begin the firmware update process.
- Wait for Completion: The update process can take some time, potentially up to 25 minutes, depending on the update size and your internet speed. A progress bar is typically displayed within the software to show the update status. Crucially, do not disconnect the scanner or turn off your computer during the update. Interrupting the process can cause serious issues with your scanner’s firmware.
- Confirmation: Once the update is complete, the software will display a confirmation message. You can then safely disconnect your OBD2 scanner and start using it with the latest updates.
Troubleshooting Common Update Issues
Encountering problems during the OBD2 scanner update process is not uncommon. Here are solutions to some frequent issues:
Connection Problems
If the update software fails to recognize your scanner and displays a “Not Connected” status, try these steps:
- Reconnect USB Cable: Unplug the USB cable from both the scanner and computer, then firmly replug it, ensuring a secure connection.
- Try Different USB Port: Switch to a different USB port on your computer. Sometimes, certain USB ports may have connectivity issues.
- Use a New USB Cable: A faulty USB cable can also cause connection problems. Try using a different, known-good USB cable.
Update Errors and Stuck Updates
If you encounter an “Update Error” message or the update progress bar gets stuck for an extended period (e.g., at 5% for more than 20 minutes), these steps may help:
- Re-attempt the Update: Reconnect your scanner and try running the update process again. Temporary internal errors can sometimes cause update failures, and retrying might resolve the issue.
- Repair Update Software: If the update consistently gets stuck, the issue might be with an outdated version of the update software itself. Re-download the latest version of the update software from the manufacturer’s website. During installation, you may be prompted with options like “Modify,” “Replace,” or “Repair.” Choose the “Repair” option to update the existing software installation to the newest version without fully reinstalling.
Issues Downloading the Update Software
If you are unable to download or install the OBD Tool Updater application itself, consider these solutions:
- Reboot Your Computer: Restarting your computer can resolve temporary software conflicts that might be preventing the download or installation.
- Disable Antivirus Temporarily: In rare cases, antivirus software might interfere with the download or installation process. Temporarily disable your antivirus software and try downloading/installing again. Remember to re-enable your antivirus software afterward.
- Contact Customer Support: If none of the above steps work, reach out to the OBD2 scanner manufacturer’s customer support team. They can provide specific guidance and assistance tailored to your scanner model and software.
Conclusion
Regularly updating your OBD2 scanner is a simple yet vital step to ensure you’re getting the most out of your diagnostic tool. By following these steps and troubleshooting tips, you can keep your scanner running smoothly, compatible with the latest vehicles, and equipped with the newest features and data. Make it a habit to check for updates periodically to maintain peak performance and stay ahead of potential diagnostic challenges.