For car enthusiasts and developers alike, tapping into the wealth of data your vehicle generates can unlock a world of possibilities. Imagine building your own custom dashboard, monitoring engine performance in real-time, or even creating sophisticated diagnostic tools. The key to this automotive data is OBD2 (On-Board Diagnostics II), and with the versatility of C#, you can readily access and utilize this information for exciting projects.
This article explores how you can leverage C# to interface with your car’s OBD2 system, specifically using an ELM327 adapter. We’ll delve into the basics of OBD2 communication, walk through the initialization process with C# code examples, and highlight essential tips for your Obd2 C# development journey.
Understanding OBD2 and ELM327 for Data Access
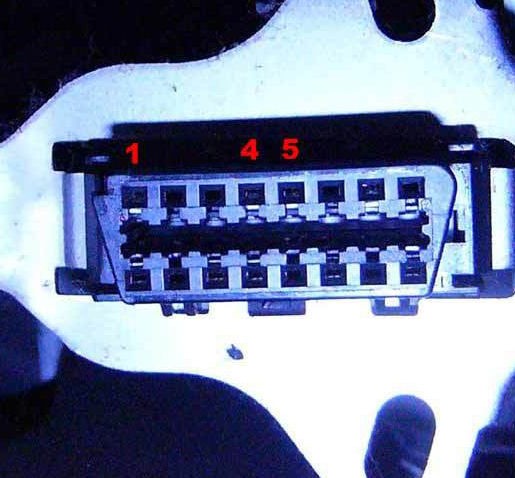
Modern vehicles are equipped with an OBD2 port, a standardized interface that provides access to a wealth of engine and vehicle data. This port, typically a 16-pin connector, is what mechanics use to diagnose car issues. But it’s also your gateway to real-time data for your own projects.
Image: A close-up view of a standard 16-pin OBD2 port, the gateway to vehicle diagnostics and data access.
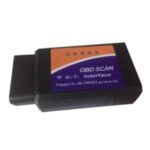
The most straightforward way to interact with the OBD2 port from your computer is using an ELM327 adapter. This handy device acts as a bridge between your car’s OBD2 system and your PC, typically connecting via USB and presenting itself as a virtual COM port. Think of it as a translator, allowing your computer to “speak” the language of your car. ELM327 adapters communicate using AT commands, a command set similar to those used in modems, making interaction relatively simple.
Image: An ELM327 OBD2 adapter connected to a car’s OBD2 port, illustrating the physical connection for data retrieval.
C# and Serial Communication: Talking to Your Car
To start retrieving data, you’ll need to establish serial communication with the ELM327 adapter using C#. This involves opening the virtual COM port created by the adapter and sending commands. Here’s a basic C# code snippet demonstrating the initialization process:
SerialPort serialPort1 = new SerialPort();
serialPort1.PortName = comPort; // Replace comPort with your COM port name

try
{
    serialPort1.Open();
}
catch (Exception excep)
{
    // Handle exception if port fails to open
}

send_data("ATZ"); // Reset ELM327
Thread.Sleep(2000);
send_data("ATE0"); // Disable echo
Thread.Sleep(1000);
send_data("ATL0"); // Disable line feeds
Thread.Sleep(500);
send_data("ATH1"); // Enable headers
Thread.Sleep(500);
send_data("ATSP 5"); // Set protocol (ISO 15765-4 CAN 11bit 500kbps) - May vary for your car
Thread.Sleep(500);
send_data("0100"); // Request supported PIDs to test connection
Thread.Sleep(500);

// ... (send_data function implementation would be needed)
This code snippet initializes the serial port and sends a series of AT commands to the ELM327. Let’s break down these commands:
ATZ: Resets the ELM327 adapter, ensuring a clean start.ATE0: Disables command echoing, simplifying response parsing.ATL0: Disables line feeds in responses, again for easier processing.ATH1: Enables headers in responses, crucial for identifying data parameters.ATSP [protocol]: Sets the communication protocol.ATSP 5in the example is a common protocol (ISO 15765-4 CAN 11bit 500kbps), but you might need to experiment with protocols 1 through 5 (and potentially others) to find the correct one for your vehicle. Tools like PuTTY can be helpful for interactive testing of these commands.0100: This is an OBD2 command (PID request) to query supported PIDs (Parameter IDs). A successful response confirms communication with the car’s ECU (Engine Control Unit).
Requesting and Interpreting OBD2 Data: PIDs
OBD2 data is organized using PIDs. Each PID is a hexadecimal code that represents a specific parameter, such as engine RPM, vehicle speed, coolant temperature, and more. To request data, you send a PID code to the ELM327, and it responds with the corresponding value.
For example, to request engine RPM (PID 010C), you would send the command "010C". The ELM327 might respond with something like "010C001B". Here, 010C is the PID identifier, and 001B is the data in hexadecimal format. The data part needs to be interpreted according to a formula specific to each PID. For RPM (PID 010C), the formula is:
RPM = ((A * 256) + B) / 4
Where A is the first byte of the data (00 in our example) and B is the second byte (1B). Converting hexadecimal 1B to decimal gives 27. Therefore:
RPM = ((0 * 256) + 27) / 4 = 6.75 RPM
(Note: This is likely an idle RPM value or a simulated example).
A comprehensive list of standard OBD2 PIDs and their formulas can be found on the Wikipedia page for OBD-II PIDs and other online resources. Keep in mind that not all PIDs are supported by every vehicle. Standard PIDs like speed and RPM are widely supported, but more specific sensors might vary.
Tips for Smooth OBD2 and C# Development
- Threading is Key: When working with serial communication and OBD2, using threads is crucial. You need to allow time for the ELM327 to process commands and for data to be transmitted. Introduce delays (using
Thread.Sleepas shown in the example) between commands to ensure reliable communication. - OBDSim: Your Virtual Car: Before connecting to your actual car, consider using an OBD2 simulator like
obdsim-windows. This program creates a virtual OBD2 port on your computer, allowing you to test your C# code and communication logic without needing a physical vehicle. This is invaluable for development and debugging. - Explore Further PIDs: Once you have the basics working, delve deeper into the world of OBD2 PIDs. Experiment with different PID requests to access various engine and vehicle parameters. Consult online PID lists and your vehicle’s documentation (if available) to discover what data you can retrieve.
This article provides a starting point for your journey into OBD2 data access with C#. While not a step-by-step tutorial, it equips you with the foundational knowledge and code examples to begin building your own custom automotive applications. With C