Whether you’re a seasoned auto mechanic or a car owner keen on understanding your vehicle’s inner workings, grasping the Obd2 Drive Cycle is essential. This process is crucial for verifying car repairs and ensuring your vehicle passes emissions testing. Especially if you’re using an OBD2 scanner for a car diagnostic test at home, understanding the drive cycle is indispensable.
Understanding the OBD2 Drive Cycle
In simple terms, an OBD2 drive cycle is a series of specific driving conditions that allows your vehicle’s onboard computer, known as the Powertrain Control Module (PCM), to run self-diagnostic tests. These tests are designed to check the functionality of various emission control systems. Completing a drive cycle successfully resets the emission monitors, which is necessary after repairs or when preparing for an emissions test. Think of it as a health check for your car’s emission system, ensuring everything is operating correctly and efficiently.
Why is this important? Modern vehicles are equipped with sophisticated emission control systems to minimize pollutants released into the environment. The PCM continuously monitors these systems, and when a problem is detected, it triggers the check engine light and stores Diagnostic Trouble Codes (DTCs). After addressing the issue and clearing these codes, the drive cycle is performed to confirm the repair and ensure that all emission monitors are in a “ready” state. This “ready” status is often a prerequisite for passing emissions inspections.
Performing an OBD2 Drive Cycle: Step-by-Step Instructions
Executing a drive cycle might seem daunting, but it’s a straightforward process. However, it requires careful preparation and adherence to specific steps. Keep in mind that while the general procedure is similar across vehicles, slight variations may exist depending on your car’s manufacturer, model, and year. Always consult your vehicle’s owner’s manual for the most accurate and model-specific instructions.
Here are the general steps for performing a basic OBD2 drive cycle:
-
Clear Existing OBD II Error Codes: Before initiating a drive cycle, it’s crucial to clear all existing OBD II error codes using an OBD2 scanner. The drive cycle cannot commence until this step is completed, as the presence of old codes may interfere with the process.
-
Fuel Level Check: Ensure your fuel tank is between 30% and 70% full. This fuel range is generally recommended for the drive cycle to execute correctly.
-
Battery and Alternator Health: Verify the health of your battery and alternator. A robust and stable electrical system is vital for a successful drive cycle. Avoid jump-starting your vehicle, as it can disrupt the process.
-
Cold Start and Soak Time: Allow your vehicle to sit undisturbed for at least eight hours prior to starting the drive cycle. During this “soak time,” ensure the key is not in the ignition and the car doors remain locked. This allows the engine to cool down completely, which is necessary for certain monitors to run their tests.
-
Initial Idle: Start your car and let it idle in park or neutral for two to three minutes. Do not engage any accessories during this period.
Image alt text: Car engine idling during OBD2 drive cycle, showing dashboard and steering wheel.
-
Accessory Engagement Idle: Turn on your headlights, heater, and defrosters for a minimum of two minutes while the vehicle is still idling. This step is designed to test the electrical system under load.
-
Moderate Acceleration and Deceleration: Drive to a location where you can safely reach 25 mph. At each stop sign or traffic light, make slow, complete stops. Gradually and steadily increase your speed to 35 mph, and then to 45 mph. Avoid aggressive acceleration or braking during this phase.
-
Highway Driving with Cruise Control: Find a freeway on-ramp and merge into traffic smoothly, accelerating normally. Stay in the slow lane and steadily increase your speed to 55 mph or 60 mph. Engage cruise control to maintain a constant speed for at least five miles. This steady state driving is crucial for certain monitors to complete their evaluations.
Image alt text: Car driving on a highway during OBD2 drive cycle, maintaining steady speed with cruise control.
-
Deceleration and Coast Down: Locate a reasonably long exit ramp and allow your vehicle to coast down to a slower speed without using the brakes, if possible. You can use the brake gently at the very end of the ramp if needed for safety.
-
Repeat Stop-and-Go and Final Idle: Return home or to your mechanic, repeating step number seven (moderate acceleration and deceleration with stops). Upon arrival, put your vehicle in park and let it idle for one to two minutes to conclude the drive cycle.
Duration of an OBD2 Drive Cycle
While the preparation for a drive cycle, including the engine soak time, takes approximately eight hours, the active drive cycle test itself is relatively short. In total, a basic OBD2 drive cycle typically takes around 30 minutes to complete, with approximately 20 minutes of actual driving involved. This relatively short duration makes it a convenient process to incorporate into your vehicle maintenance routine.
Post-Drive Cycle OBD II Scan and Next Steps
After completing the OBD2 drive cycle, the next step is to perform an OBD II scan using your OBD2 scanner. This scan will reveal whether your vehicle has successfully reset the emission monitors and is ready for an emissions test. It also helps confirm the effectiveness of any repairs you’ve made.
If the scan shows all monitors are in a “ready” state and no new DTCs have appeared, your vehicle has likely passed the drive cycle successfully. However, if new OBD2 codes emerge, it indicates that there may still be underlying issues requiring attention.
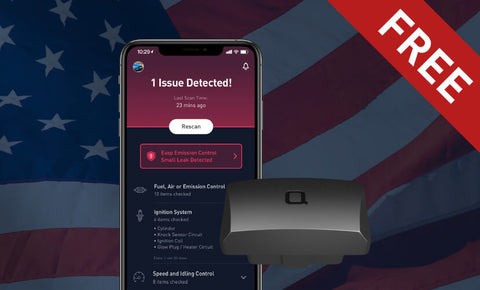
In such cases, tools like nonda’s Smart Vehicle Health Monitor paired with the ZUS app can be invaluable. These tools provide in-depth diagnostics of OBD2 codes and often offer guided repair solutions, including videos, to assist with DIY fixes. This can potentially save you significant costs on mechanic fees and ensure your vehicle is properly maintained.
For further assistance in troubleshooting specific DTC codes, resources like the nonda Auto DIY Center YouTube channel offer numerous videos detailing DIY repair methods for common codes, such as P0420 (Catalyst System Efficiency Below Threshold), P0171 (System Too Lean), P0456 (EVAP System Leak), P0300 (Cylinder Misfire), P0400 (EGR Flow Malfunction), and P0128 (Coolant Thermostat Malfunction).
Start Your DIY Diagnostics Today
Performing an OBD2 drive cycle and utilizing an OBD2 scanner empowers you to take control of your vehicle’s health. By understanding and implementing these simple steps, you can proactively maintain your car, address potential issues early, and ensure it’s running efficiently and cleanly. Explore the benefits of DIY car diagnostics and consider using a FREE OBD2 device and app from nonda to get started.
 OBD2 Scanner