Integrating your car’s On-Board Diagnostics (OBD2) system with your smart home setup opens up a world of possibilities for vehicle monitoring and automation. Imagine receiving real-time data about your car’s performance, fuel consumption, or even potential issues directly within your Home Assistant dashboard. This level of integration is now achievable with devices like WiCAN, a versatile tool that bridges the gap between your vehicle’s CAN bus and your Home Assistant ecosystem.
This guide will walk you through the process of connecting WiCAN to Home Assistant, leveraging the power of MQTT and Node-RED to create a seamless Obd2 Home Assistant experience. By following these steps, you’ll be able to monitor various aspects of your vehicle directly from your smart home platform, paving the way for advanced automations and insightful data analysis.
Prerequisites
Before diving into the integration process, ensure you have the following components ready:
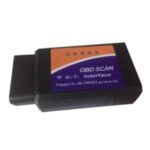
- WiCAN Device: This is the core hardware that interfaces with your car’s CAN bus and transmits data wirelessly.
- Home Assistant: A running instance of Home Assistant is essential to centralize and visualize your vehicle data.
- MQTT Broker (Mosquitto): MQTT (Message Queuing Telemetry Transport) acts as the communication protocol between WiCAN and Home Assistant. Mosquitto is a popular MQTT broker add-on for Home Assistant.
- Node-RED Add-on for Home Assistant: Node-RED is a flow-based visual programming tool that simplifies the creation of automations and data processing within Home Assistant.
- WiCAN Firmware and Example Flow: You’ll need the specific firmware for WiCAN and the example Node-RED flow designed for Home Assistant integration, readily available from the WiCAN developer.
Step-by-Step Guide to Connect WiCAN to Home Assistant
Follow these steps to establish a connection between your WiCAN device and Home Assistant, enabling you to monitor your car’s OBD2 data within your smart home environment.
1. Install Mosquitto Broker Add-on
Mosquitto broker serves as the central hub for MQTT communication. If you haven’t already, install the Mosquitto Broker add-on within your Home Assistant instance. This can be done through the Home Assistant Supervisor panel, under the Add-on Store section. Search for “Mosquitto Broker” and install it. Refer to the official Mosquitto broker add-on documentation for detailed instructions and configuration options if needed.
2. Create Home Assistant User for WiCAN
For security and access control, it’s recommended to create a dedicated Home Assistant user account specifically for WiCAN. This account will be used for MQTT authentication. Navigate to your Home Assistant settings, then to “People & Zones,” and create a new user. Note down the username and password for this new user, as you’ll need them later to configure WiCAN’s MQTT settings.
3. Connect to WiCAN Access Point
Power up your WiCAN device and allow it to boot. WiCAN typically operates as a Wi-Fi access point initially. Use a computer or smartphone to connect to the Wi-Fi network broadcasted by WiCAN. The network name usually follows a pattern like “WiCAN_xxxxxxxxxxxx,” where “xxxxxxxxxxxx” is a unique identifier for your device.
4. Configure WiCAN Mode and WiFi
Once connected to WiCAN’s access point, open a web browser and navigate to http://192.168.80.1/. This will take you to WiCAN’s configuration interface. Within the web interface, locate the “Mode” setting and change it to “Ap+Station.” This mode allows WiCAN to act as both an access point (for initial configuration) and a Wi-Fi station (to connect to your home network). Next, enter your home Wi-Fi network’s SSID (network name) and password in the provided fields. This will enable WiCAN to connect to your home network and communicate with Home Assistant.
5. Enable and Configure MQTT
In the WiCAN web interface, find the MQTT settings section. Enable MQTT functionality. You’ll need to fill in the MQTT broker details. For a local Home Assistant setup using the Mosquitto add-on, the broker IP address is likely your Home Assistant’s IP address (or localhost if WiCAN and Home Assistant are on the same network segment). Enter the username and password of the Home Assistant user you created in step 2 for MQTT authentication. These credentials will allow WiCAN to securely publish MQTT messages to your Home Assistant broker.
6. Install Node-RED Add-on
Node-RED is a powerful tool for creating automations and handling data within Home Assistant. Install the Node-RED add-on from the Home Assistant Supervisor panel, similar to how you installed Mosquitto Broker. Search for “Node-RED” and install the add-on provided by Home Assistant add-ons.
7. Import Node-RED Flow
Download the “wican_example_flow.json” file, which contains a pre-built Node-RED flow designed to process WiCAN data for Home Assistant. This file is usually provided by the WiCAN developer. Once downloaded, open the Node-RED add-on in Home Assistant. In the Node-RED interface, click the menu button (usually three horizontal lines) and select “Import” -> “Nodes.” Choose the “wican_example_flow.json” file you downloaded and import it. Remember to replace the placeholder device_id within the imported flow with your actual WiCAN device ID.
8. Configure MQTT Broker in Node-RED
Within the imported Node-RED flow, locate the “subsection Node” (likely named something similar to “MQTT in” or “MQTT subscribe”). Double-click on this node to edit its properties. You’ll need to configure the MQTT server details here. Similar to step 5, enter your MQTT broker’s IP address (your Home Assistant’s IP) and the MQTT user credentials you created in step 2. This ensures that Node-RED can connect to the MQTT broker and receive messages published by WiCAN.
9. Deploy Node-RED Flow
After configuring the MQTT broker details in Node-RED, click the “Deploy” button in the top right corner of the Node-RED interface. This will activate the imported flow, enabling Node-RED to start listening for MQTT messages from WiCAN and processing them.
10. Configure MQTT Sensors in configuration.yaml
To make your vehicle data accessible as sensors within Home Assistant, you need to define them in your configuration.yaml file. Open your configuration.yaml file (usually accessible through the Home Assistant File editor or Studio Code Server add-ons). Add the following lines to configure MQTT sensors. Modify the state_topic values (CAR1/Amb_Temp, CAR1/Fuel_Level) to match the topics used in your WiCAN setup and Node-RED flow. Adjust the name, unit_of_measurement, and value_template according to the specific OBD2 data you want to monitor.
mqtt:
  sensor:
    - name: "Amb Temp"
      state_topic: "CAR1/Amb_Temp"
      unit_of_measurement: "°C"
      value_template: "{{ value_json.amb_temp }}"
    - name: "Fuel Level"
      state_topic: "CAR1/Fuel_Level"
      unit_of_measurement: "%"
      value_template: "{{ value_json.fuel_level }}"
Node-RED flow editor interface displaying a WiCAN example flow for integrating OBD2 data with Home Assistant, showcasing the visual programming approach for home automation.
11. Restart Home Assistant
After modifying your configuration.yaml file, you need to restart Home Assistant for the changes to take effect. Navigate to the Home Assistant “Developer Tools” section, then to the “YAML” tab, and click the “Restart” button.
12. Add Entities to Dashboard
Once Home Assistant restarts, your newly configured MQTT sensors should be available as entities. You can now add these entities to your Home Assistant dashboards to visualize your vehicle data in real-time. Go to your Home Assistant dashboard, enter edit mode, and add new “Entity” cards. Search for the sensor names you defined in your configuration.yaml (e.g., “Amb Temp,” “Fuel Level”) and add them to your dashboard.
Conclusion
By following these steps, you’ve successfully integrated your WiCAN device with Home Assistant, creating a powerful obd2 home assistant system. You can now monitor your vehicle’s OBD2 data directly within your smart home platform, opening up possibilities for vehicle performance tracking, custom alerts based on vehicle parameters, and even more advanced home automations triggered by your car’s status. Explore the capabilities of Node-RED and Home Assistant further to tailor your setup and unlock the full potential of your connected vehicle data.