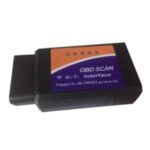
The OBD2 interface has revolutionized car diagnostics, allowing vehicle owners and professionals to access a wealth of information about their car’s health and performance. Among the various OBD2 interfaces available, the V1.5 stands out for its compatibility and reliability. However, to fully utilize your OBD2 V1.5 interface with your Windows computer, installing the correct driver is crucial. This guide provides a detailed, SEO-optimized walkthrough on how to install your Obd2 Interface V1.5 Driver on Windows, ensuring a smooth connection and optimal performance for your car diagnostics needs.
Understanding and correctly installing your obd2 interface v1.5 driver is the first step in using diagnostic software to read fault codes, monitor live data, and perform various car maintenance tasks. Without the proper driver, your computer will not be able to communicate with the OBD2 interface, rendering your diagnostic efforts futile. This article will guide you through the process, ensuring you can seamlessly connect your OBD2 V1.5 interface and start diagnosing your vehicle.
Step-by-Step Guide to Install OBD2 Interface V1.5 Driver on Windows
Installing your obd2 interface v1.5 driver on Windows can be straightforward, but it sometimes requires a few troubleshooting steps. Follow these instructions to ensure a successful installation:
-
Connect Your OBD2 V1.5 Interface: Begin by plugging your ELM327 USB OBD2 interface into a USB port on your Windows laptop or desktop.
-
Automatic Driver Installation (Initial Check): Windows will often attempt to automatically install the drivers. Let this process complete.
-
Verify Driver Installation in Device Manager: To check if the driver installation was successful, you need to access the Device Manager.
- Search for “Device Manager” in the Windows search bar and open it.
- In Device Manager, look for “Ports (COM & LPT)” and expand this section.
You are looking for your OBD2 interface listed here, typically as a “USB-Serial CH340”, “FT232R USB UART”, “USB-to-Serial”, “USB Serial Port”, “USB2.0-Serial”, or “Silicon Labs CP210x USB to UART Bridge”.
-
Check for Yellow Exclamation Marks: A crucial step is to check for any yellow exclamation marks next to the devices listed under “Ports (COM & LPT)”. A yellow mark indicates a problem with the driver installation and means your obd2 interface v1.5 driver is not correctly installed.
-
If there are no yellow marks: Congratulations! Your obd2 interface v1.5 driver is likely installed correctly. You should now be able to use your OBD2 software to connect to your car.
-
If there are yellow marks: This indicates that the automatic driver installation has failed, and you need to manually install the drivers. Proceed to the next steps.
-
-
Manual Driver Installation Using Driver Packs: If you encounter a yellow exclamation mark, you will need to manually install the obd2 interface v1.5 driver. We have compiled driver packs to help you with this process.
Driver Pack 1: Download Driver Pack 1
- This pack is for CP210x USB to UART Bridge drivers.
- If you have a 64-bit version of Windows, run
CP210xVCPInstaller_x64.exe. - For 32-bit Windows, run
CP210xVCPInstaller_x86.exe.
Driver Pack 2: Download Driver Pack 2
- This pack is for Prolific USB-to-Serial drivers.
Driver Pack 3: Download Driver Pack 3
- This is for FTDI drivers.
Driver Pack 4: Download Driver Pack 4
- For CH340 USB drivers, commonly used with ELM327 interfaces.
Driver Pack 5 (Prolific Driver – Important for Some Systems): Download Driver Pack 5
-
Important Installation Steps for Driver Pack 5:
a. Move the downloaded, unextracted folder to your Desktop.
b. Right-click on “ser2pl” (the icon with a gear) and select “Install”.
c. Connect your ELM327 cable, and then go to Device Manager again.
d. Find “Prolific” with the yellow mark, right-click, and choose “Update Driver Software”.
e. Select “Browse my computer for driver software”.
f. Choose “Let me pick from a list of device drivers on my computer”.
g. Uncheck “Show compatible hardware”.h. Select “Prolific driver version 3.3.2.102” and install.
Driver Pack 6 (Total Car Diagnostics ELM327 Driver Package): Download Driver Pack 6
- Steps for Driver Pack 6:
a. Download and extract the Driver Pack 6.
b. Run “InstallUSB.exe”.
c. Connect your cable and check Device Manager for yellow marks.
-
Alternative Manual Driver Update: If the driver packs don’t resolve the yellow mark, you can try manually pointing Windows to the driver folder.
- Right-click on the device with the yellow mark in Device Manager.
- Select “Update Driver Software”.
- Choose “Browse my computer for driver software”.
- Browse to the folder where you extracted Driver Pack 6 (or any other driver pack). Ensure “Include subfolders” is checked.
- Click “Next”.
- If you get a warning, choose “Install this driver software anyway”.
- After installation, check if the yellow mark is gone. If another yellow mark appears under “Other devices” or “Unknown Device”, repeat these steps for that device as well.
Troubleshooting Common Driver Issues
Even after trying these steps, you might encounter a “Code 10 error” next to “Prolific USB-to-Serial” in Device Manager. This is a common issue, and there’s a specific fix for it.
- Code 10 Error Fix: Click here for Code 10 Error Solution for a dedicated guide to resolve this specific problem.
If you are still facing issues after trying all these steps, it’s essential to consider other potential problems.
Verifying Your OBD2 Interface V1.5 and Driver Installation
Once you believe you have correctly installed your obd2 interface v1.5 driver, it’s important to verify that everything is working as expected before attempting to diagnose your car.
-
Physical Interface Check: Ensure your ELM327 OBD2 interface is functioning correctly. When you plug the USB cable into your computer, the lights on the interface should flash briefly and then typically settle to a single red power light. If the lights do not flash at all, or only the red light is constantly on without an initial flash, this could indicate a faulty interface.
-
Using Test Software (EasyOBD): A quick way to test if your obd2 interface v1.5 driver and interface are working correctly with Windows is to use free OBD2 test software like EasyOBD.
- Step 1: Download and install EasyOBD Test Software. Do not launch it yet.
- Step 2: Connect your ELM327 USB OBD2 interface to your laptop and your car’s OBD2 port (usually located under the dashboard).
- Step 3: Turn your car’s ignition to the “ON” position (the position just before starting the engine, where dashboard lights are illuminated).
- Step 4: Launch EasyOBD. The software should automatically attempt to connect to your interface and car.
EasyOBD will perform a series of checks. If the first five lines of the test results are GREEN, it indicates that your obd2 interface v1.5 driver is correctly installed and communicating with your car. You are now ready to use more advanced OBD2 diagnostic software.
If any of the first five lines are RED in EasyOBD, it suggests that there is still an issue with the driver installation or interface communication. In this case, revisit the driver installation steps or consider further troubleshooting.
Conclusion
Installing your obd2 interface v1.5 driver correctly is a fundamental step in utilizing OBD2 diagnostics for your vehicle. By following this comprehensive guide, you should be able to successfully install the necessary drivers on your Windows system and verify the connection. Proper driver installation ensures seamless communication between your computer, your OBD2 V1.5 interface, and your car, empowering you to perform effective vehicle diagnostics and maintenance. Remember to always prioritize downloading drivers from reputable sources to ensure the safety and stability of your system.