Converting your BMW E36 M3 from OBD2 to OBD1 engine management can seem like a daunting task, often underestimated as a simple “electronics swap”. However, with meticulous planning and the right knowledge, this performance-enhancing modification is achievable. This guide, based on real-world experience and technical expertise, will walk you through the process, focusing on the crucial role of the Obd2 To Obd1 Harness and other essential components.
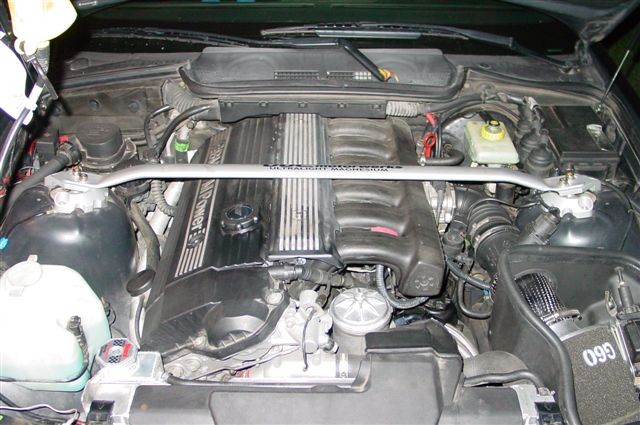
Before diving in, let’s visualize the starting point.
This conversion is typically performed on OBD2-equipped BMWs, like the ’99 M3 with S52 engine and EWS (Electronic Immobilization System), to leverage the advantages of OBD1 engine management. This guide utilizes components sourced from an OBD1 325i, including the engine harness and the red-label 413 ECU, a popular choice for its non-EWS origins.
Here’s a list of the essential parts you’ll need for a successful OBD2 to OBD1 conversion:
- OBD1 Engine Harness: The backbone of the conversion, facilitating communication with the OBD1 ECU.
- OBD1 ECU (preferably 413 “red label”): The brain of the system, ideally from a non-EWS vehicle to simplify integration.
- OBD1 Performance Chip: For optimized engine tuning and performance gains.
- OBD1 Intake Manifold: Known for superior airflow compared to OBD2 manifolds.
- OBD1 Fuel Rail: Required to accommodate the OBD1 fuel system configuration.
- OBD1 Crank Position Sensor: Different mounting location necessitating the OBD1 sensor.
- OBD1 Cam Position Sensor: Essential for OBD1-specific engine timing.
- OBD1 Knock Sensors (x2): For engine protection, OBD1 specification is required.
- OBD1 Oxygen Sensor: OBD1 systems typically use a single pre-catalyst sensor.
- OBD1 HFM (Hot-Film Air Mass Meter): Matches the OBD1 ECU requirements.
- OBD1 Main Engine Coolant Hose: Due to differences in coolant pipe design.
- OBD1 Throttle Boot: To connect the OBD1 intake manifold to the throttle body.
- OBD1 Throttle Body (optional): Simplifies throttle body integration, though OBD2 can be adapted.
- OBD1 Valve Cover and Coil Packs (optional): Primarily for aesthetic and wiring harness routing considerations.
While conceptually straightforward, the OBD2 to OBD1 conversion involves numerous intricate details. Let’s delve into each step to ensure a smooth and successful transformation.
1. Valve Cover and Coil Pack Considerations
The OBD2 valve cover is not designed for OBD1 harness routing, as OBD2 wiring enters from the passenger side, while OBD1 enters from the driver’s side. You have two main choices: retain your OBD2 valve cover and coil packs or switch to an OBD1 valve cover with OBD1 coil packs. Both coil versions are compatible with the OBD1 harness. Choosing to keep the OBD2 valve cover necessitates minor modification, typically using a Dremel tool, to accommodate the OBD1 wiring.
2. Vanos Solenoid Wiring
The OBD2 Vanos solenoid wire connector is shorter than its OBD1 counterpart. To address this, you can either replace it with an OBD1 solenoid or extend the OBD2 solenoid wiring. A practical solution for extending the wiring is utilizing BMW part # 12-52-2-274-971, a transmission harness originally designed for backup lights, which features identical connectors and is perfectly suited for extending the Vanos solenoid wiring.
3. Coolant Pipe Adaption
Significant differences exist in the main coolant pipe connecting to the timing cover between OBD1 and OBD2 systems. OBD2 employs a fixed metal pipe with sealant, while OBD1 uses a rubber hose connected to an aluminum neck. You have two options: replace the OBD2 timing cover with an OBD1 version, or use a coolant pipe adapter. Coolant pipe adapters, available from Bimmerworld, Active Autowerkes, or Turner Motorsport, are a cost-effective solution. This adapter, secured with JB Weld within the OBD2 timing case cover, allows for the connection of the OBD1 coolant hose using a hose clamp.
4. Intake Manifold Upgrade: Unleashing Performance
A key performance benefit of the OBD1 conversion lies in the intake manifold. The OBD1 M50 intake manifold boasts superior airflow compared to OBD2 (M52/S52) manifolds. This manifold is a mandatory component for the conversion. The OBD1 manifold directly bolts onto M52/S52 cylinder heads without requiring modifications. Notably, it includes an air temperature sensor and a vacuum port for the fuel pressure regulator on its underside, near the firewall.
5. Throttle Body Compatibility and Solutions
While you can reuse your OBD2 throttle body, an adapter is necessary for proper gasket sealing. The OBD1 throttle body features a flat mating surface, clamping to a gasket on the OBD1 intake manifold. Conversely, the OBD2 throttle body has a gasket within it, clamping to a flat surface on the OBD2 intake manifold. Solutions include using an adapter plate placed between the OBD2 throttle body and OBD1 manifold, or employing an extended gasket to directly clamp the OBD2 throttle body to the OBD1 intake manifold. Opting for an OBD1 throttle body eliminates the need for adapters altogether.
6. Coolant Temperature Sender Configuration
OBD2 systems utilize a single coolant temperature sender on the cylinder head, whereas OBD1 systems employ two. You can splice the OBD2 wiring harness and use the OBD2 plug connector to connect to the single OBD2 sender. Alternatively, a cleaner, plug-and-play solution is the coolant temperature sender wiring adapter from Turner Motorsport.
7. Crank Position Sensor Relocation
The OBD2 crank position sensor resides on the engine block near the starter motor. The OBD1 sensor, however, is located on the timing cover, mounted on a circular tab with a 6mm Allen bolt. You must use an OBD1 crank position sensor for this conversion. The OBD2 sensor can be left in place to plug the hole.
8. Fuel Line Modifications for OBD1 Fuel Rail
The fuel delivery systems differ significantly between OBD2 and OBD1. OBD2 fuel rails have both fuel lines connecting at the rear, with the fuel pressure regulator located under the car, near the fuel filter. OBD1 fuel rails have the supply line at the front and the return line at the rear, with the fuel pressure regulator integrated into the fuel rail itself. The OBD1 fuel rail is essential for the conversion, necessitating fuel line modifications. This involves removing the OBD2 fuel pressure regulator and routing new 8mm fuel lines to the OBD1 fuel rail. Bridge the gap left by the OBD2 regulator with new fuel lines, connecting the fuel filter feed to the front of the OBD1 rail and the return line to the existing return line under the car. Connect the OBD1 fuel pressure regulator vacuum line to the one-way valve on the OBD1 intake manifold.
9. PCV System Adaptations
The Positive Crankcase Ventilation (PCV) systems differ between OBD2 and OBD1. If retaining the OBD2 valve cover, you can keep the OBD2 PCV setup, devising a method to mount the breather valve under the intake manifold. If using an OBD1 valve cover, utilize the OBD1 breather valve, which clips onto the crankcase vent port and connects to the ICV and dipstick. A third option is a breather catch can setup. A simple solution involves using a short length of 1” rubber hose to connect the OBD2 valve cover to the OBD1 breather valve, joining the oil drain line to the dipstick with a barbed connector.
10. Idle Control Valve (ICV) – Reusing OBD2 Components
The OBD1 and OBD2 Idle Control Valves (ICVs) are identical and interchangeable. You can reuse your OBD2 ICV. Ensure you acquire the correct connector and hoses for the ICV-to-intake manifold connection and the ICV-to-throttle boot vacuum port hose.
11. Fuel Tank Breather Valve – Maintaining OBD2 System
Similar to the ICV, the OBD2 fuel tank breather valve can be reused. You’ll need fittings to connect the vacuum hose to the throttle boot vacuum port. Hardware store barb fittings (3/8” and 5/8”) can be utilized to create a connection to the throttle body vacuum port.
12. Oxygen Sensors and Secondary Air Pump – Streamlining Emissions
OBD2 systems incorporate a secondary air pump, an emission control system eliminated during the OBD1 conversion. The conversion also removes the two pre-catalyst and two post-catalyst OBD2 oxygen sensors. Remember to plug the O2 sensor ports with M18 bolts (Toyota Land Cruiser oil pan drain bolts are a suitable match). OBD1 management uses only a single pre-catalyst oxygen sensor.
13. Oil Pan and Dipstick – No Changes Needed
Contrary to some beliefs, an OBD1 oil pan and dipstick are not necessary. Your OBD2 oil pan and dipstick are fully compatible and can be retained without any modifications.
14. EWS (Electronic Immobilization System) – Wiring Modification
EWS presence varies across E36 models. While using a non-EWS ECU minimizes EWS issues, ignition problems can still arise post-conversion. A straightforward wiring modification resolves this. Locate wire #66 (typically solid green or black/violet) on the ECU connector and cut it. Insulate both ends with electrical tape.
15. Power Distribution and Grounding – Careful Reconnection
Before disconnecting anything, meticulously document or label power and ground connections. Ensure the negative battery post is disconnected throughout this process. The OBD2 main battery positive post is near the ECU compartment on the passenger side. The OBD2 distribution box, mounted parallel to the fender, will need slight relocation to access the OBD1 harness power connections. Utilize the screw holes freed by removing the secondary air pump to remount the distribution box closer to the motor and parallel to the firewall. This tight fit is necessary to reach the main power feed on the OBD1 harness. A ground connection will be located under the OBD diagnostics port. Verify power (RED wires) and ground (BROWN or BLACK wires) connections. A large power feed goes to the starter, and a smaller one to the fuse box. Ground the small wire from the spark plug rail to the engine hoist loop bolt on the Vanos unit.
16. General Wiring Best Practices – Labeling is Key
Prior to installation, thoroughly label all connectors on the OBD1 harness. Utilize Bentley wiring schematics to identify each plug and label it with painter’s tape and a marker. This is crucial as the harness can become a tangled mess, making connector identification difficult. Wire lengths are generally appropriate, placing connectors near their intended locations. Photograph power and ground connections during OBD2 wiring disassembly, and especially capture starter wiring connections to avoid future confusion.
Conclusion: OBD1 Conversion Achieved
This detailed guide provides a comprehensive overview of the OBD2 to OBD1 conversion process for BMW E36 M3s, emphasizing the critical aspects of the OBD2 to OBD1 harness and related component integrations. While involved, this conversion unlocks the performance potential of the S52 engine.
Post-conversion, expect enhanced engine responsiveness and tuning flexibility. Dyno results from a similar conversion showcased performance gains, achieving 262 RWHP and 230 TQ after tuning adjustments.
This conversion, while complex, offers a rewarding upgrade for E36 M3 enthusiasts seeking to optimize their vehicle’s performance and engine management system. Remember to consult wiring diagrams and seek expert advice when needed to ensure a successful and reliable OBD2 to OBD1 conversion.