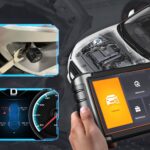
For motorcycle enthusiasts and DIY mechanics, accessing your bike’s diagnostics can be crucial for maintenance and troubleshooting. A Usb To Obd2 Cable is an essential tool that, when paired with the right software, allows you to read error codes, monitor engine parameters, and gain deeper insights into your motorcycle’s health. This guide will walk you through how to use a USB to OBD2 cable, specifically focusing on connecting it to your motorcycle and utilizing diagnostic software like iBeat.
What You’ll Need
Before you begin, ensure you have the following:
-
USB to OBD2 Cable (Vagcom KKL): This is the interface that bridges your motorcycle’s diagnostic port and your computer. Look for a cable labeled “VAG KKL” and “KKL VAG-COM for 409.1”. While other cables might work if they support the ISO9141 protocol, this type is commonly recommended and confirmed to be effective.
-
Diagnostic Software (iBeat): iBeat is a software program used for communicating with your motorcycle’s Engine Control Unit (ECU). It’s important to note that iBeat software is known to function optimally on 32-bit Windows operating systems. If you are running a 64-bit system, you may need to use a virtual machine with a 32-bit Windows installation.
-
A Windows Computer: As iBeat is Windows-based software, a computer running Windows is necessary.
-
Your Motorcycle: This guide is generally applicable to motorcycles with OBD2 diagnostic ports.
Step-by-Step Guide to Connecting and Diagnosing
Here’s how to connect your USB to OBD2 cable and start diagnosing your motorcycle:
1. Software Installation and Setup
- Install iBeat Software: If you haven’t already, install the iBeat diagnostic software on your Windows computer. For 64-bit systems, consider using a virtual machine with a 32-bit Windows OS for best compatibility.
2. Driver Installation and COM Port Configuration
- Connect the OBD2 Cable to your Computer: Plug the USB end of your OBD2 cable into a USB port on your computer. If you are using a virtual machine, ensure the cable is mounted to the virtual machine.
- Install Drivers: In most cases, drivers for the OBD2 cable should install automatically. If not, use the driver disc that came with your OBD2 cable. Do not install iBeat drivers at this stage.
- Check COM Port Assignment: After driver installation, you need to identify the COM port assigned to your OBD2 adapter.
- Windows XP: Go to Start > Run, type
devmgmt.msc, and click OK. - Windows Vista/7/10: Right-click on ‘Computer’ or ‘This PC’, select ‘Properties’, and then click ‘Device Manager’ in the top left corner.
- Windows XP: Go to Start > Run, type
- Locate COM Port: In Device Manager, expand ‘Ports (COM & LPT)’. You should see your USB Serial Port or similar device listed, indicating the COM port number assigned (e.g., COM4). Note this COM port number as you’ll need it for the iBeat software.
Alt text: Device Manager window in Windows showing the Ports (COM & LPT) section expanded, highlighting a USB Serial Port (COM4) indicating the assigned COM port for the OBD2 cable.
- Verify Port Settings: Right-click on the identified COM port in Device Manager, select ‘Properties’, and go to the ‘Port Settings’ tab. The default settings (Bits per second: 9600, Data bits: 8, Parity: None, Stop bits: 1, Flow control: None) should be correct. If they differ, adjust them to these default values.
3. iBeat Software COM Port Selection
- Start iBeat Software: Launch the iBeat diagnostic software.
- Configure COM Port in iBeat: Go to the ‘Options’ or ‘Settings’ menu within iBeat. Look for a COM port setting and select the COM port number you identified in Device Manager in the previous step.
Alt text: Screenshot of iBeat software options menu with a dropdown list for COM port selection, used to configure the communication port for the OBD2 cable.
Alt text: iBeat software main interface showing the configured COM port and ready for connection to the motorcycle ECU.
- Troubleshooting Communication Errors: If you encounter a “communication port error” in iBeat, even with the correct COM port selected, try the following:
- Re-plug the USB to OBD2 cable.
- Restart the iBeat software.
- Restart your computer.
4. Connecting to Your Motorcycle’s Diagnostic Port
- Locate the Diagnostic Port: Find the OBD2 diagnostic port on your motorcycle. It is often located under the seat, near the battery, or under a side panel.
- Remove the Diagnostic Port Cap: You may need to remove a protective cap from the diagnostic port. Ensure you remove the entire cap as one piece to expose the connector.
Alt text: Close-up image showing the removal of the protective cap from a motorcycle’s diagnostic port to access the connector.
- Identify the Connector: Once the cap is removed, you should see a yellow connector. This is where you will plug in your OBD2 cable.
Alt text: Image of a motorcycle’s diagnostic port with the cap removed, revealing the yellow connector ready for OBD2 cable connection.
- Connect the OBD2 Cable to the Motorcycle: Plug the OBD2 connector end of your cable into the motorcycle’s diagnostic port.
Alt text: Photograph illustrating the physical connection of the USB to OBD2 cable to the motorcycle’s diagnostic port, preparing for ECU communication.
- Correct Pinout Diagram: Be aware that some online pinout diagrams might be reversed. Ensure you are using the correct pinout for connecting to your motorcycle’s female plug. The correct pinout is crucial for successful communication.
Alt text: Diagram illustrating the correct pinout configuration for connecting an OBD2 cable to a motorcycle diagnostic port, emphasizing the pin assignments for proper communication.
5. Establishing Connection and Diagnostics
- Turn on the Motorcycle: Turn the motorcycle key to the ‘ON’ position. Make sure the kill switch is in the ‘RUN’ position. You should hear the fuel pump prime. Starting the engine is not necessary at this stage.
- Establish Connection in iBeat: In the iBeat software, if it’s showing ‘OFFLINE’ (usually indicated by an orange button), click on it to retry the connection. The software should now establish a connection with your motorcycle’s ECU and switch to ‘ONLINE’.
Important Notes and Troubleshooting
- LED Indicator: The red LED on the Vagcom cable typically stays on when connected to USB power. It doesn’t indicate connection status with the motorcycle ECU, so ignore it for diagnostic purposes.
- Ground Pin: This guide uses pin ‘4’ for ground. If you experience issues, you can try pin ‘5’ as an alternative ground.
- Voltage Check: If you’re unable to connect, check for voltage at pins 5 and 6 of the motorcycle’s diagnostic port with the key in the ‘ON’ position. Pin 5 should be positive, and pin 6 negative, providing approximately 12 volts. Lack of voltage indicates a potential issue with your motorcycle’s electrical system.
- Connection Order: The order in which you connect the cable, turn on the bike, and start iBeat doesn’t seem to matter significantly. Just ensure everything is connected and powered on before attempting to establish the connection in iBeat by clicking the ‘OFFLINE’ button.
By following these steps, you should be able to successfully connect your USB to OBD2 cable to your motorcycle, interface with the iBeat software, and begin diagnosing your bike’s systems. This empowers you to perform your own diagnostics, saving time and potentially money on professional mechanic visits for basic troubleshooting.